amigurumi, Uncategorized

German Christmass Cookies “Nüsschen” Free Crochet Tutorial

These cookies are very traditional German Christmas cookies every family bakes in December. This is my very first recipy and these cookies are my husband’s favourite! The crocheted version would be a cute decoration for your kitchen or a beloved toy for your kid!

Here you can find both the free crochet pattern and the original recipy!

Ingredients:

  • 3 mm crochet hook
  • stitch marker
  • dark brown and light brown (or even yellow) yarn
  • scissors
  • sewing needle
  • yarn leftovers for stuffing

Abbreviations:

  • ch – chain
  • st – stitch
  • sc – single crochet
  • inc – 2 sc in one st (used to increase the number of stitches)
  • X 6 – repeat 6 times
  • at the end of every round total number of stitches is shown

The pattern:

Top part:

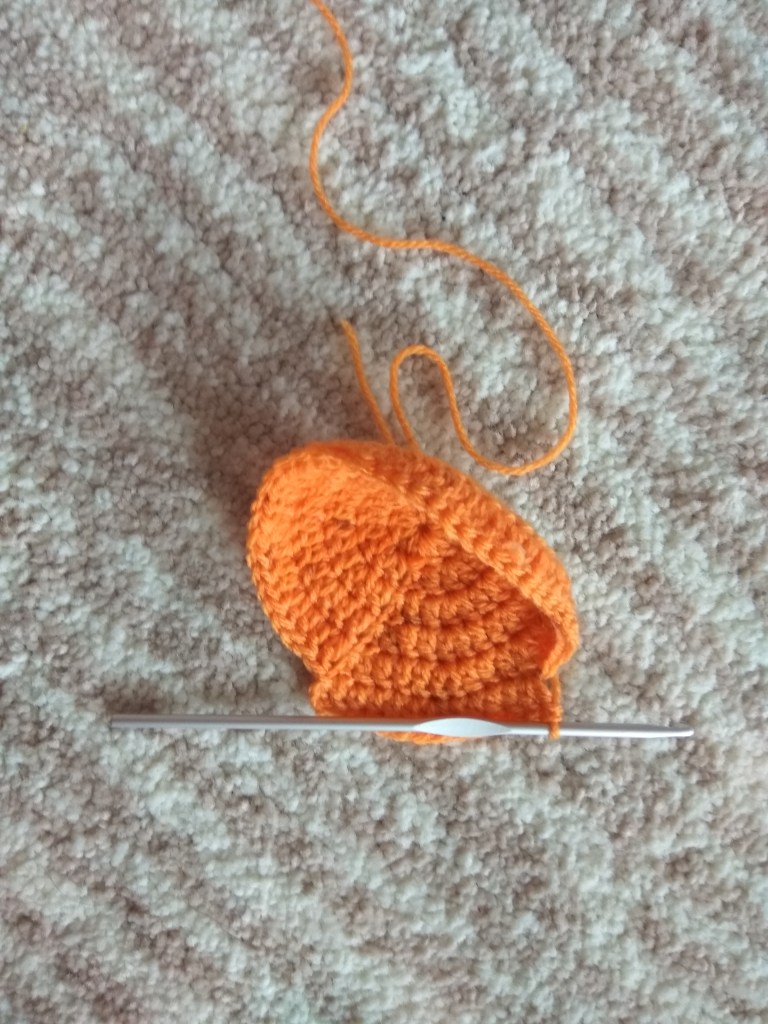
Start with dark brown yarn: 6 sc in Magic Ring

Round 1: Sc in each st (6)

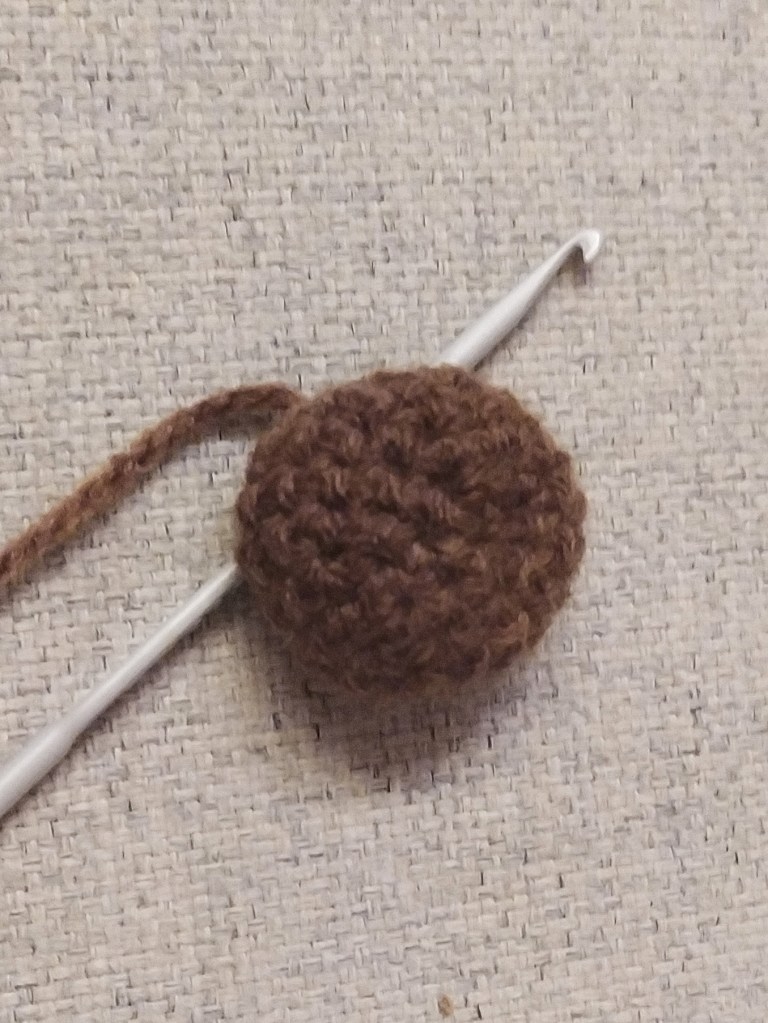
Change to the light brown yarn.

Round 2: Inc X 6 (12)

Round 3: (sc in next st, inc) X 6 (18)

Round 4: (sc in next 2 st, inc) X 6 (24)

Rounds 5-6: sc in all st (24). Fasten off and cut the yarn, weave in the end.
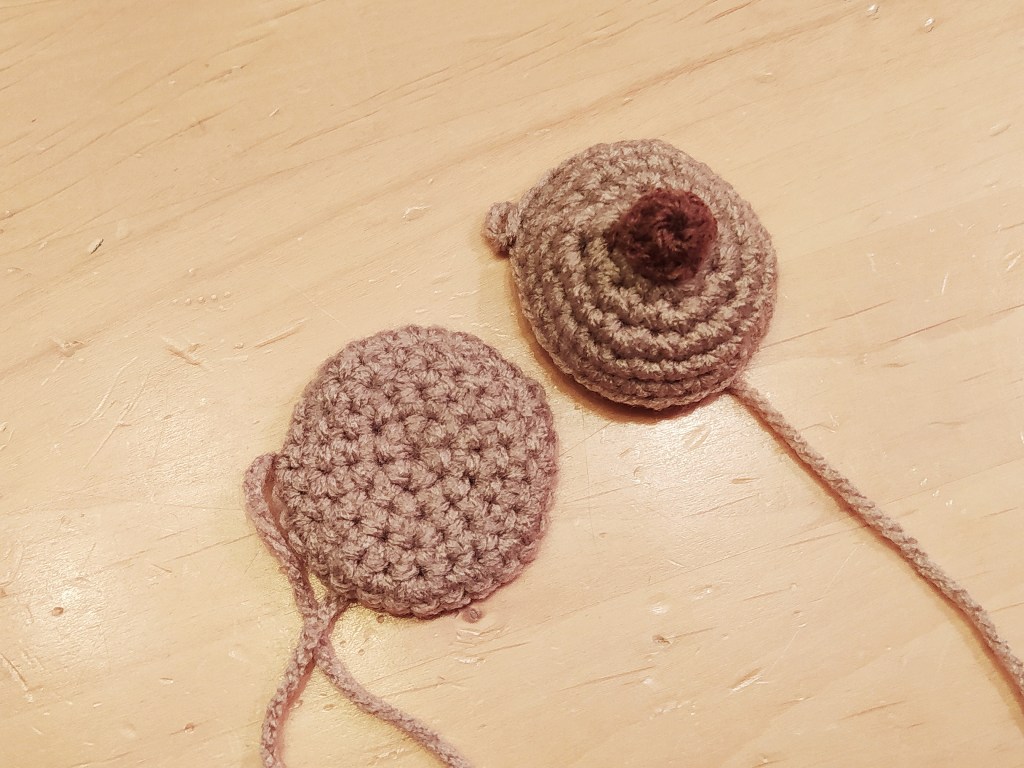
Bottom part:

Crochet with the light brown yarn: 6 sc in Magic Ring

Round 1: Sc in each st (6)

Round 2: Inc X 6 (12)

Round 3: (sc in next st, inc) X 6 (18)

Round 4: (sc in next 2 st, inc) X 6 (24)

Round 5: (sc in next 3 st, inc) X 6 (30). Fasten off, cut the yarn leaving a longer tail for sewing.

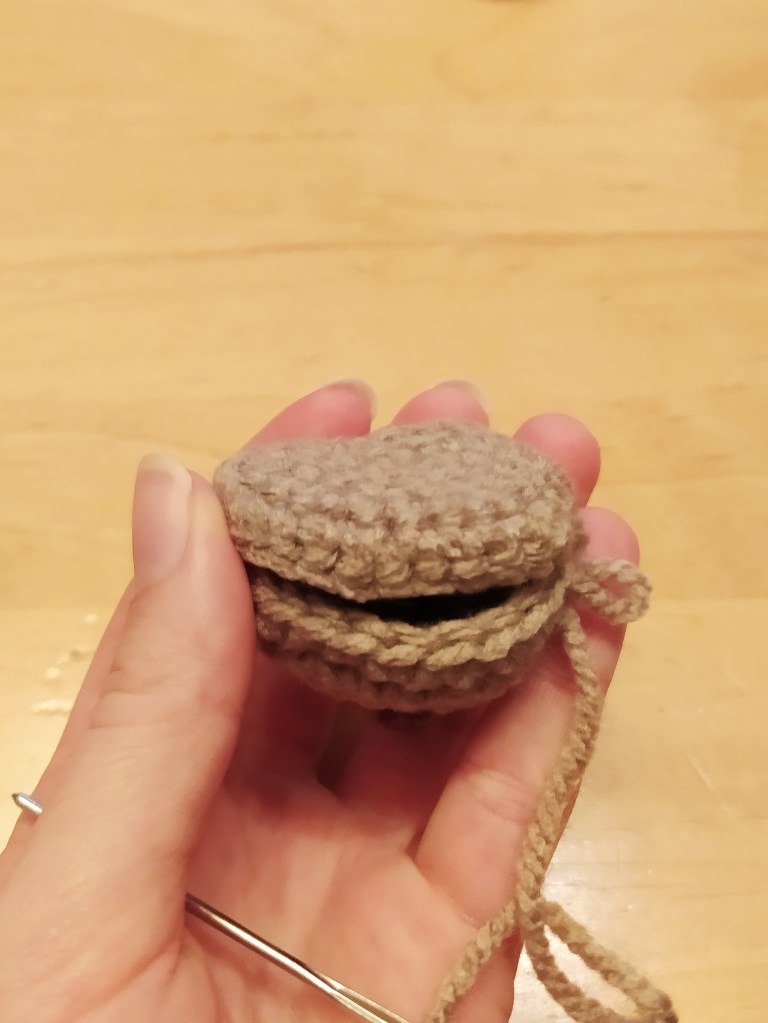
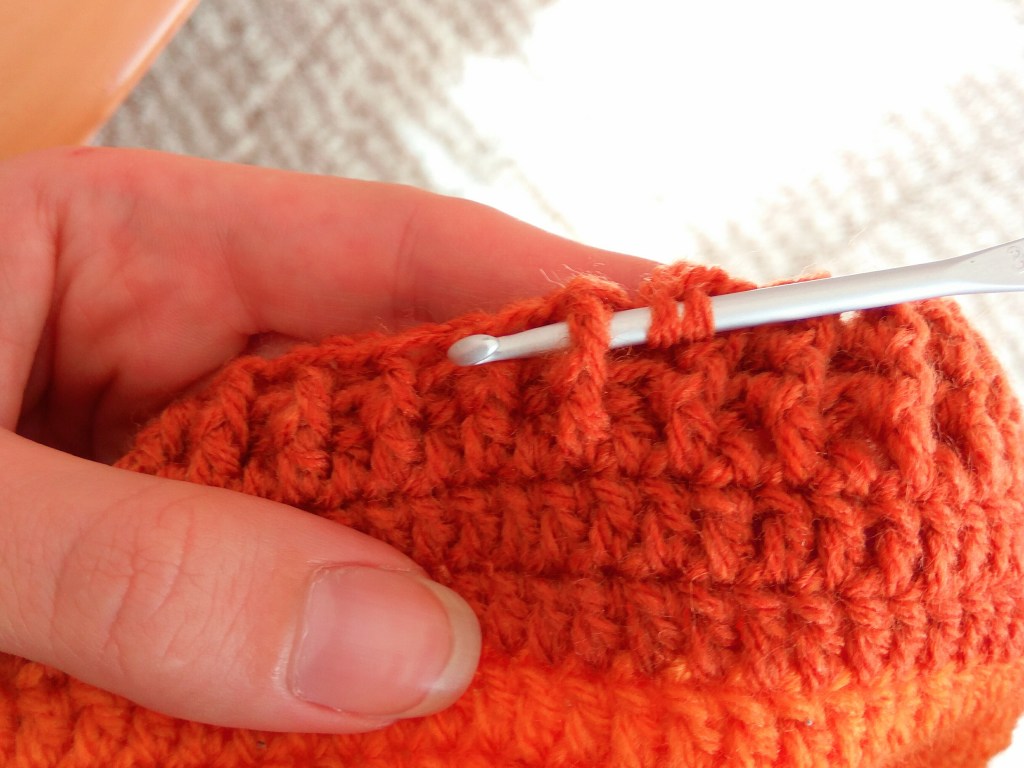
Sew two parts together, stuff it with yarn leftovers. Note: the bottom part has to be inside out (the “right” side should be inside, see the pics).

Taadaaaaa, finished!

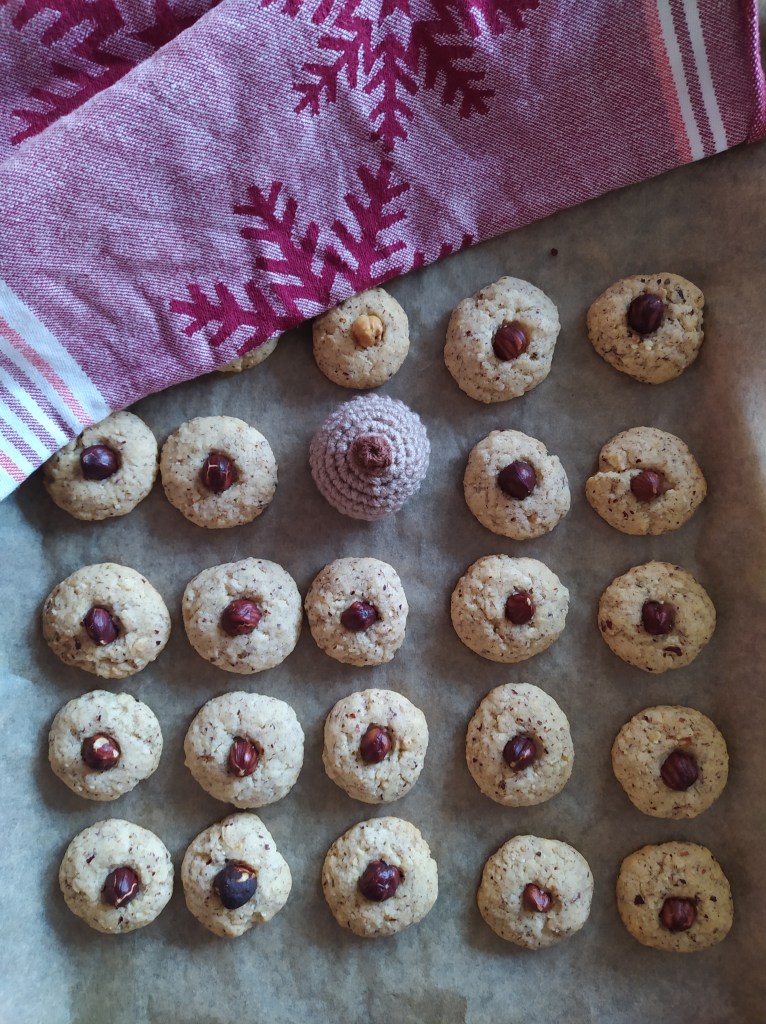
Now check out the eatable recipe 🙂

Plätzchen “Nüßchen”

  • 300 g ground haselnuts
  • 300 g soft butter
  • 200 g sugar
  • 300 g flour
  • 1 tea spoon baking powder
  • 2 packages vanilla sugar
  • about 100 whole haselnuts for decoration

Preparation:

  • Preheat the oven 180°C, soft butter and sugar mix together, add other ingridients.
  • Mix everything in a homogeneous dough
  • Shape small balls (2 cm diameter) and put it on a baking sheet
  • Press a whole haselnut in each dough ball (until a half of the nut will be inside).
  • Bake 12 minutes and let the cookies cool down (When you get the cookies out of the oven, they will still feel very soft. Dont worry about it and let them cool down, they will ge harder very fast!).

Bon appetit!

Uncategorized

Crochet For Future

You all know about the Fridays for future, right? I find the idea really cool: a community gets together regularly and addresses a global problem, brings attention of the society to this problem.

This makes one feel like one can really change or influence something. So I realize, there is so much I want to say and I want to share it with you as much as I want to hear your voices!

I want to introduce a hashtag #crochetforfuture in instagram and every Friday I am going to write a post/stories/anything related to global topics and how we can make the world a better place as crafters and crocheters.

Just write about any problems and how crochet can help or about any act of kindness related to crochet. Or about smaller things like … lets say, you saw a cool funny crocheted hat in a bus and it made you smile. Please dont forget to mention #crochetforfuture so we can build a sub community and discuss how we can save the world together!

You can find me on instagram: @nicecrocheting

Thanks a lot!

Uncategorized

Autumn Beanie for Children Free Pattern

The summer is over which means we need crochet more than ever! How to stay warm and stylish during the cold seasons? Here is my idea for a hat! Of course it can be made any size and colours, but let’s admit that the burning colours of autumn are magical!
IMG_20191010_145835

Materials:

  • 3.5 mm crochet hook
  • recommended for the hook yellow, orange and light brown yarn (I used an amazing yarn will all the colours coming one after another without a gradient (see the picture). 210 m = 85 g, I needed a little less than 85 g)
  • scissors
  • pompon (if you do not have one, just make it yourself using the tutorial)

Abbreviations:

  • ch – chain
  • st – stitch
  • sl st – slip stitch
  • dc – double crochet
  • dinc – in this case: 2 double crochet in 1 st
  • FPdc – front post double crochet
  • (…) X 10 – repeat “…” 10 times

The pattern is for a 2 years old child (50-52 cm head). If you use a yarn of a different sickness, the size of the hat might change!

The pattern:

Important: At the beginning of every round we make 3 ch which are counted as one dc in the pattern. At the end of every round the last dc is connected to the first one with one sl st.

Round 1: 10 dc in magic ring (10)
Round 2: dinc X 10 (20)
Round 3: (dc in next st, dinc) X 10 (30)
Round 4: (dc in next 2 st, dinc) X 10 (40)
Round 5: (dc in next 3 st, dinc) X 10 (50)
Round 6: (dc in next 4 st, dinc) X 10 (60)
Round 7: (dc in next 5 st, dinc) X 10 (70)
Round 8: (dc in next 6 st, dinc) X 10 (80)

IMG_20191010_155646
Round 9-18: dc in all st (80)

Now we start crocheting the ribbling (just go on further without cutting the yarn).
Round 19-21: FPdc in all dc of the prvious round (80) If you do not know the stitch, no worries, it is really easy! Just insert the hook into a double crochet of the round before (as it is shown on the picture below), the rest is the same as a regular dc.

IMG_20191011_155151

As you see, I made 3 rounds in the ribbling, but you can make more if you think, that the ribbling is too narrow. Perfect would be to let your child try it on. If you do not have the opportunity, just make 4 rounds to be sure that the hat is long enough!

Now you can fasten off, cut the yarn, weave in the end and sew the pompon to the hat. If you have do not have a pompon and you have never made it before, here is one of the method (the easiest) explained.

Yeeeey… the hat is ready!!!

My son loves his new autumn hat, he even wanted to wear it indoor 🙂

IMG-20191229-WA0010

I hope that a little owner of the hat you made will like it and stay warm!

Did you like to crochet with the tutorial? Check out my other patterns here!

You may also like:

My Crochet Highlights 2019

IMG_20191229_171502

Crochet for Baby

IMG_20180114_094332

Uncategorized

My Crochet Highlights of the Year

Hello Everybody!

Just two more days and we will welcome a New Year of adventures in the world of crochet! Well, it is a perfect timepoint to think back and remember the best moments of the current year. I have not been that active posting my patterns this year… Why? Actually, I was busy crocheting! And here are my crochet highlights 2019:

  • I have learned to crochet sweaters! I am very proud and excited about it! I have never thought that I can actually wear a crocheted sweater. But now I have learned an easy technique to make really fashionable designs! As always, my first attempt was for my son, and then I was so happy with the result and it motivated me to crochet my first adult sweater ever!!!

IMG_20191229_171502

  • 2. A while ago I saw a Seaside Stash Busting Blanket by Eleonora from Coastal Crochet. I was too late for taking part in the Crochet Along with Eleonora but the style of the blanket is sooo inspiring! So trying out the pattern became the Number 1 in my “Crochet To Do List”. And I ended up making accessories one after another using the stitches I have learned from Eleonora. Here are photos of some of the things I have made. Thank you Eleonora for showing the awesome stitches and inspiring me for creating these things!

And here is a flower pot decoration for our terrasse:

IMG-20191229-WA0011

I wish you all a great New Year full of ideas and inspiration! My New Year resolution is to share with you the patterns for all of the things mentioned in this post. I hope you are as excited as I am about crocheting new things and making your families and friends happy with your wonderful handmade gifts!


Uncategorized

Winter Breakfast Decoration: Egg Cosy Crochet Hat

Here is very simple way to make a regular breakfast become special! It took 2 hours to make the egg cosy.

This patter is also available  on Instagram!

You will need:

  • 3.5 mm or 4 mm crochet hook
  • Salmon colour yarn recommended for the hook
  • Scissors
  • Needle and string
  • Pompon or anything you want to use for decoration of the hat

Abbreviations:

  • ch – chain
  • sl st – slip stitch
  • st – stitch
  • sc – single crochet
  • dec – 2 sc together (used to decrease the number of stitches)
  • X 6 – repeat 6 times
  • at the end of every round total number of stitches is shown in brackets

IMG_20181202_115804

Instructions:

We start with the ribbing, make 5 ch (the last, 5th ch is a turning ch)
Rounds 1-36: sc in next 4 st IN BACK LOOPS ONLY, 1 turning ch (4)

Round 36: now we are going to close the rubber. Insert the hook in the last st of the last and the first rounds at the same time, make sl st in next 4 st (4)

Now we are crocheting the “body” of the hat. So I start counting the rounds again.

Round 1: 1 ch, sc in next 36 st (36)

Round 2: (sc in next 4 st, dec) X 6 (30)
Round 3: sc in all st (30)
Round 4: (sc in next 3 st, dec) X 6 (24)
Round 5: sc in all st (24)
Round 6: (sc in next 2 st, dec) X 6 (18)
Round 7: sc in all st (18)
Round 8: (sc in next st, dec) X 6 (12)
Round 9: sc in all st (12)
Round 10: (dec) X 6 (6)
Round 11: sc in all st (6)
Round 12: Closing the hat: dec, skip 1 st, sl st, fasten off, cut the yarn and weave in all ends.

Now sew the pompon, decorate the hat and it is finished!

IMG_20181202_115900

Invite guests for a cosy Sunday breakfast and decorate the table!

IMG_20181208_111821

Merry Christmas! Ho Ho Ho!

Did you like to crochet with the tutorial? Check out my other patterns here!

You might also like:

IMG_20181128_194949

Mulled Wine Mug Cosy – Cabled Pattern

IMG_20181027_221058