amigurumi, Uncategorized

Egg Cozy Baby Yoda

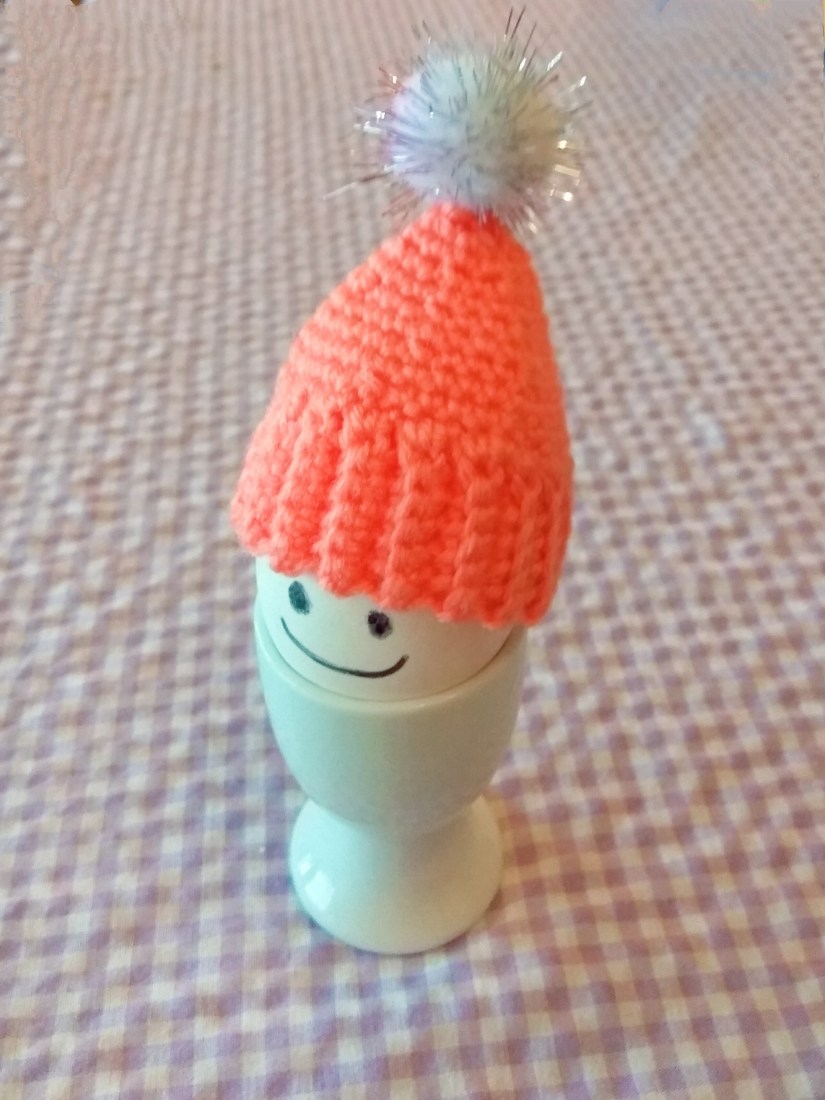
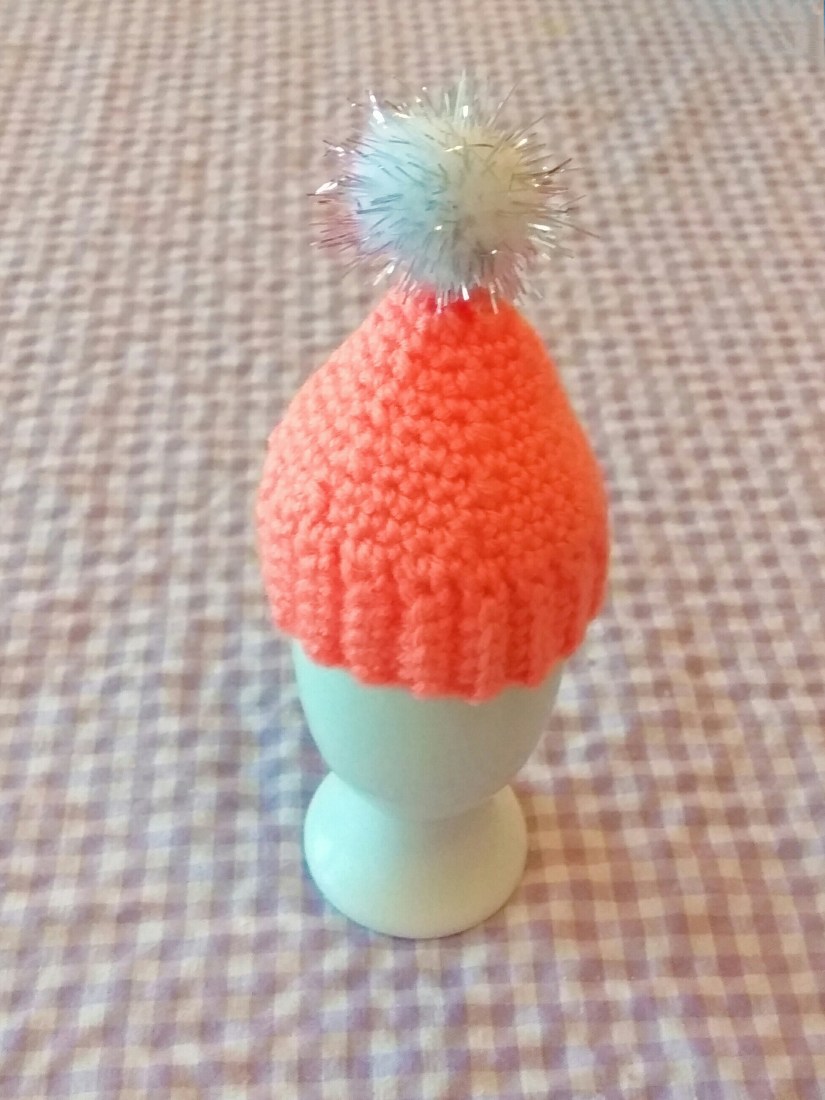
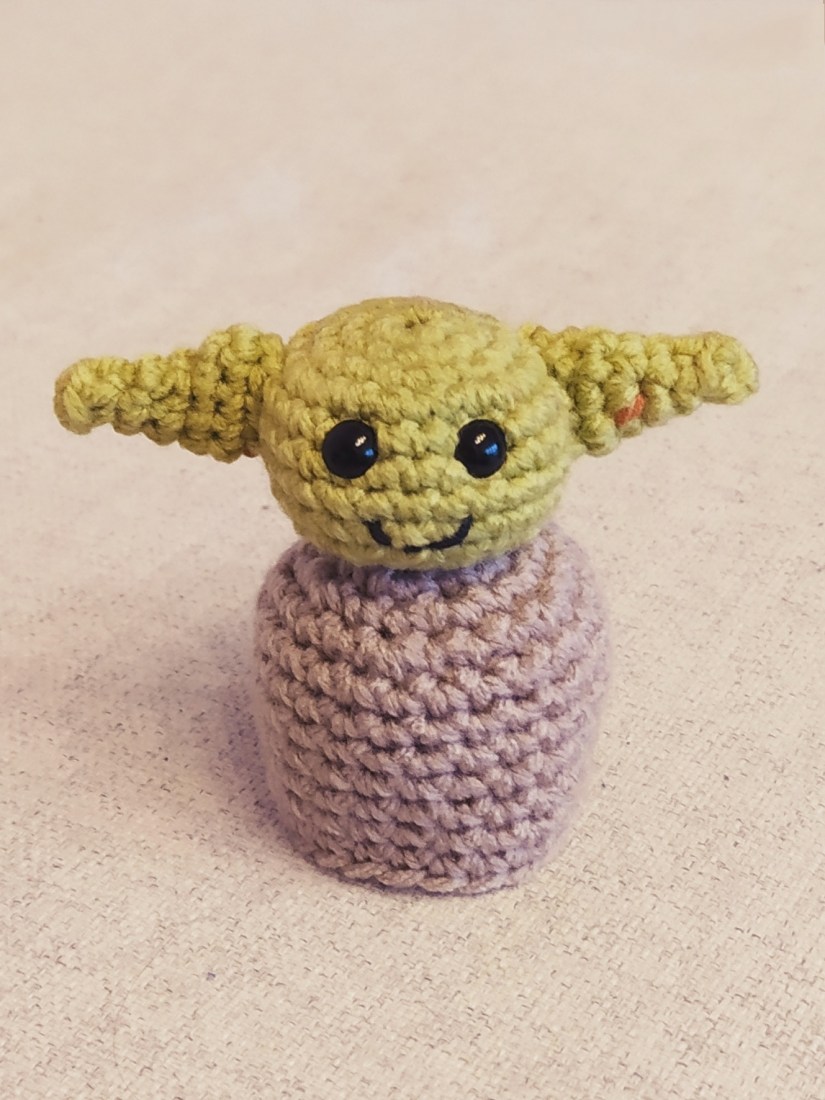
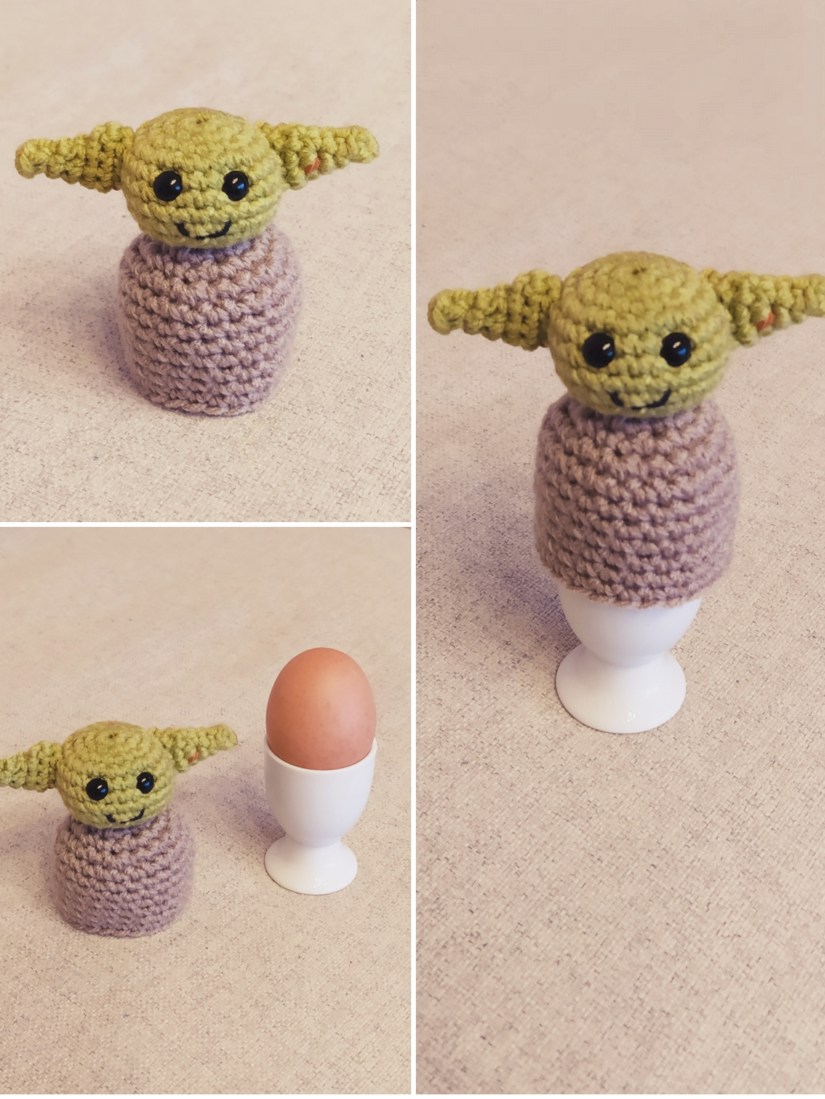
Is not the Child the most adorable character of a TV show ever? I could not stop looking at him watching the series and now when the season is over, I miss him. So I crocheted one for me to think of baby Yoda when I am having a breakfast! As always: simple pattern, beginners are welcome! Join me if you miss baby Yoda, too!

IMG_20200122_161004

You will need:

  • 3,5 mm and 6 mm crochet hook (I have crocheted the head with the smaller hook so one cant see the fill)
  • light brown and green yarn
  • scissors
  • stitch marker
  • safety eyes (I had 5 mm)
  • sewing needle
  • black yarn to embroider the mouth
  • fiberfill

Abbreviations:

  • ch – chain
  • st – stitch
  • sl st – slip stitch
  • sc – single crochet
  • inc – 2 sc in 1 st
  • dec – crochet 2 st together
  • X N – repeat N times
  • at the end of every round total number of stitches is shown

If it is your first amigurumi attempt ever, you might want to have a look at my tricks for crocheting amigurumi and ideas for interesting amigurumi stuffing. I am sure you will find it helpful! Have fun crocheting!

The pattern

Good news first: now you can find nicecrocheting and my pattern on Instagram!

The body (light brown yarn):

Round 1: 5 sc in magic ring (5)
Round 2: inc X 5 (10)
Round 3: (sc in next st, inc) X 5 (15)
Round 4: (sc in next 2 st, inc) X 5 (20)
Round 5: (sc in next 3 st, inc) X 5 (25)
Rounds 6-12: sc in all st (25)

Fasten off, cut the yarn and weave in the end.

The head (green yarn):

Round 1: 6 sc in magic ring (6 )
Round 2: inc X 6 (12)
Round 3: (sc in next st, inc) X 6 (18)
Round 4: (sc in next 2 st, inc) X 6 (24)
Round 5-8: sc in all st (24)
Round 9: (sc in next 2 st, dec) X 6 (18)
Round 10: (sc in next 1 st, dec) X 6 (12)
Fasten off and cut the yarn leaving a tail for sewing the head to the body.

Ears (green yarn):

Round 1: 4 sc in magic ring (4)
Round 2: sc in all st (4)
Round 3: (2 sc in next st, sc in next st) X 2 (6)
Round 4: sc in all st (6)
Round 5: (3 sc in next st, sc in next 2 st) X 2 (9)
Round 6: sc in all st (9)
Fasten off and cut the yarn leaving a tail for sewing.

IMG_20200122_160729

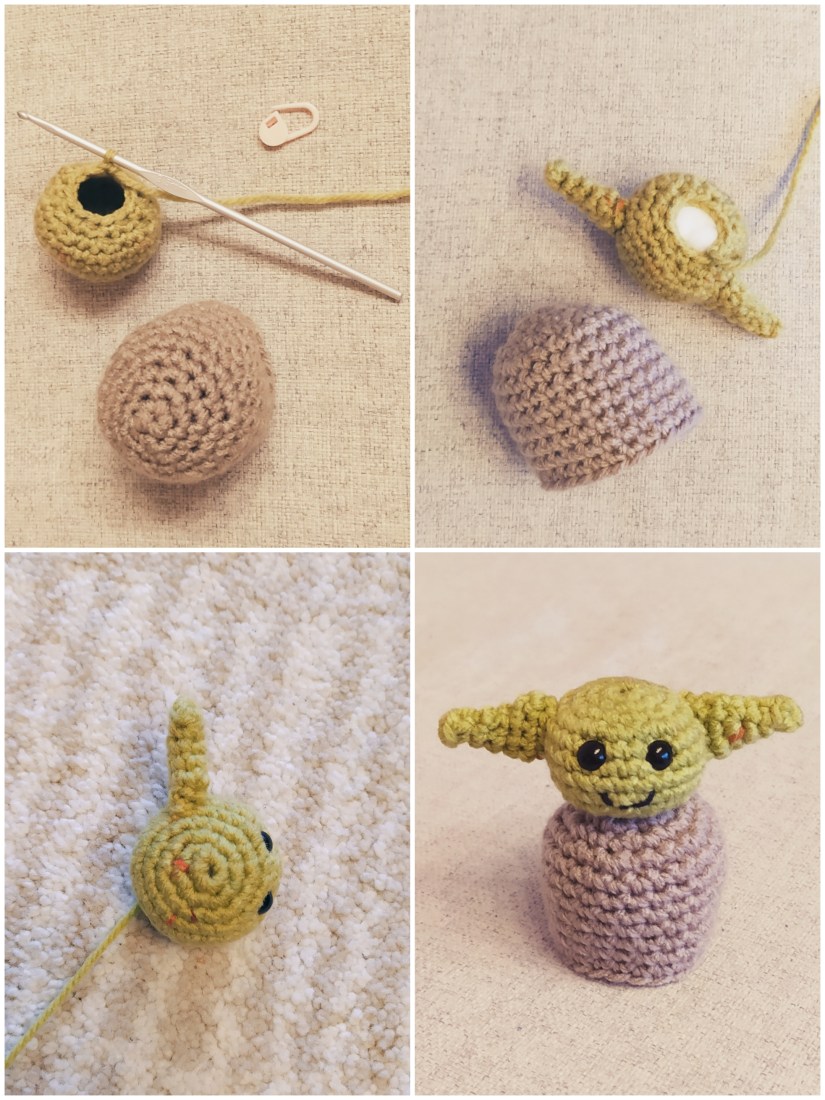
Put the safety eyes in, sew the ears to the head, embroider the mouth and stuff the head. Your egg cozy is finished!!!

IMG_20200122_162629

Was it fun to crochet with this tutorial? Have a look at my other patterns, maybe you will find something you like there!

You may also like:

St. Valentine’s Day – 5 Crochet Gift Ideas for Him

IMG_20180126_095400

Uncategorized

Winter Breakfast Decoration: Egg Cosy Crochet Hat

Here is very simple way to make a regular breakfast become special! It took 2 hours to make the egg cosy.

This patter is also available  on Instagram!

You will need:

  • 3.5 mm or 4 mm crochet hook
  • Salmon colour yarn recommended for the hook
  • Scissors
  • Needle and string
  • Pompon or anything you want to use for decoration of the hat

Abbreviations:

  • ch – chain
  • sl st – slip stitch
  • st – stitch
  • sc – single crochet
  • dec – 2 sc together (used to decrease the number of stitches)
  • X 6 – repeat 6 times
  • at the end of every round total number of stitches is shown in brackets

IMG_20181202_115804

Instructions:

We start with the ribbing, make 5 ch (the last, 5th ch is a turning ch)
Rounds 1-36: sc in next 4 st IN BACK LOOPS ONLY, 1 turning ch (4)

Round 36: now we are going to close the rubber. Insert the hook in the last st of the last and the first rounds at the same time, make sl st in next 4 st (4)

Now we are crocheting the “body” of the hat. So I start counting the rounds again.

Round 1: 1 ch, sc in next 36 st (36)

Round 2: (sc in next 4 st, dec) X 6 (30)
Round 3: sc in all st (30)
Round 4: (sc in next 3 st, dec) X 6 (24)
Round 5: sc in all st (24)
Round 6: (sc in next 2 st, dec) X 6 (18)
Round 7: sc in all st (18)
Round 8: (sc in next st, dec) X 6 (12)
Round 9: sc in all st (12)
Round 10: (dec) X 6 (6)
Round 11: sc in all st (6)
Round 12: Closing the hat: dec, skip 1 st, sl st, fasten off, cut the yarn and weave in all ends.

Now sew the pompon, decorate the hat and it is finished!

IMG_20181202_115900

Invite guests for a cosy Sunday breakfast and decorate the table!

IMG_20181208_111821

Merry Christmas! Ho Ho Ho!

Did you like to crochet with the tutorial? Check out my other patterns here!

You might also like:

IMG_20181128_194949

Mulled Wine Mug Cosy – Cabled Pattern

IMG_20181027_221058

Uncategorized

Egg Cosy Santa’s Hat – Crochet Tutorial

December is almost there! It’s time to create a special athmosphere of a miracle around. We exchange all home decorations with christmas specialities. Candels, Nutcrackers, angels and stars are everywhere. Kitchen towels of christmas colours, tablecloth with winter ornaments and special egg warmers for decorating the breakfast table on Sunday!

IMG-20181115-WA0001

You will need:

  • 3.5 mm or 4 mm crochet hook
  • White and red yarn recommended for the hook
  • Scissors
  • Small piece of cardboard

Abbreviations:

  • ch – chain
  • sl st – slip stitch
  • st – stitch
  • sc – single crochet
  • dec – 2 sc together (used to decrease the number of stitches)
  • X 5 – repeat 5 times
  • at the end of every round total number of stitches is shown in brackets

Instructions:

The hat:

We start with the rubber, take white yarn and make 5 ch (the last, 5th ch is a turning ch)
Rounds 1-35: sc in next 4 st IN BACK LOOPS ONLY, 1 turning ch (4)

IMG_20181115_203638
Round 36: now we are going to close the rubber. Insert the hook in the last st of the last and the first rounds at the same time, make sl st in next 4 st (4)

Now we are crocheting the “body” of the hat. So I start counting the rounds again. And by the way, we should change to the red yarn now.
Round 1: 1 ch, sc in next 35 st (35)

IMG_20181115_203618

Round 2: (sc in next 5 st, dec) X 5 (30)
Round 3: sc in all st (30)
Round 4: (sc in next 4 st, dec) X 5 (25)
Round 5: sc in all st (25)
Round 6: (sc in next 3 st, dec) X 5 (20)
Round 7: sc in all st (20)
Round 8: (sc in next 2 st, dec) X 5 (15)
Round 9: sc in all st (15)
Round 10: (sc in next st, dec) X 5 (10)
Round 11: sc in all st (10)
Round 12: (dec) X 5 (5)
Round 13: Closing the hat: dec, skip 1 st, sl st, fasten off, cut the yarn and weave in all ends.

Pompon:

Now we are making the pompons. It is so much easier than it looks, so no worries! We should cut two identical rings out of the cardboard piece, put them together and make a cut (as it is shown on the picture below). I also added the dimensions I have, but it is very individual, just decide what size your pompon should be.

IMG_20181115_212916

Then we reel up the yarn on the rings. Try to destribute the yarn equally and remember: the longer you are reeling up, the thicker your pompon will be.

IMG_20181115_213019

When you think it is enough, or you have no more space, just insert scissors between the rings through the yarn layer (as shown on the picture below by the red scissors :). Try to hold the pompon together so it doesn’t fall apart. Now we tie the pompon together: To do so take a new yarn piece (around 10 cm long) and reel it once between the rings, make a knot and tighten it. Make one more knot and remove the cardboard rings.

IMG_20181115_213315

Now form the pompon, fluff it up. If some parts are a bit longer that the others, just cut them a little. Don’t cut two ends of the connecting yarn, we need them for attaching the pompon to the hat.

IMG_20181120_200514

Now attach the pompon to the hat using the tails. And the Santa’s Hat Egg Cosy is finished! You might consider to make one for every family member and get a “Breakfast Set”. Perfect for having a breakfast in December! I am sure, everyone would be happy to get it as a Christmas gift!

IMG_20181115_201832

Merry Christmas! Ho Ho Ho!

Did you like to crochet with the tutorial? Check out my other patterns here!

You might also like:

Mulled Wine Mug Cosy – Cabled Pattern

IMG_20181027_221058