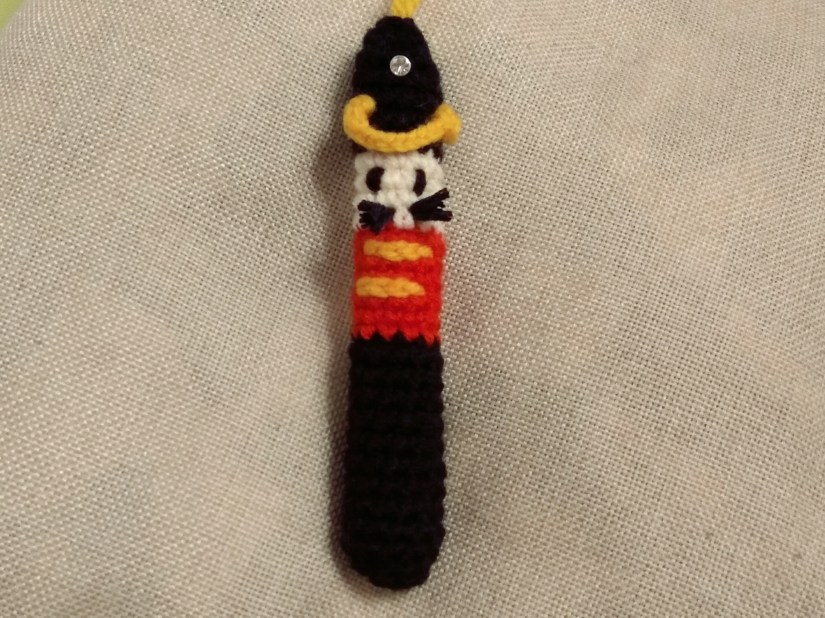
Yesterday I have watched the beautiful love story between Marie and the Nutcracker in ballet and it was just wonderful! The magical show has inspired me to create the decorations for a Christmas tree: simple figures of the characters.
The Nutcracker is ready so I share with you this simple pattern. Maybe some of your friends celebrate Christmas on Januar 7th? This would be a perfect last minute gift!
You will need:
- 3,5 mm crochet hook
- black, red, yellow, beige yarn
- decoration for the hat (I used an old earring)
- sewing needle
- scissors
- fiberfill
Abbreviations:
- ch – chain
- st – stitch
- sl st – slip stitch
- sc – single crochet
- hdc – half double crochet
- inc – 2 sc in one st (used to increase the number of stitches)
- dec – crochet 2 sc together (used to decrease the number of stitches)
- X N – repeat N times
- at the end of every round total number of stitches is shown
If it is your first amigurumi attempt ever, you might want to have a look at my tricks for crocheting amigurumi . I am sure you will find it helpful! Have fun crocheting!
The Pattern:
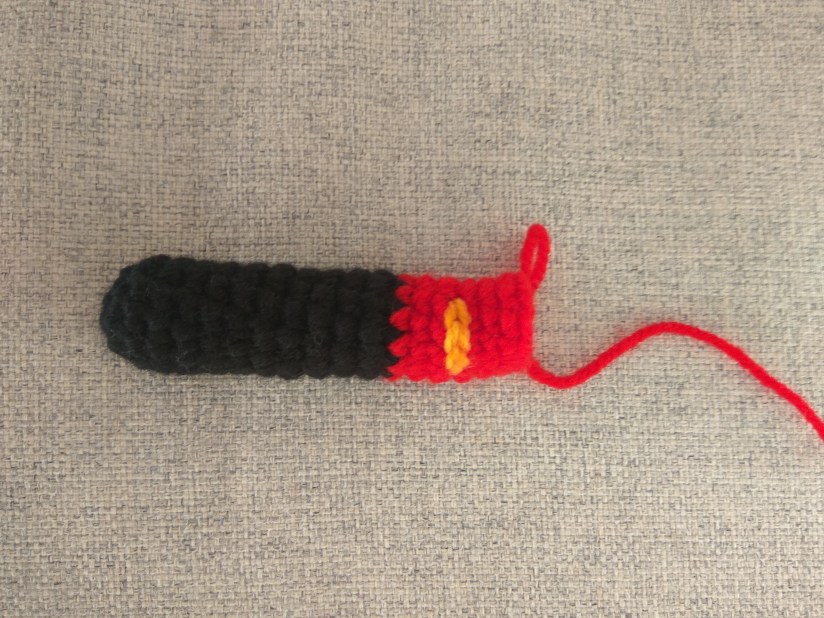
Start with the black yarn.
Round 1: 6 sc in magic ring (6)
Round 2: (inc) X 6 (12)
Rounds 3 – 13: sc in all 12 st (12)
Change to the red yarn.
Rounds 14 – 20: sc in all st (12), do not cut the yarn. On the front side of the shirt sew two horisontal parallel stripes with yellow yarn (4 st long each). Stuff legs and body with fiberfill using the back side of a crochet hook. If your hook has a handle and does not fit here, use a chopstick or a manicure wooden stick.
Change to the beige yarn.
Rounds 21 – 25: sc in all st (12). On the third beige round sew the eyes using black yarn (2 st between the eyes), stuff the head as you go.
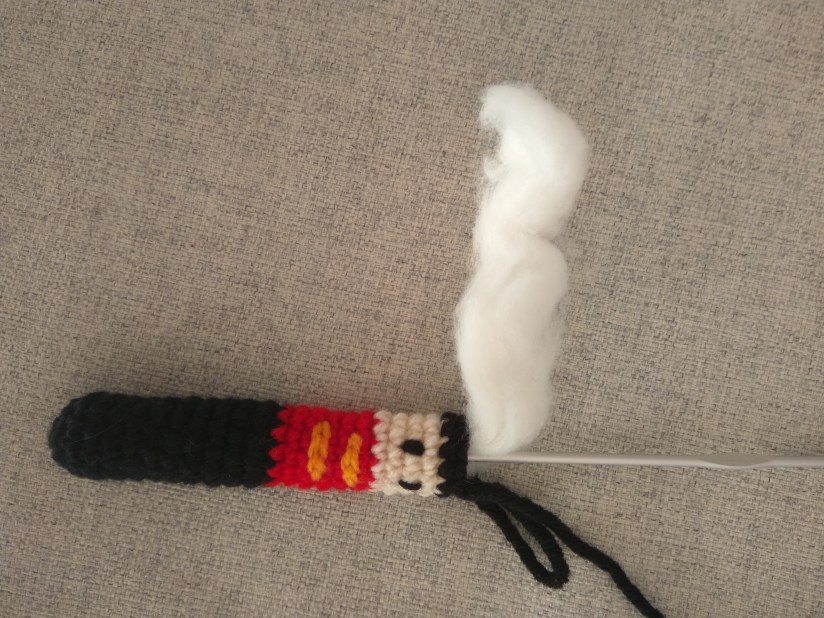
Change to the black yarn.
Rounds 26 – 30: sc in all st (12). Do not cut the yarn. Leave the crocheting to the side and make the decoration for the hat.
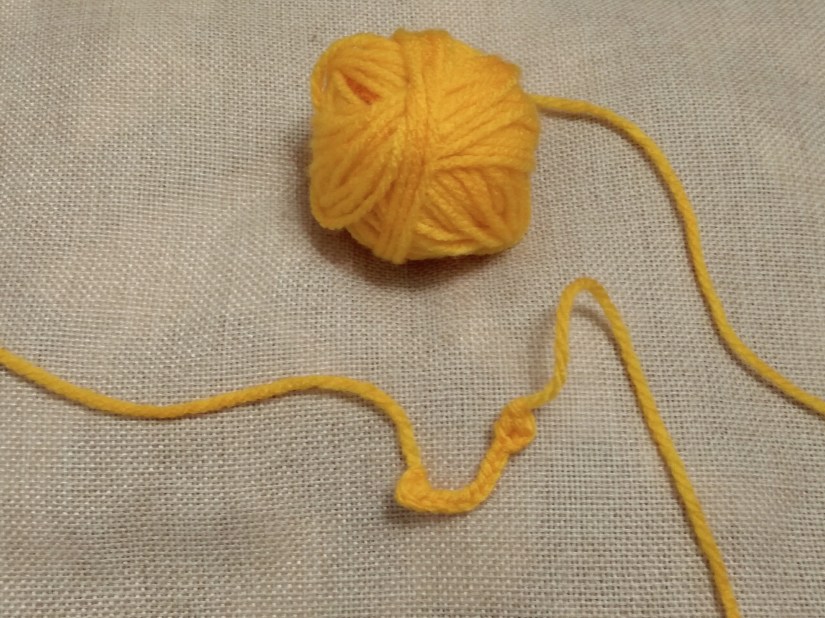
For that take the yellow yarn, crochet 2 ch (Important: Leave a long tail before the first st, we will need the long string for hanging the Nutcracker on a tree). Make a hdc in the 2nd ch from the hook and make 10 ch more. Then 1 ch, and again 1 hdc in the 2nd ch from the hook. Fasten off and cut the yarn leave a long tail (ideally as long as the first one).
Now sew the yellow chain to the hat, and the long strings pull outside through the hole, knot them together, this is now a loop for hanging the Nutcracker. Place a decoration element you have prepared on the hat as well. As I said earlier, I just use a simple earring.
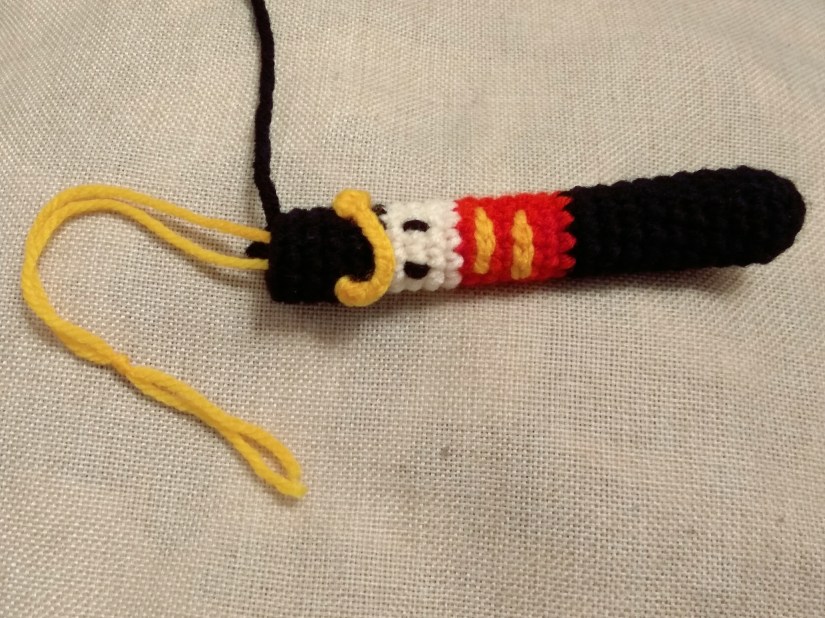
Stuff the hat and continue crocheting:
Round 31: (dec) X 6 (6), fasten off, cut the yarn and weave in the end.
Make a mustache: just pull a knot with several strings of the black yarn through a st in the first beige round, cut the ends.
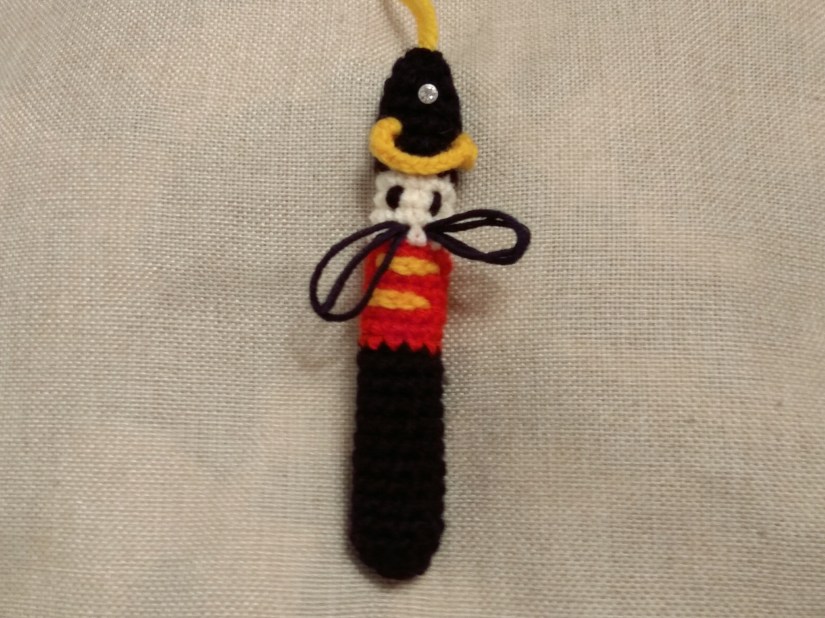
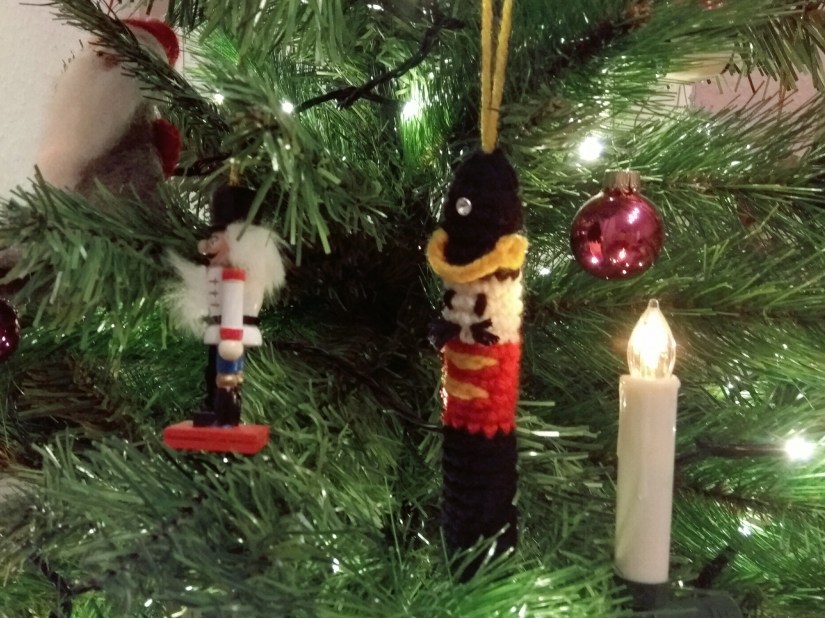
Voila, the Nutcracker is ready!!! Find a nice place on your Christmas tree for him!
Did you like to crochet with the tutorial? Check out my other patterns here!
You may also like:
The Nutcracker Story: Ballerina Marie Amigurumi Pattern

Cupcake Box Free Crochet Tutorial with Pictures