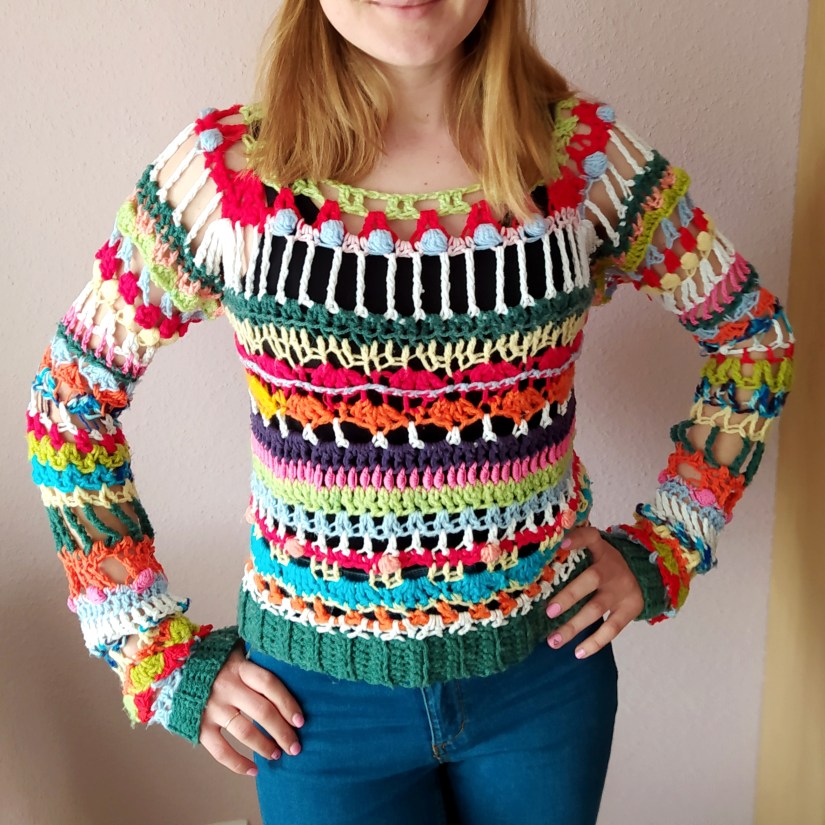
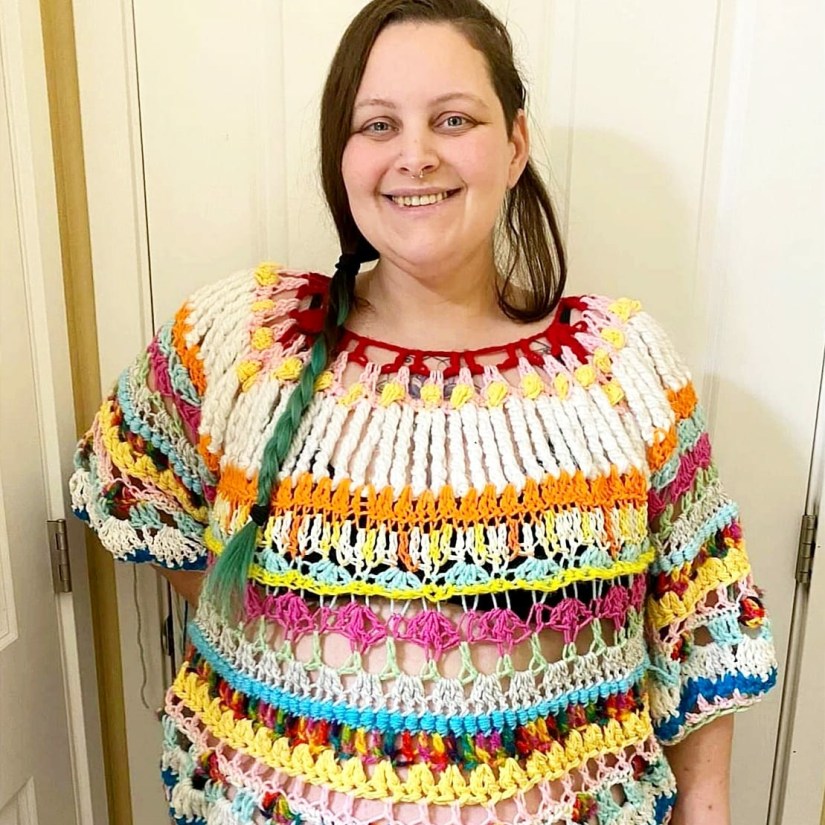
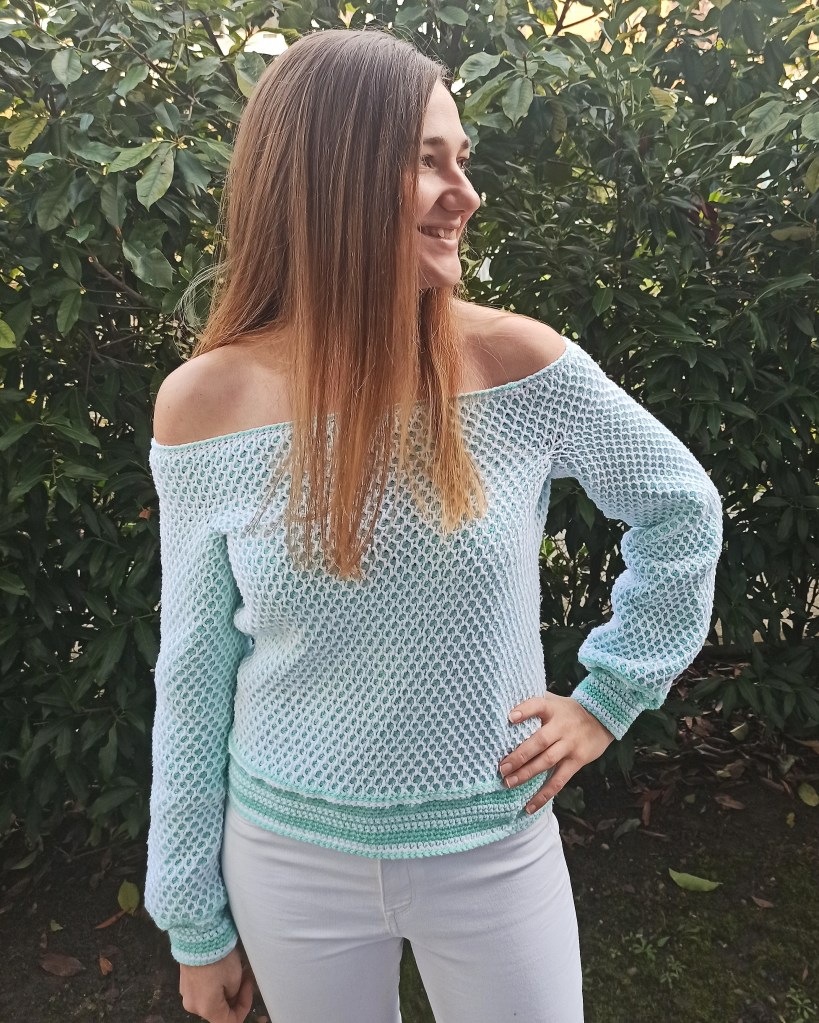
I am so excited to announce that my cropped sweater pattern is finally live! This pattern means so much for me, because originally I made the sweater as a stash busting project. Not only using yarn left overs of different colours but also of different weight and fabric. It has been a complete chaos and I did not even think it was possible to write it down as a finished pattern for others to follow. But here I am, a year later releasing the pattern!
I have chosen my birthday to publish the pattern because I feel so connected to this design: for me it symbolizes human kindness (so many nice supporting people have motivated and encouraged me to publish this design, without their feedback I would not be able to go that far) and being respectful to out planet (using random leftovers and not going to a yarn store while making a sweater is a very cool thing and unfortunately it happens rare over here).
Another thing which is really special about this pattern – it is left-handed crocheters inclusive! I tried my best to include references to special stitch tutorials as well as a couple of tips for left-handed makers. I hope it is helpful and everybody is going to feel included.
So here are some key infos about the pattern, that you might want to know:
you are going to need 9 mm crochet hook for the sweater body and 6 mm crochet hook for ribbing
the pattern is made to measure
level is intermediate because you will have to work with yarn of different weights (most likely)
you will need 150 g – 650 g of yarn leftovers (estimated for sizes XS – 3 XL). Please note, that this number depends very strongly on fabric so your yardage might differ significantly from these numbers.
I have tried my best to make it easy for you to access the pattern. This site is free of advertisement and I am sharing with you a FREE PDF!!! As I drink a loooot of coffee while working on my tutorials, please consider buying me a cup if you like my pattern:
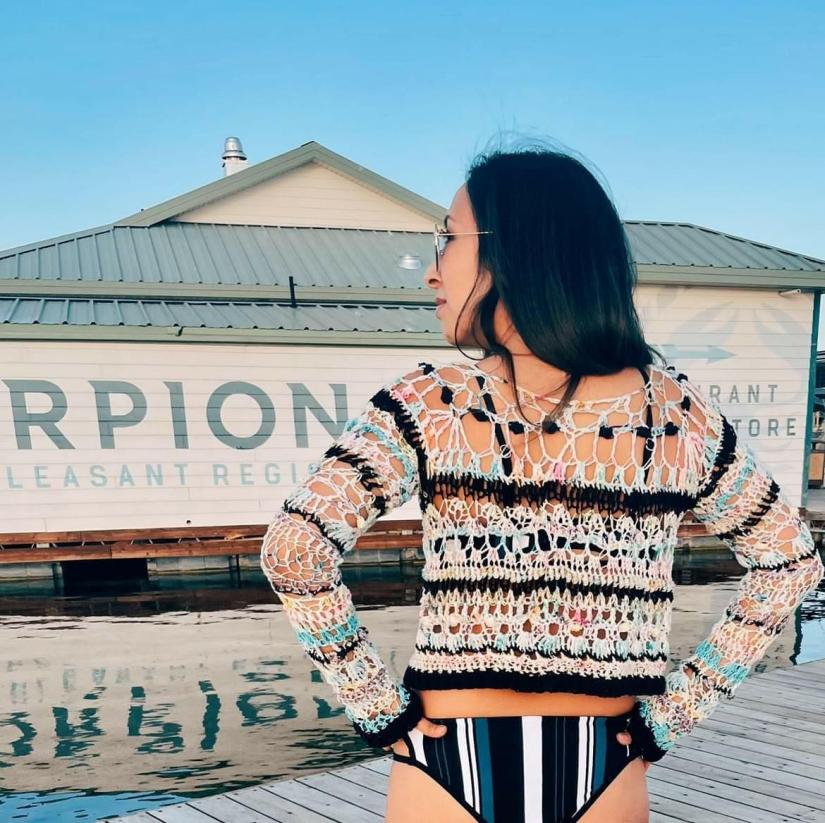
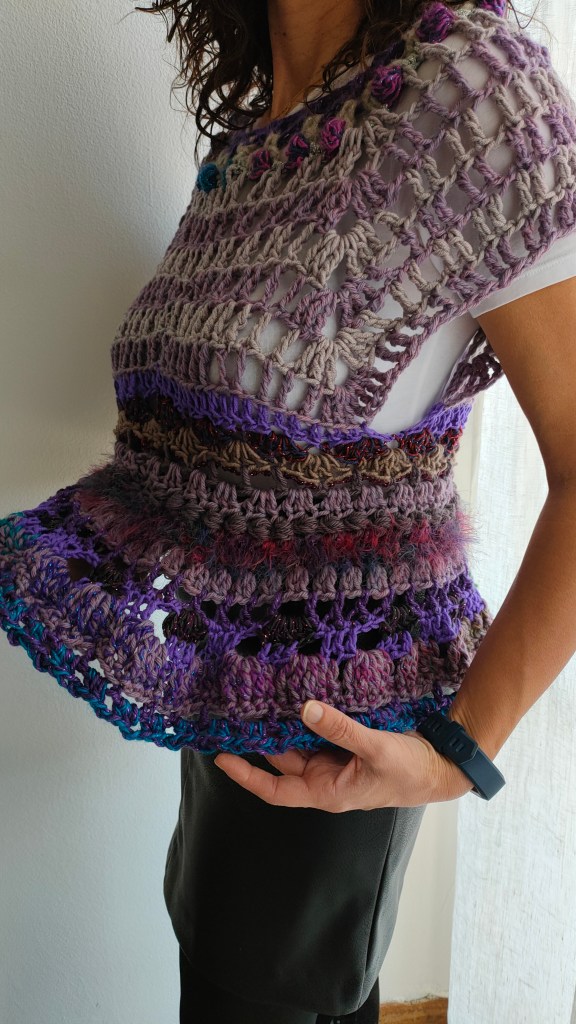
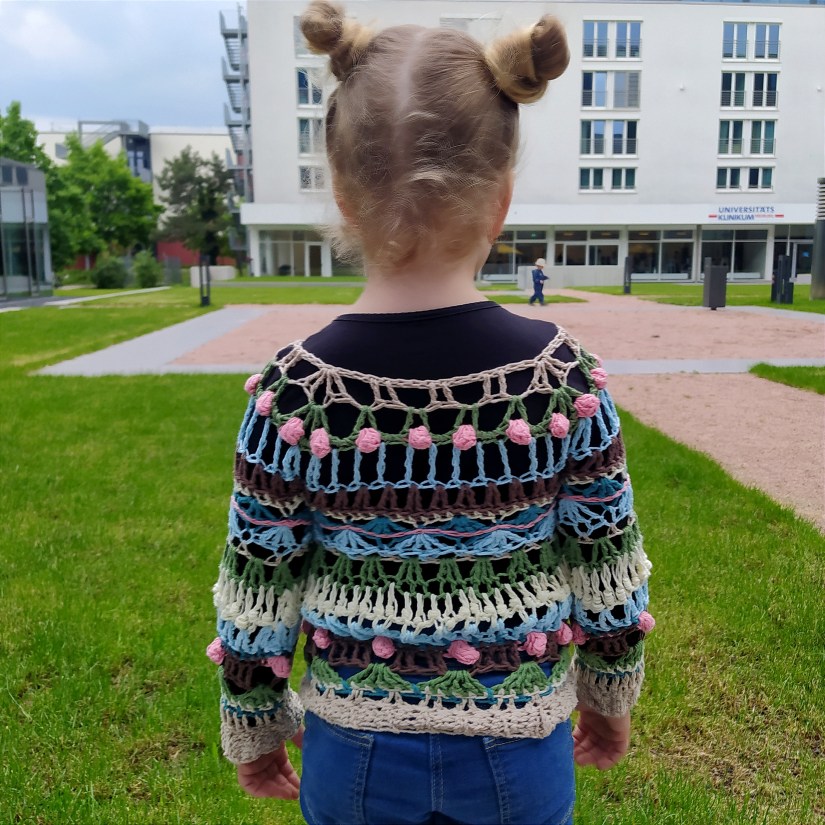
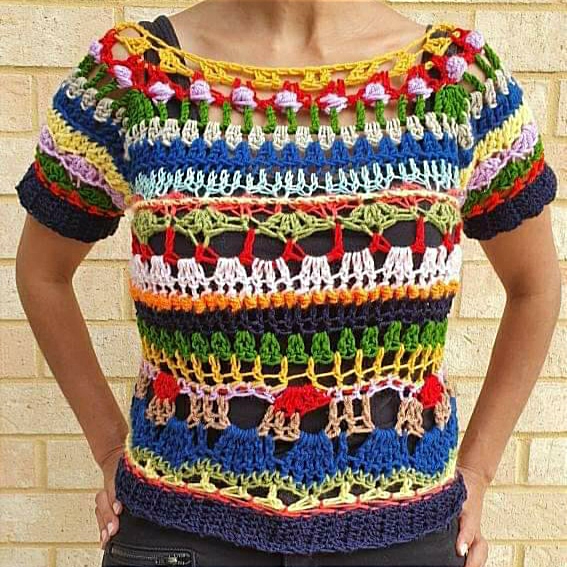
Check out photos of my testers: @knottyninjacrafts, @arkifede_handmade, @malilin_hobby, @crochetlea66, @amberoodle and @nixie_pixie_handmade!
More info about them and their beautiful versions is in my next post! You can also find some inspiration in Instagram using #connectingcroppedsweater or #secretcrochetbox
So if you are ready, click here to download the pattern:
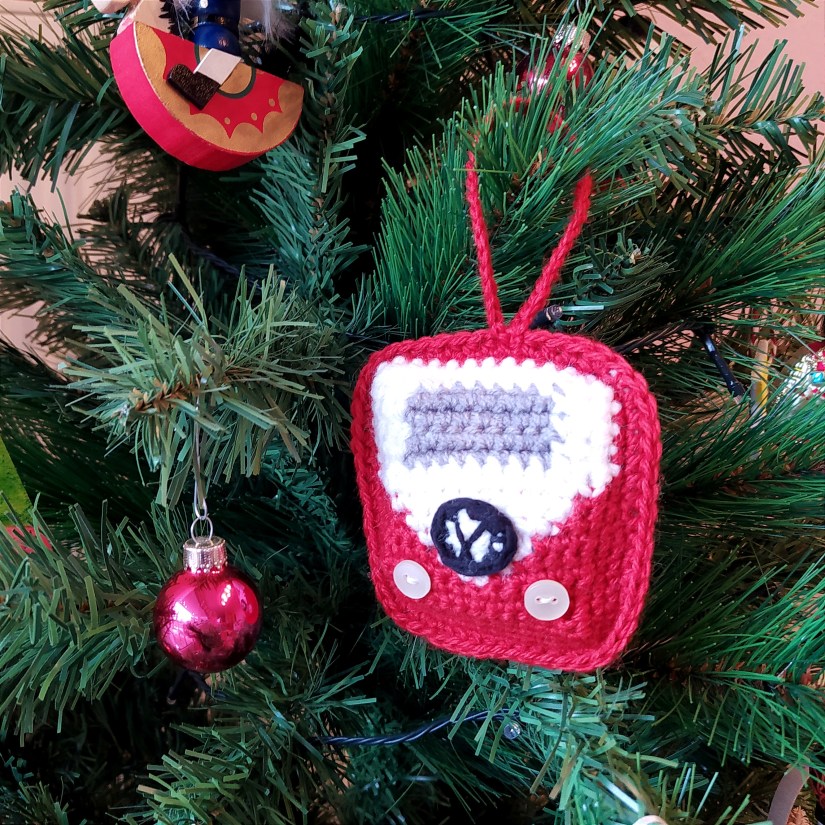
If you are looking for a last minute Christmas gift idea – here it is! More and more people are falling in love with camping lately. Well, it is not surprising: this is the only type of holidays we could make during the pandemy. Why dont we make a Christmas ornament out of the new trend?
You will need:
3,5 mm crochet hook
white, red, grey and black yarn leftovers. The white yarn should be a bit thicker than the red one: it will make the upper half of the van look broader than the bottom part. If you do not want this effect – use all four yarns of the same type
scissors
stitch marker
2 white simple buttons
thread and a needle for sewing the buttons
fiberfill (I used yarn leftovers to stuff the van)
Abbreviations:
ch – chain
st – stitch
sl st – slip stitch
sc – single crochet
hdc – half double crochet
dc – double crochet
inc – 2 sc in 1 st
X N – repeat N times
( … ) – at the end of every round total number of stitches is shown
14 ch, insert the hook in the 2nd from the hook ch
Row 1: sc in each st, 2 ch, turn (13)
Rows 2 – 4: dc in each st, 2 ch, turn (13)
Row 5: dc in next st, 2 dc in next st, dc in next 9 st, 2 dc in next st, dc in next st (15). Note: if all of your yarns are of the same type/thickness, skip the increases, in this case your Row 5 would be identical to Rows 2-4.
Rows 6 – 7: dc in each st, 2 ch, turn (15)
Row 8: dc in each st (15)
Place sc around the back panel (1 sc in each stitch, 2 sc in each corner stitch), fasten off, cut the yarn, weave in the tail.
VW logo:
Round 1 (white yarn): 6 sc in magic ring (6)
Round 2 (black yarn): (sc in next st, inc in next st) X 3 (9). Sl st to the first st of this round
Fasten off and cut the yarn leaving a long tail. Pull the tail through the 5th stitch of the last round, pull it back through the 4th stitch and insert the tail into the 8th stitch. Use the tail for sewing the logo to the front panel later.
Front panel:
Starting with red yarn: 13 ch, insert the hook in the 2nd st from the hook
Rows 1 – 3 (red yarn): sc in in every st, 1 ch, turn (12)
Row 4: sc in next 5 st, change to white yarn: sc in next 2 st (carry the red thread along), change to red yarn (leave the white thread as it is, you will pick it on the way back): sc in next 5 st, 1 ch, turn (12)
Row 5: sc in next 4 st, change to white yarn: sc in next 4 st (carry the red thread along), change to red yarn (leave the white thread as it is, you will pick it on the way back): sc in next 4 st, 1 ch, turn (12)
Row 6: sc in next 3 st, change to white yarn: sc in next 6 st (carry the red thread along), change to red yarn (leave the white thread as it is, you will pick it on the way back): sc in next 3 st, 1 ch, turn (12)
Row 7: sc in next 2 st, change to white yarn: sc in next 8 st (carry the red thread along), change to red yarn (leave the white thread as it is, you will pick it on the way back): sc in next 2 st, 1 ch, turn (12)
Row 8: sc in next st, change to white yarn: sc in next 10 st (carry the red thread along), change to red yarn (leave the white thread as it is, you will pick it on the way back): sc in next st, 1 ch, turn (12)
Rows 9 – 10 (white yarn): sc in in every st, 1 ch, turn (12)
Rows 11 – 14: sc in next 2 st, change to grey yarn: sc in next 8 st (carry the white thread along), change to white yarn (leave the grey thread as it is, you will pick it on the way back): sc in next 2 st, 1 ch, turn (12)
Fasten off the grey thread. Now we are going to crochet around the front panel.
Round 1: With white yarn make sc in each stitch until the end of the row (12), sc again in the last st and place sc in the end of each white row. Change to red yarn when going further to the red half of the van. Fasten off white yarn. Keep crocheting around the red part placing sc in each st and 2 sc in each corner st. Change back to white yarn when going further to the white half of the van and carry on the red thread, go on until the beginning of the round, do not sl st (52).
Round 2: make another round of sc (on sc in each st). Change to red yarn when going further to the red half of the van and change back to white for the last couple of stitches carrying along the red thread. Do not sl st, fasten off white yarn (52).
Round 3: sc in each stitch using red yarn only (52). Do not fasten off, you will keep crocheting around connecting the front panel to the back panel.
Sew the VW logo and the buttons to the front panel.
Place the front panel on the top of the back panel. The right side of the front panel looks up now, the right side of the back panel looks down. Crochet around both panels:
Place hdc in each stitch, 2 hdc in each corner stitch. After completing three sides stuff the van. Continue crocheting until the end of the round. Sl st to the first hdc. Fasten off, cut the yarn and weave in the tail.
Insert the hook in the central stitch of the top side of the van, make 35 ch, sl st to the beginning of the chain (or the next stitch of the van side if it looks more symmetrical). Fasten off, cut the yarn and weave in the tail. Yeeey, you have just completed your camping van ornament!
I am looking for testers for my pattern “Dreamer Crochet Top”. The pattern is really simple and beginner-friendly – only basic crochet stitches are used!
Materials: I used sport-weight yarn (cotton/nylon) and a 6.5 mm crochet hook.
Timeline: application deadline is on Friday, July 30th 2021. I will choose the testers over the weekend and contact them on Monday, August 2nd. After that testers will have 8 weeks (for sizes XS-L) and 9 weeks (for sizes XL-2XL) to complete the pattern/provide feedback/send photos.
Sizes: Pattern is written for sizes XS-2XL. If your size is outside of this range, please apply anyway and I will work on additional sizes with your help 🙂
Thanks so much for reading! If you want to apply for testing, fill out the tester form.
If you have any further questions, contact me here or via instagram.
Your Ana
Sorry! This product is not available for purchase at this time.
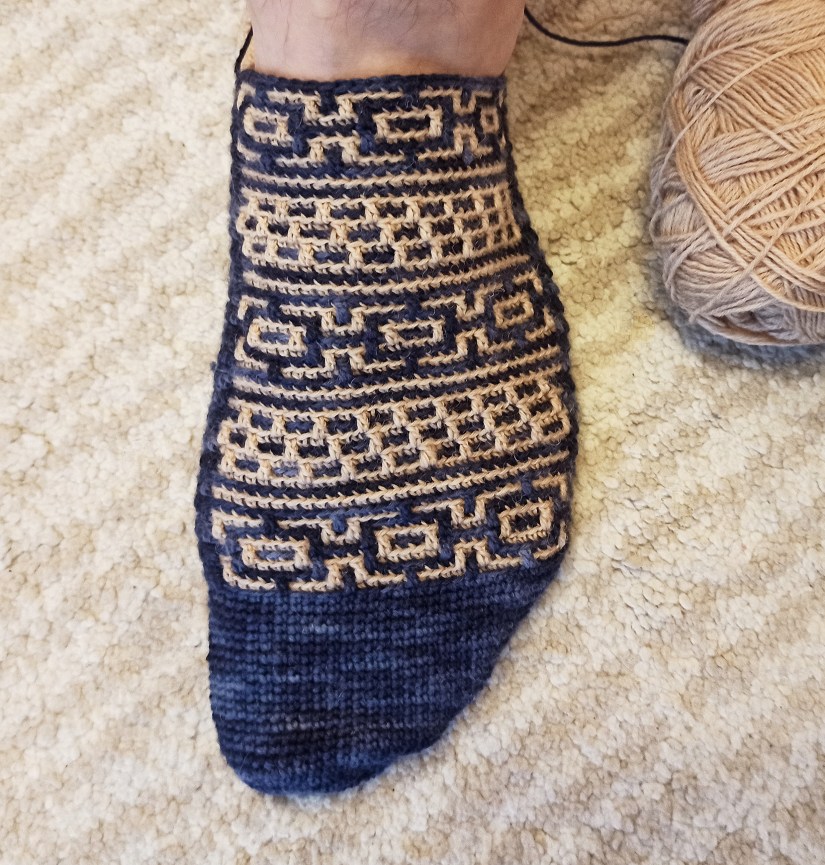
One of my crochet new year resolutions is to learn mosaic crochet. I thought it will be complicated and hard with all the colours and yarn ends. So I was pushing forward my first attempt of mosaic crochet for months until I have told myself: I have to try it in 2021!
And directly in January I could test a beautiful mosaic crochet sock pattern by @yarnandfabric. So I am making my first crochet sock ever and I am learning mosaic crochet. Two “firsts ever” in one pattern! So far I love it and the mosaic part is really easy to follow and now I am so motivated to add a mosaic crochet element to all my creations.
What about you? Have you tried mosaic crochet? What is your favouring crochet technique?
The year 2020 is almost (finally) over and I want to share my biggest crochet achievements of the year with you! I am very sorry for all the typos in this post, I think I am already drunk (it is only 6 pm here!). I am just really looking forward to step into the new year! 🙂
But let’s stay positive and talk about crochet! So in 2020 I had 4 crochet goals:
to learn tunisian crochet;
to try irish lace;
to crochet a realistic bird;
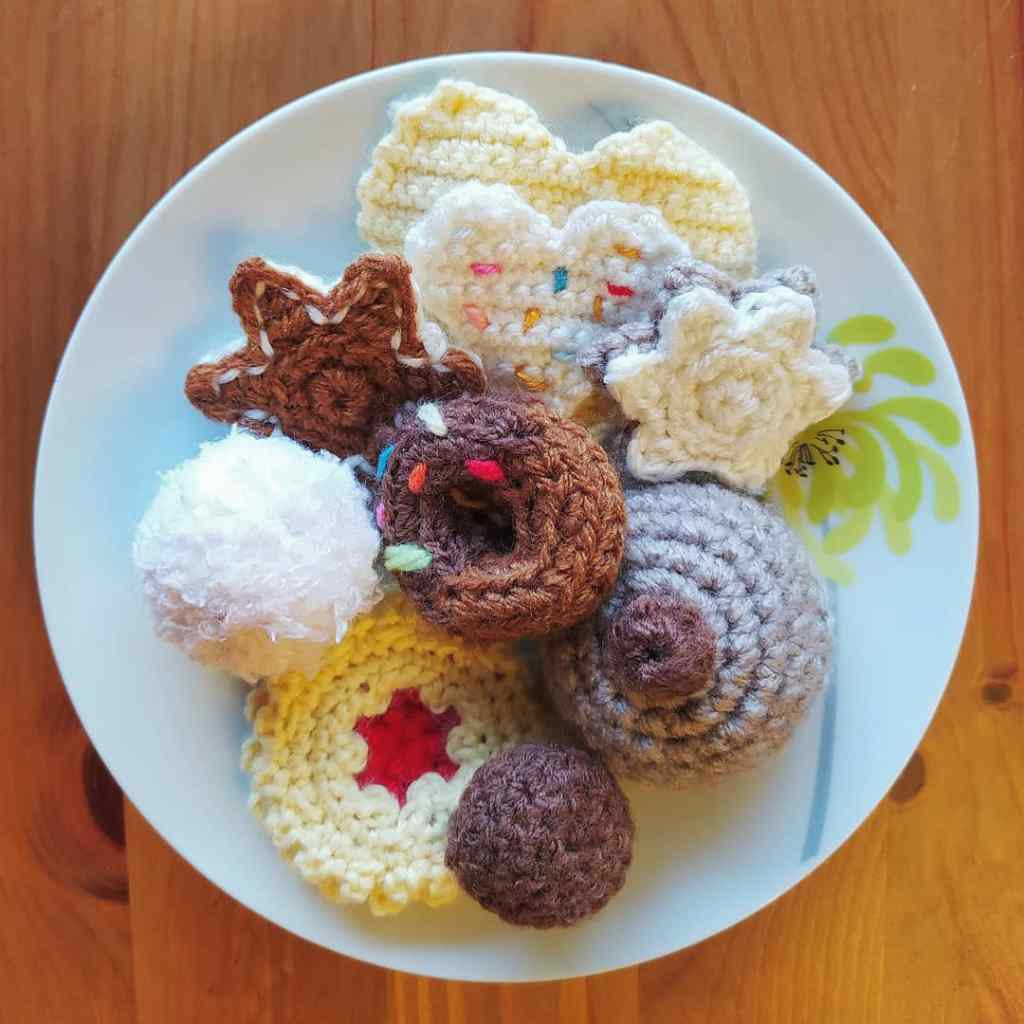
to crochet a christmas cookie.
And I am sooooo proud to tell you that all these goals have been achieved! I am really glad because I tend to not finish very many of my projects.
Another thing I put in my crochet to-do list for the year is to take more care of my blog and to try to establish more contact with another creators. In January 2020 I have created an account in Instagram and I am so happy I did it! I can’t believe it had been only a year!
I have participated in so many CALs (thank you Eleonora! You were the first person I followed after signing up in Instagram :), giveaways (I even won one, yeeey!) and I have tested 5 patterns. I have found so many great people and I am so thankful for all of it.
Here some photos of the activities I have mentioned:
Tunisian Crochet. In February I have been testing a tunisian sweater pattern created by @inthestitchwithvix. This was the first pattern I have tested and my first tunisian crochet experience. I loved everything about this design and I got into tunisian crochet so much, so I crocheted the sweater again 🙂
2. Irish lace. Uuuuh this gorgeous technique gave me a hard time getting into it (I vene wrote a post about it, you can read it here). But it did work although I still have a long way to go for imroving my skills.
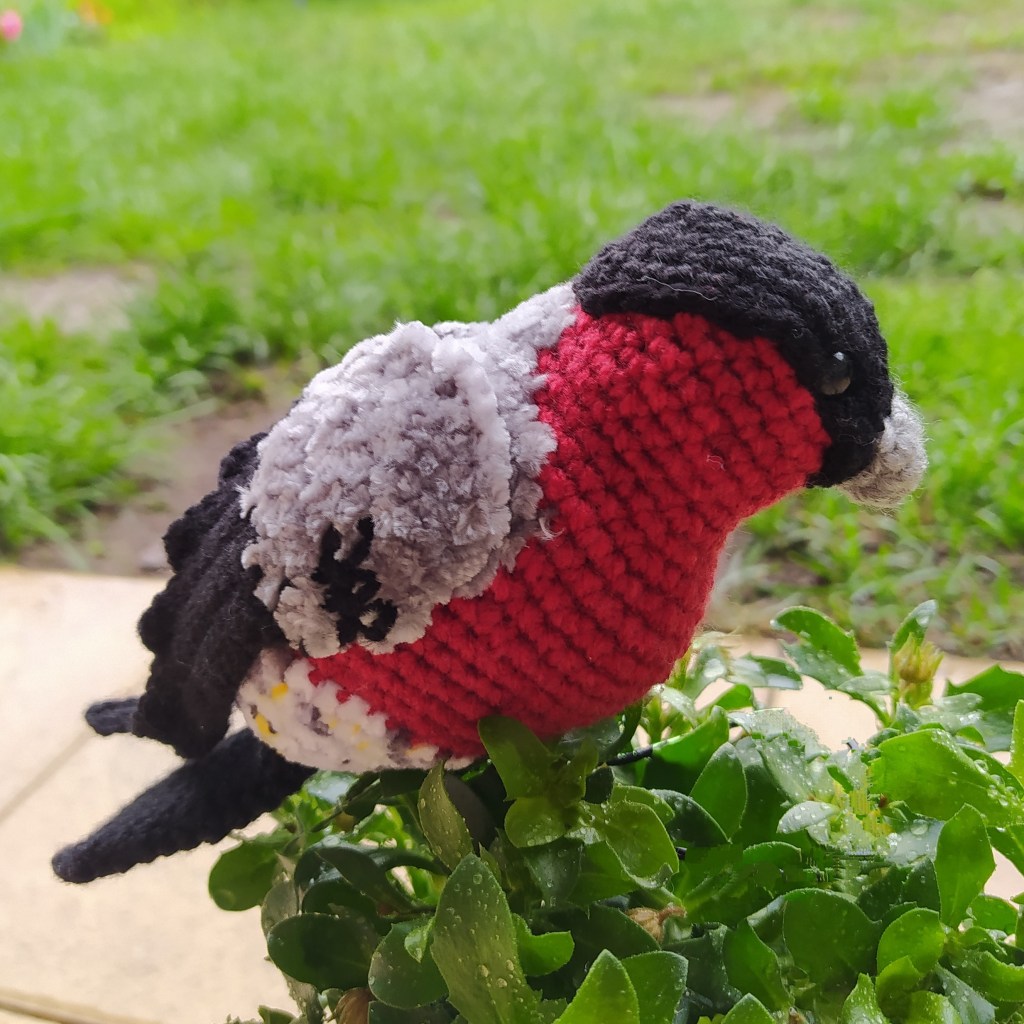
3. Realistic bird.
I crocheted a bullfinch as a gift for my friend. I followed this great youtube tutorial (it is only available in Russian).
4. Last but not the least, I have crocheted (and baked!!!) a bunch of Christmas cookies!! I shared several patterns here and you can find them in My Patterns.
The year was not that bad after all, right? But it is also good to move on 🙂
I have so many ideas, goals and inspiration for the next year and I hope to show it to all of you soon!
Thank you so much for reading it! I encourage you to see positive sides of 2020 and I hope you will have a great new year!