My Inspirations

Mosaic Crochet: My First Steps

One of my crochet new year resolutions is to learn mosaic crochet. I thought it will be complicated and hard with all the colours and yarn ends. So I was pushing forward my first attempt of mosaic crochet for months until I have told myself: I have to try it in 2021!

And directly in January I could test a beautiful mosaic crochet sock pattern by @yarnandfabric. So I am making my first crochet sock ever and I am learning mosaic crochet. Two “firsts ever” in one pattern! So far I love it and the mosaic part is really easy to follow and now I am so motivated to add a mosaic crochet element to all my creations.

What about you? Have you tried mosaic crochet? What is your favouring crochet technique?

amigurumi, Uncategorized

German Christmass Cookies “Nüsschen” Free Crochet Tutorial

These cookies are very traditional German Christmas cookies every family bakes in December. This is my very first recipy and these cookies are my husband’s favourite! The crocheted version would be a cute decoration for your kitchen or a beloved toy for your kid!

Here you can find both the free crochet pattern and the original recipy!

Ingredients:

  • 3 mm crochet hook
  • stitch marker
  • dark brown and light brown (or even yellow) yarn
  • scissors
  • sewing needle
  • yarn leftovers for stuffing

Abbreviations:

  • ch – chain
  • st – stitch
  • sc – single crochet
  • inc – 2 sc in one st (used to increase the number of stitches)
  • X 6 – repeat 6 times
  • at the end of every round total number of stitches is shown

The pattern:

Top part:

Start with dark brown yarn: 6 sc in Magic Ring

Round 1: Sc in each st (6)

Change to the light brown yarn.

Round 2: Inc X 6 (12)

Round 3: (sc in next st, inc) X 6 (18)

Round 4: (sc in next 2 st, inc) X 6 (24)

Rounds 5-6: sc in all st (24). Fasten off and cut the yarn, weave in the end.

Bottom part:

Crochet with the light brown yarn: 6 sc in Magic Ring

Round 1: Sc in each st (6)

Round 2: Inc X 6 (12)

Round 3: (sc in next st, inc) X 6 (18)

Round 4: (sc in next 2 st, inc) X 6 (24)

Round 5: (sc in next 3 st, inc) X 6 (30). Fasten off, cut the yarn leaving a longer tail for sewing.

Sew two parts together, stuff it with yarn leftovers. Note: the bottom part has to be inside out (the “right” side should be inside, see the pics).

Taadaaaaa, finished!

Now check out the eatable recipe 🙂

Plätzchen “Nüßchen”

  • 300 g ground haselnuts
  • 300 g soft butter
  • 200 g sugar
  • 300 g flour
  • 1 tea spoon baking powder
  • 2 packages vanilla sugar
  • about 100 whole haselnuts for decoration

Preparation:

  • Preheat the oven 180°C, soft butter and sugar mix together, add other ingridients.
  • Mix everything in a homogeneous dough
  • Shape small balls (2 cm diameter) and put it on a baking sheet
  • Press a whole haselnut in each dough ball (until a half of the nut will be inside).
  • Bake 12 minutes and let the cookies cool down (When you get the cookies out of the oven, they will still feel very soft. Dont worry about it and let them cool down, they will ge harder very fast!).

Bon appetit!

amigurumi, Uncategorized

Christmas Cookies Free Crochet Pattern

I continue introducing original German cookie recipes to you. Crocheted version you can use as Christmas decorations! And today’s cookie is the Nougat Rings!

This recipe is very special to me because I am making it for the first time this year! Usually I am quite conservative if it’s about Christmas recipes but this year is so different in many ways, so I have tried something new.

At the end of the pattern you can also find the real recipe!

You will need:

  • 3 mm crochet hook
  • stitch marker
  • dark brown yarn
  • light brown yarn
  • scissors
  • sewing needle
  • colourful yarn leftovers for decorating

Abbriviations

  • ch – chain
  • st – stitch
  • sc – single crochet
  • inc – 2 sc in one st (used to increase the number of stitches)
  • dec – 2 sc together (used to decrease the number of stitches)
  • X 6 – repeat 6 times
  • at the end of every round total number of stitches is shown

Note:

  • Every next round is crocheted in the back loop only!!!!
  • Colour change tails can be used as stuffing

The pattern:

Dark brown Ch 6, change to the light yarn and ch 6, sl st to the first ch to join the circle.

Now the colours will be kept as in the chain. So change the yarn to the light one after a half of the circle and change back to the dark yarn at the end of every round. The tails can be left here to serve as a stuffing of the cookie. Remember to crochet in back loops only!

Rounds 1-2: sc in all st (12)

Round 3: (inc, sc in next st) X 6 (18)

Round 4: (inc, sc in next 2 st) X 6 (24)

Rounds 5-6: sc in all st (24)

Now you crochet using the light yarn only.

Round 7: (dec, sc in next 2 st) X 6 (18)

Round 8: (dec, sc in next st) X 6 (12)

Now use colourful short yarn leftovers to make the sugar.

Sew the round 8 with the base chain.

Congratulations, the cookie is finished!

And as promised, here is the real recipe of the Nougat Rings Cookies:

  • 40 g nougat
  • 120 g soft butter
  • 120 g powdered sugar
  • 160 g flour
  • 2 eggs
  • 90 g instant flakes
  • chocolate and colourful sugar for decorating

Preparation:

  • Preheat the oven 200°C, soft butter and nougat mix together, add sugar.
  • Add flour, eggs and flakes to the dough and put it in a fridge for 30 minutes.
  • Put the dough in a plastic bag with a small hole (around 1 cm diameter).
  • Press the dough out of the bag in ring shapes on a baking sheet.
  • Bake 12 minutes and let the cookies cool down.
  • Decorate with chocolate and sugar. Enjoy!

I hope you had fun baking and crocheting these beauties with me!

You might also like:

Crochet Christmas Cookie Free Pattern and Recipe!

img_20201122_103654
Uncategorized

Christmas Chocolate Cookies Free Crochet Pattern

You might have noticed that I was baking a lot lately. Christmas atmosphere at home is especially important this year, when we don’t have a Christmas market to go to… And baking Christmas cookies is the best and the most tasty way to create the atmosphere. And you know what, I was not only baking cookies but also crocheted them!

To introduce original German cookie recipes to you, I have decided to design a crochet pattern for every kind. And at the end of the pattern tutorials you can also find the real recipes!

So the first ones to go are chocolate cookies (Schneebällchen Plätzchen). This recipe is one of the very special to me. 2 years ago I had a baking date with a friend of mine and we both brought our favourite cookie recipes. On this day she introduced this recipe to me and now it has become my favourite, too!

So, the crochet “recipe” first!

Ingredients:

  • 3 mm crochet hook
  • stitch marker
  • dark brown yarn
  • scissors
  • sewing needle

Abbreviations:

  • ch – chain
  • st – stitch
  • sc – single crochet
  • inc – 2 sc in one st (used to increase the number of stitches)
  • dec – 2 sc together (used to decrease the number of stitches)
  • X 6 – repeat 6 times
  • at the end of every round total number of stitches is shown

The pattern:

Note: the cookie will be “inside out”. This means that you crochet around but hold the cookie in the way that the front side looks to the inside. Place a stitch marker in the first st on every round as you go.
Round 1: 6 sc in magic ring (6 )
Round 2: inc X 6 (12)
Round 3: (sc in next st, inc) X 6 (18)
Rounds 4-5: sc in all st (18)
Round 5: (sc in next st, dec) X 6 (12)
Round 6: dec X 6 (6)
Sew the hole.

All done!!! Easy, right?

And now, as promised, the real recipe:

Ingridients:

  • 250 g – butter
  • 250 g – cornstarch
  • 75 g – flour
  • 50 g – cacao power
  • 1 package – vanilla sugar

Instructions:

Pre-heat the oven (180 degrees C) and smash the soft butter. Now add all the dry ingridients (sieve them in) and mix everything together.

Shape small balls (2 cm diameter) and bake them around 12 min. Enjoy!

What was easier, crochet recipe or the eatable one?

You might also like:

The Nutcracker Story: Ballerina Marie Amigurumi Pattern

IMG_20200112_131008
Uncategorized

Sea Shell Smartphone Case Crochet Pattern

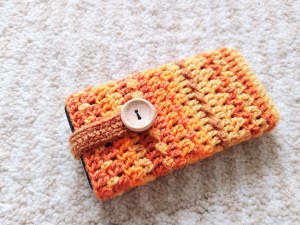
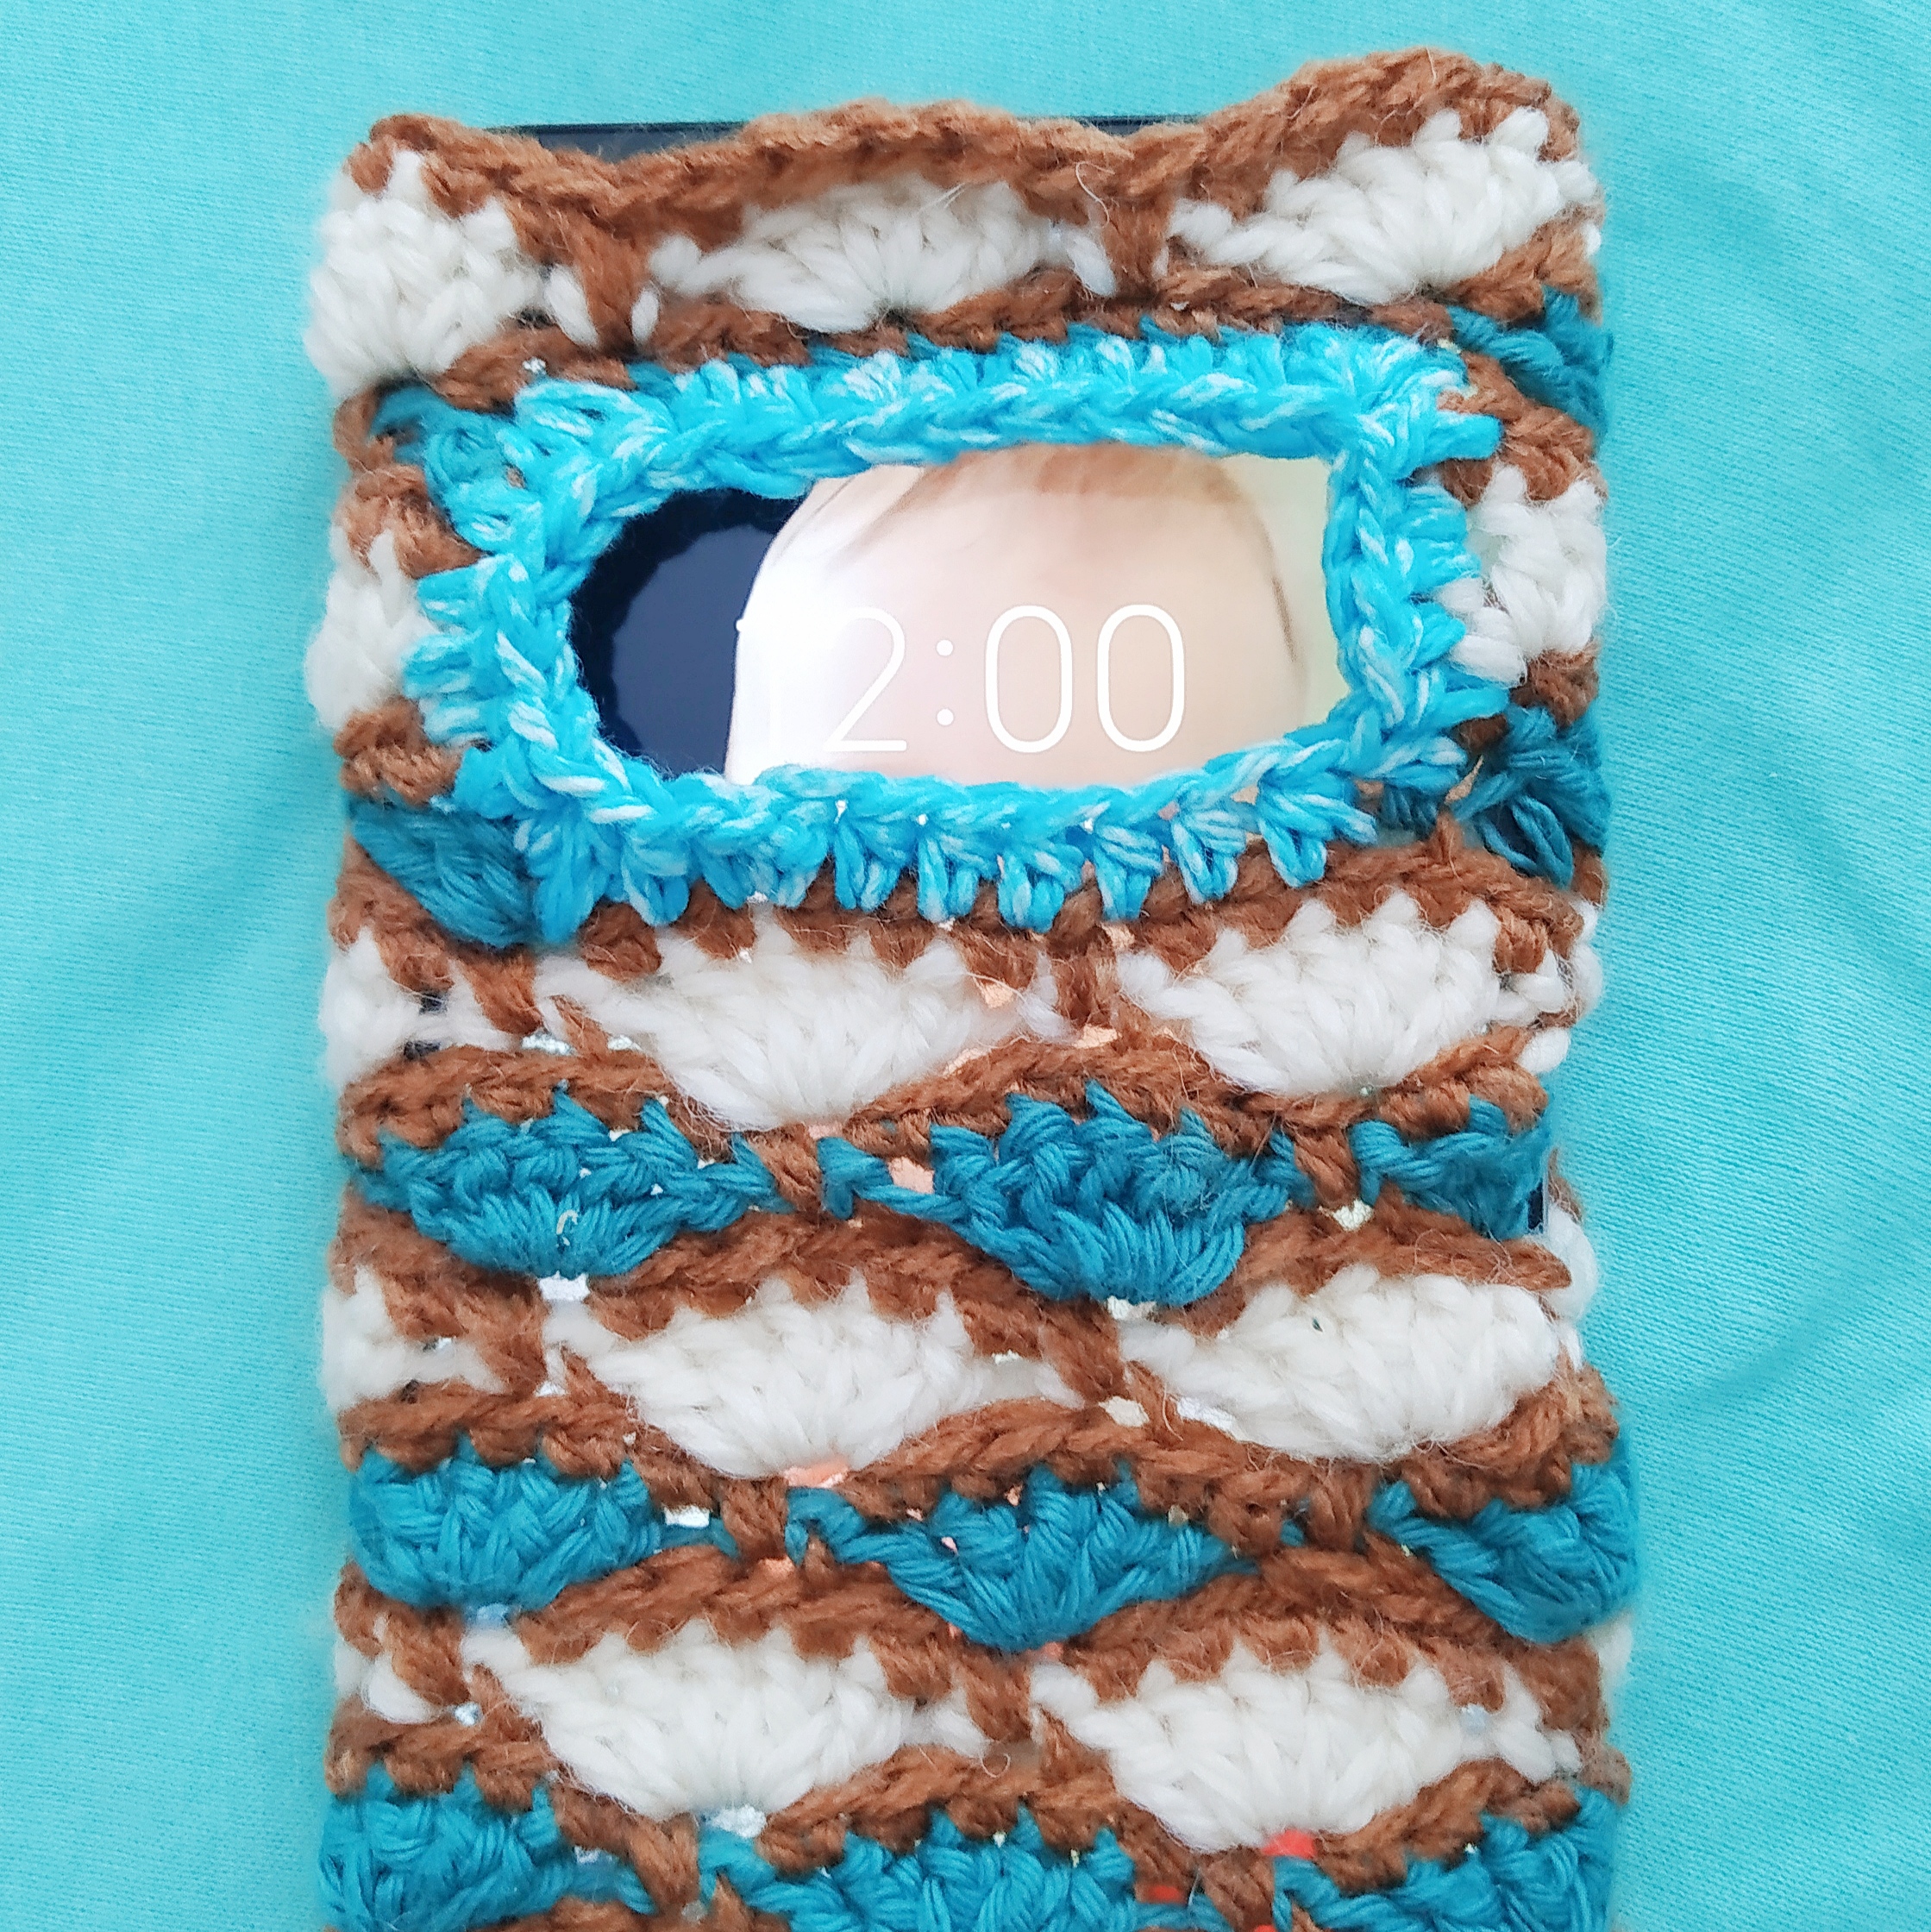
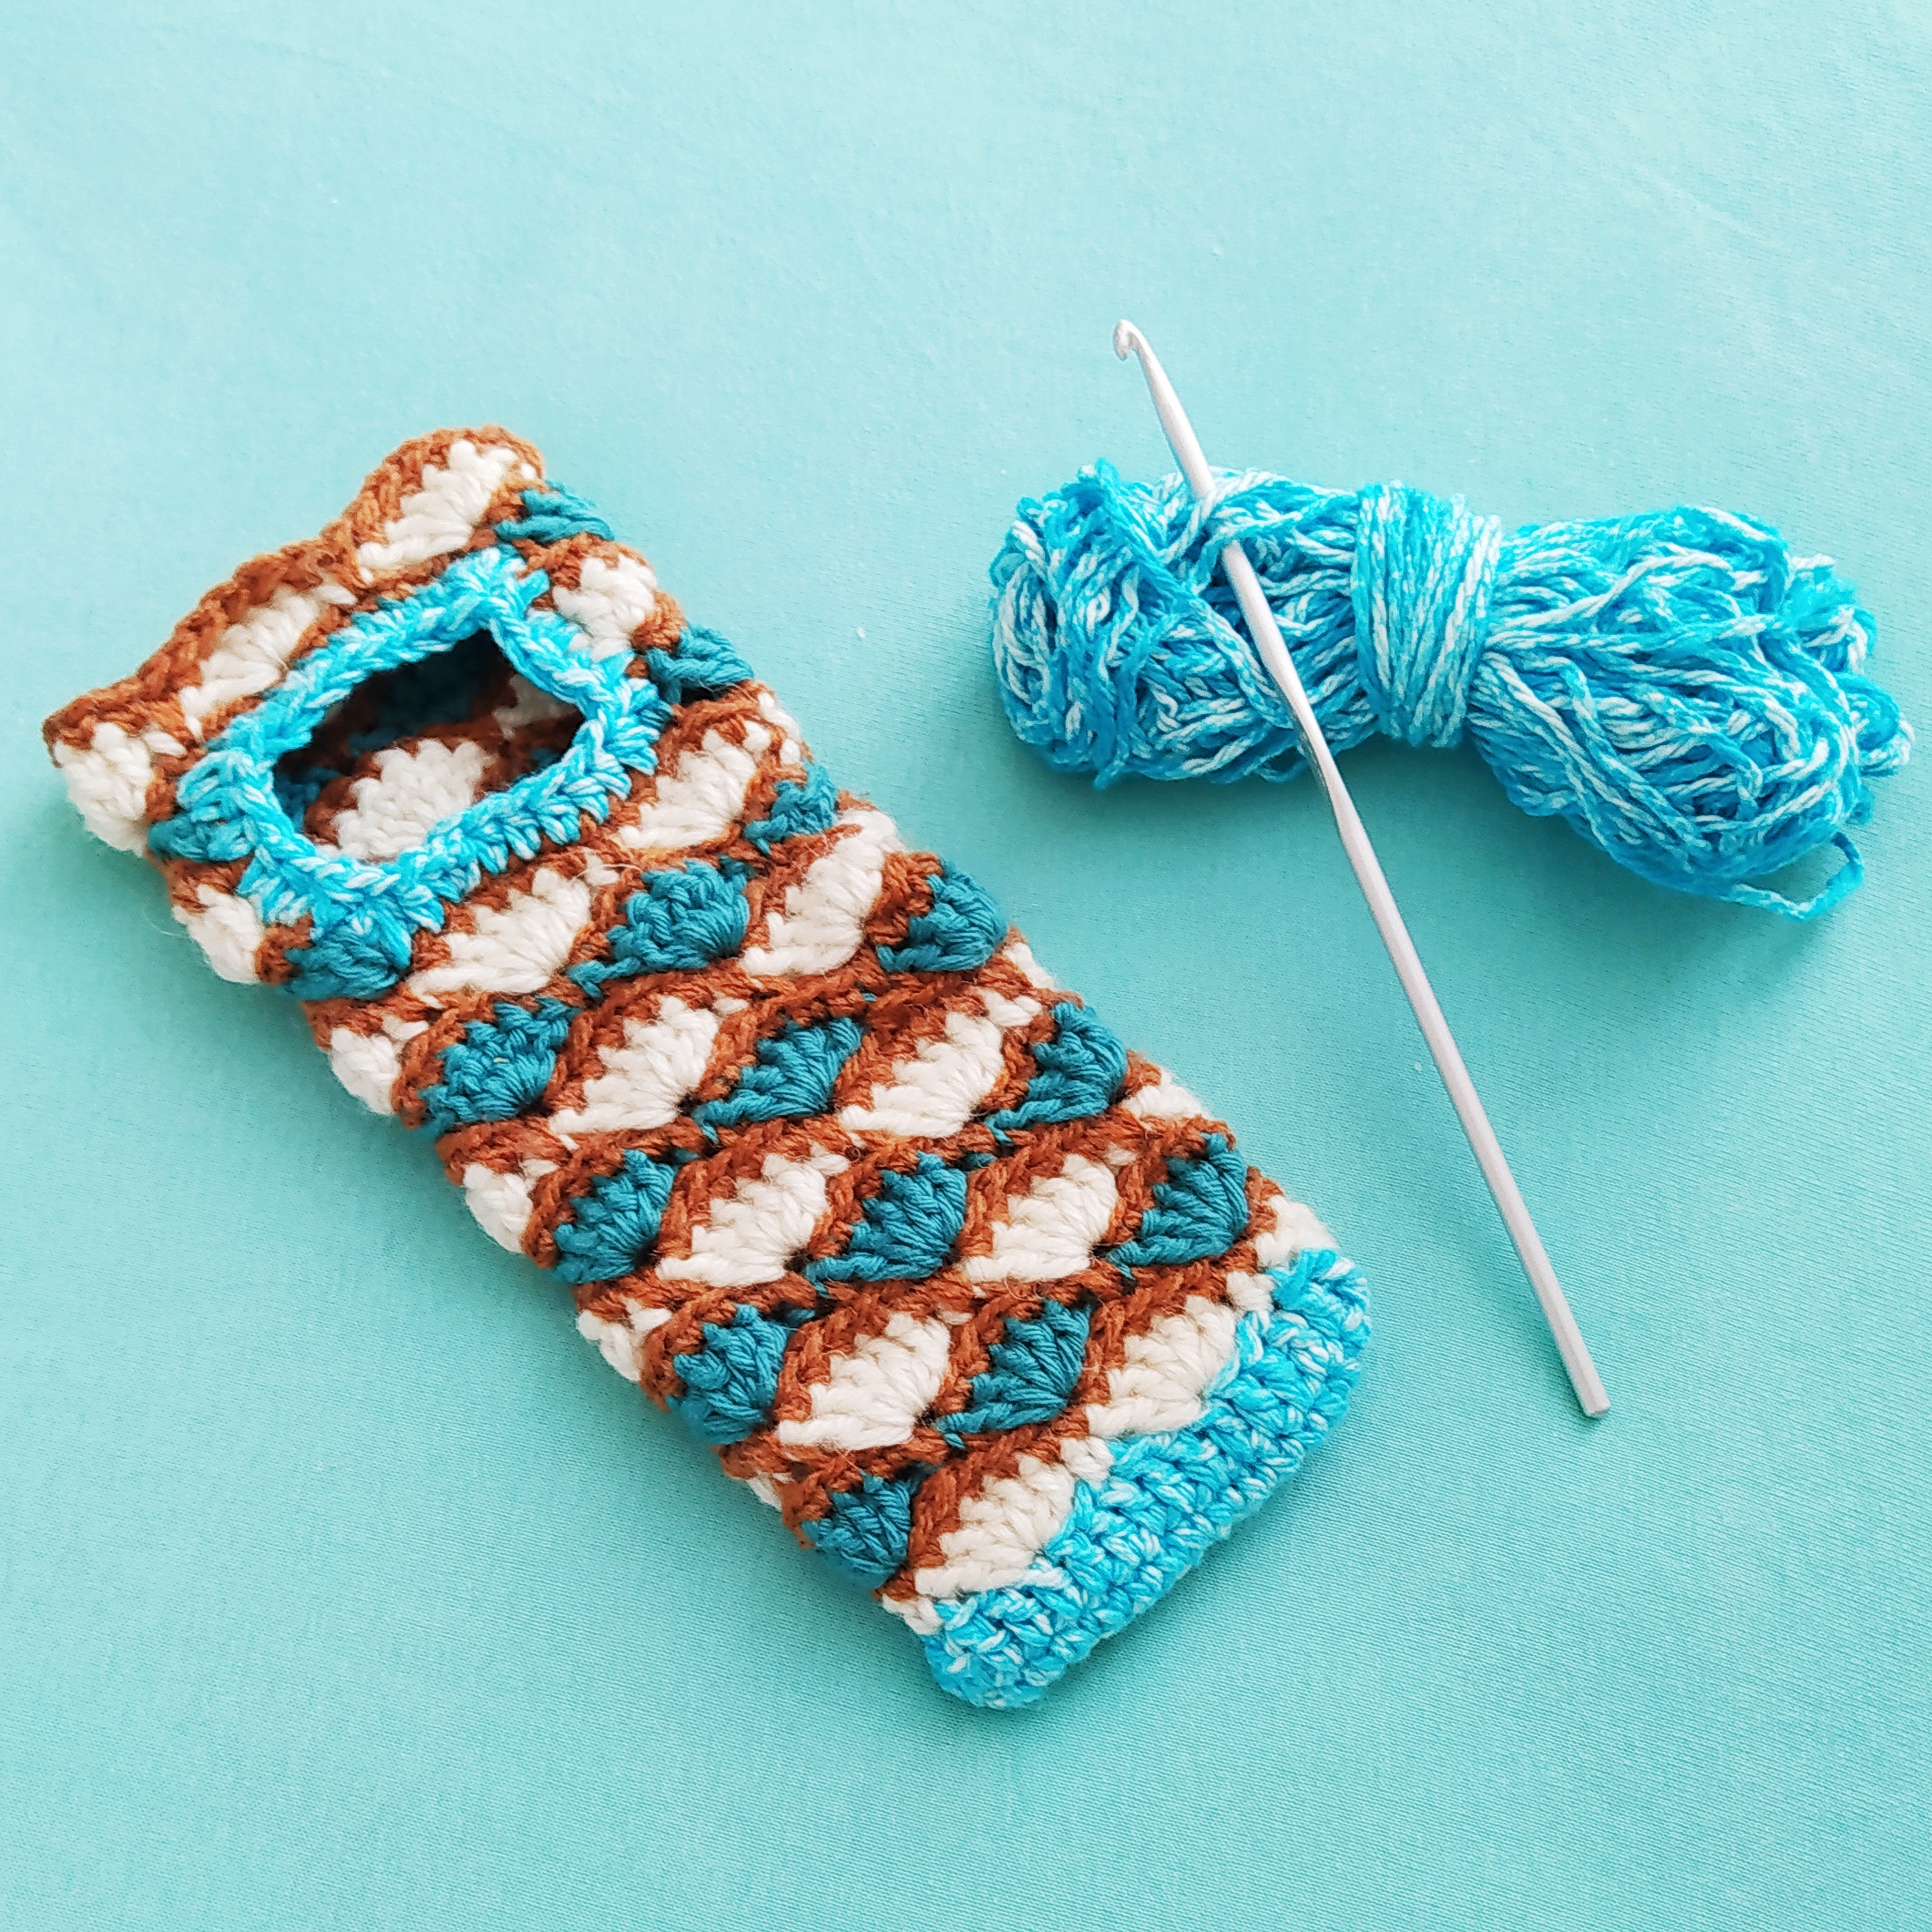
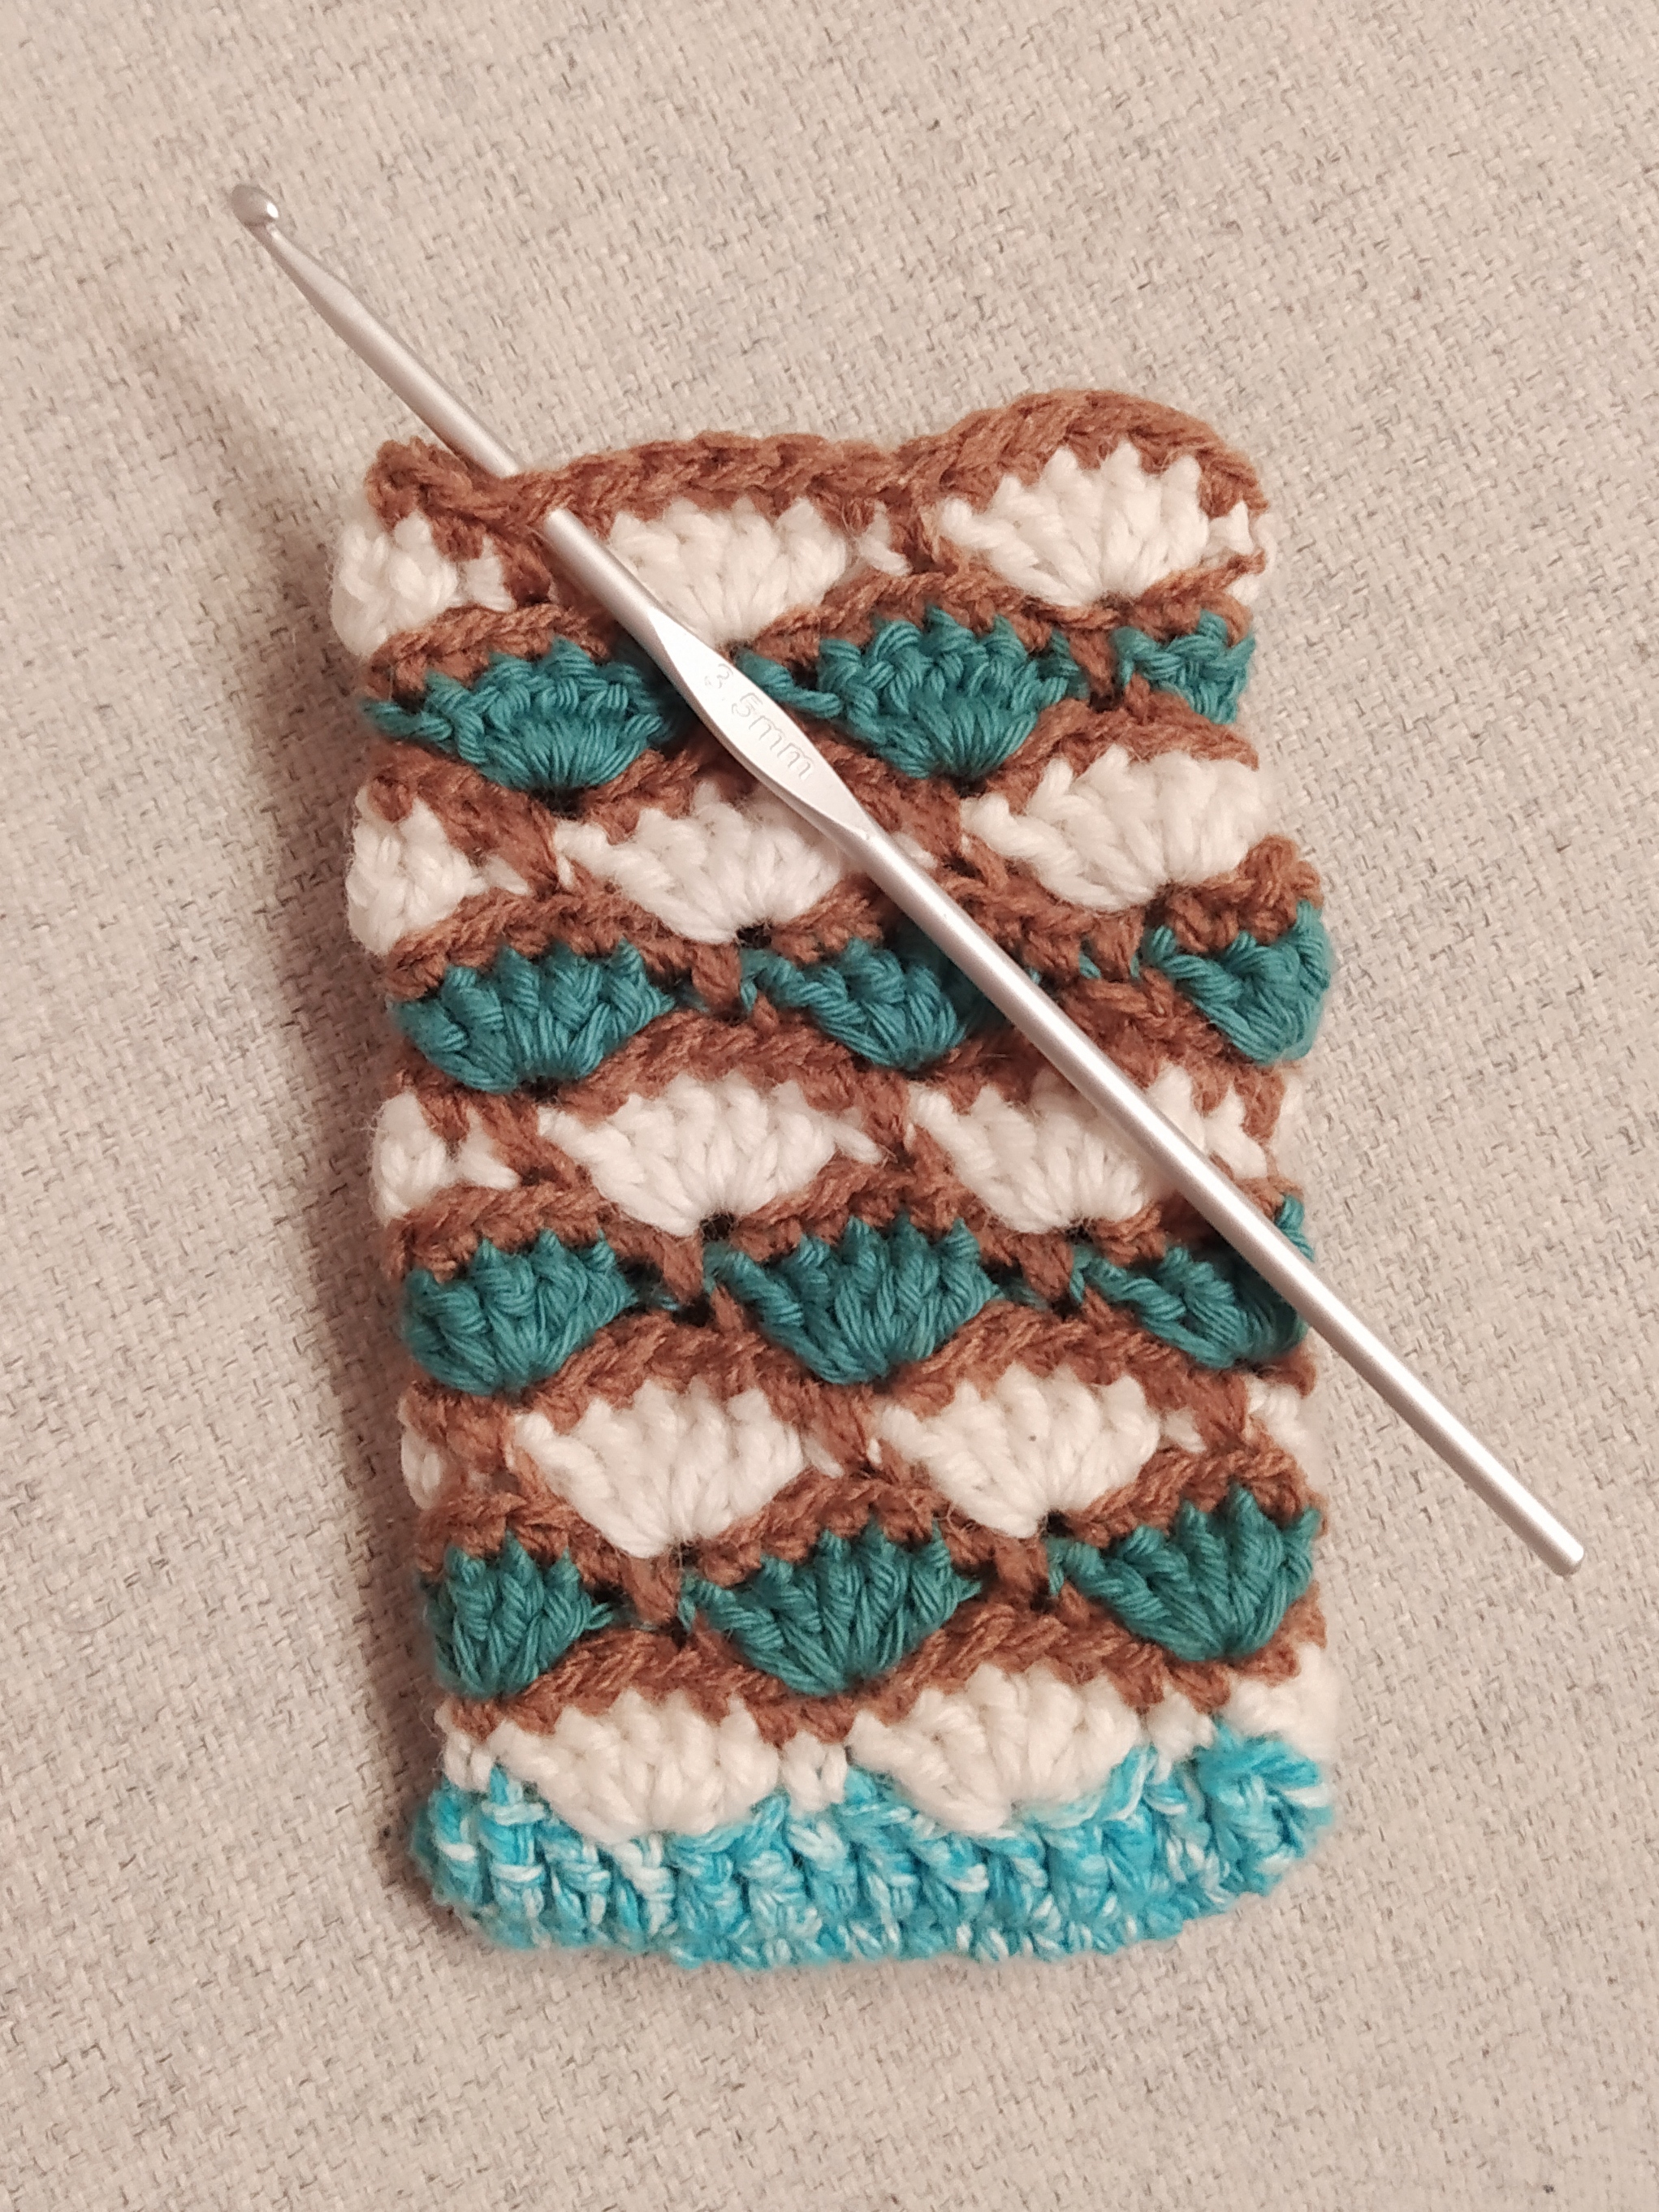
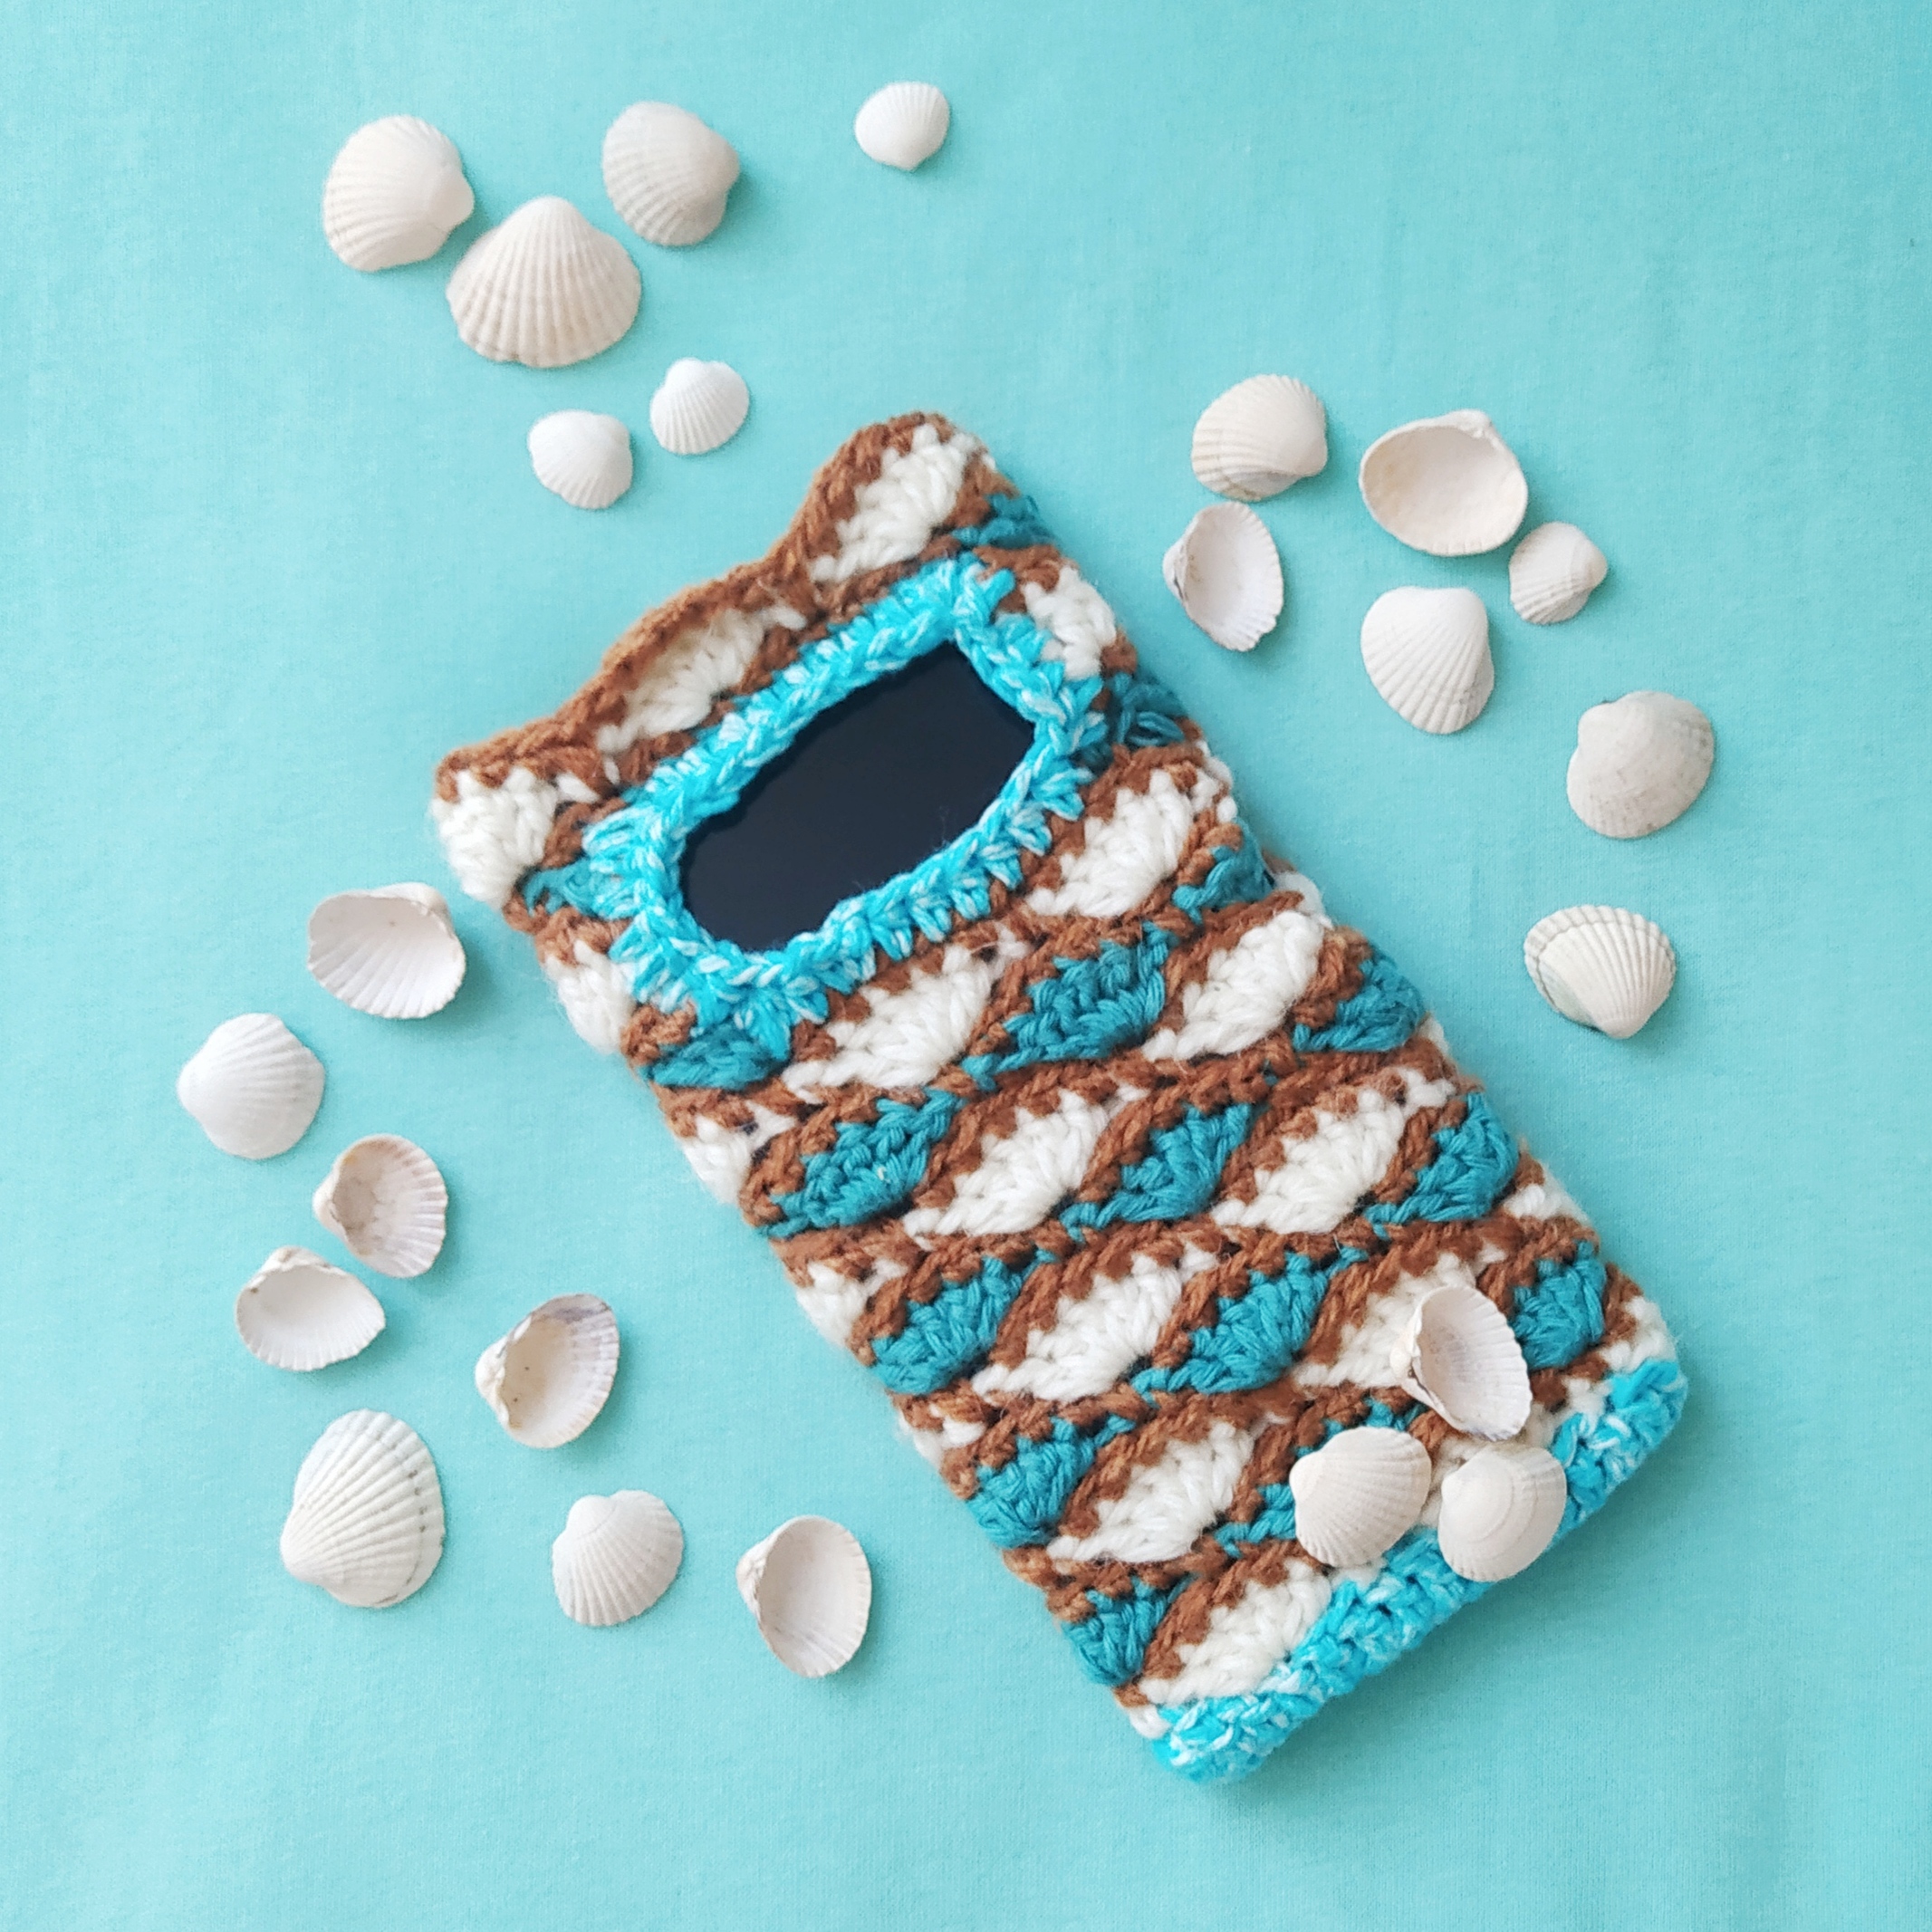
If we cannot go to vocations, we can bring vocations home! Have a look at my sea shell smartphone case inspired by my memories of waves and shells that are laying around on sand every morning… Oh, I miss being on a coast so much! Well, back to the case: I have also made a small hole for the phone on button and a small “window” for checking the time (that was a request of my dear husband who hates arm watches 🙂

IMG_20200408_143630

Materials:

  • 3.5 mm crochet hook
  • recommended for the hook yarn of beige, blue, brown colours
  • scissors

Abbreviations:

  • ch – chain
  • st – stitch
  • sl st – slip stitch
  • sc – single crochet
  • hdc – half double crochet
  • shell – shell st (5 dc in one st)
  • dc – double crochet
  • (…) X 10 – repeat “…” 10 times

IMG_20200408_110000

Pattern:

Note:

  1. The case was made for a smartphone that measures 150 mm x 76 mm x 8.6 mm.
  2. We crochet around, from the bottom to the top, every Round we join with sl st and every Round (except for the Round 1) starts with 1 ch which are not counted as a st!
  3. We make a small hole for a button to be able to switch on the phone in the case and a bigger window for seeing the watch

Blue yarn: 17 ch
Round 1: 3 sc in the second from the hook st, sc in next 12 st, 3 sc in the next st, sc in next 12 st (28)
Round 2: dc in all st (30)
Round 3, beige yarn: (sc, skip 2 st, shell in next st, skip 2 st) X 5 (30)
Round 4, brown yarn: sc in all st (30)
Round 5, blue yarn: 2 ch, 2 dc in the same st, (shell in the st between two next shells of the previous round, sc in the central dc of the next shell of the previous round) X 4, 3 dc in the first st of the round, join with sl st (30)

Round 6, brown yarn: sc in all st, Note: in the sc of  the previous round insert the hook in the st of the round before. This way the bround yarn will cover the sapce between the shells (30)

Round 7, beige yarn: sc in the same st (shell in the st between two next shells of the previous round, sc in the central dc of the next shell of the previous round) X 5, join the round with sl st (30)

Round 8, brown yarn: sc in all st, Note: in the sc of  the previous round insert the hook in the st of the round before. This way the bround yarn will cover the sapce between the shells (30)

Rounds 9-16: repeat Rounds 5-8 after each other (30)

IMG_20200408_110226

Note: if you do not need spaces for the on button and for the watch, keep crocheting until the wished size is reached. Otherwise follow further instructions:

Round 17, blue yarn: 2 ch, 2 dc in the same st, (shell in the st between two next shells of the previous round, sc in the central dc of the next shell of the previous round) X 4, 3 dc in the last st, change to brown yarn, 1 ch, turn (30) – here will be a space for the phone on button.

Round 18: crochet in the other direction: repeat the Round 6, do not join the Round. Change to beige yarn, 2 ch, turn (30)

Round 19, (shell in the st between two next shells of the previous round, sc in the central dc of the next shell of the previous round) X 5, join the round with sl st (30)

Round 20: repeat Round 6 (30)

Fasten off.

Round 21, blue: Insert the hook in 11th st of the round (space between 2nd and 3rd shells) and crochet 4 more shells and following sc’s, change to brown yarn, 1 ch, turn (20)

Now we continue crocheting only on this part of the case

Round 22, brown: sc in all st, Note: in the sc of  the previous round insert the hook in the st of the round before. This way the brown yarn will cover the sapce between the shells, change to the next colour, 2 ch, turn (20)

Round 23, beige: ch sc in the same st, (shell in the st between two next shells of the previous round, sc in the central dc of the next shell of the previous round) X 3, 3 dc in the last st of the round, change to brown yarn, 1 ch, turn (20)

Round 24: sc in all st, Note: in the sc of  the previous round insert the hook in the st of the round before. This way the brown yarn will cover the sapce between the shells, change to the next colour, 10 ch, sl st to the first st of this round (30)

Round 25, beige yarn: repeat Round 5 (30)

Fasten off, cut the yarn and weave in all ends.


Crochet around the inside part of the window with the blue yarn using hdc. Fasten off, cut the yarn and weave in all ends.

IMG_20200408_120956

Did you like to crochet with this tutorial?
Have a look at my other patterns, maybe you will find something you like there! And don’t forget to check out my Instagram @nicecrocheting!

You might also like:

Rainbow – We are Staying Home! Free Crochet Pattern

IMG_20200404_140658

Coastal Style Smartphone Case Crochet Pattern

IMG_20200326_132906