amigurumi, Uncategorized

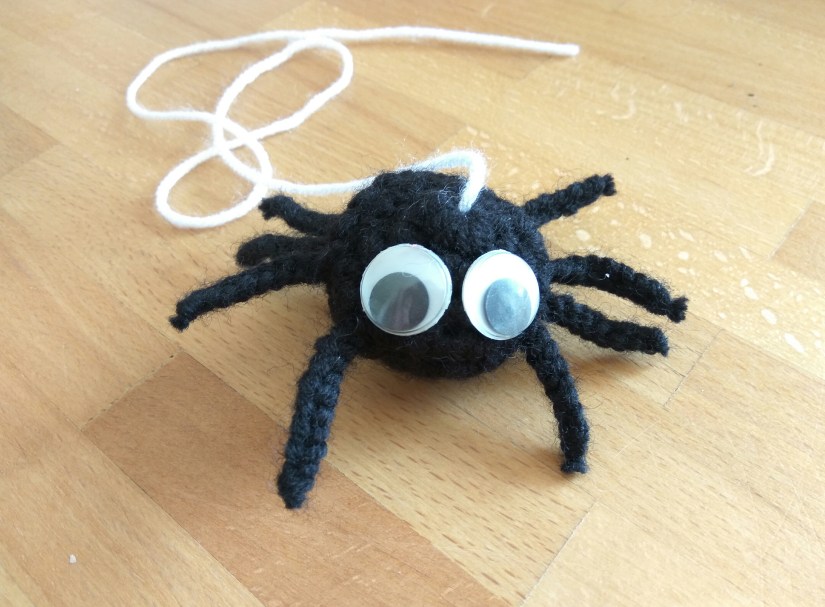
Crochet Halloween Decoration Spider in less than an hour!

Winter is coming! But first comes Halloween!
Perfect opportunity to show some creativity and crochet a scaaaring deco! Or maybe scaring and sweet, or just sweet!
Little spiders for your mailbox will scare all your neighbours and contribute into the special atmoshere on the Halloween days!
The most important: the pattern is quick and easy and you don’t have to invest a lot of time into it!
Don’t forget to buy some sweets! I am sure, kids will be attracted by the little cute spiders!

IMG_20180910_155608

You will need:

  • 5.00 mm crochet hook
  • black yarn matching the hook, white thiner yarn
  • googly eyes
  • scissors and a sewing needle
  • fiberfill

Abbreviations:

  • ch – chain
  • st – stitch
  • sc – single crochet
  • inc – 2 sc in the same st
  • dec – 2 sc together
  • X 6 – repeat 6 times
  • at the end of every round total number of stitches is shown in brackets

Instructions:

Spider body:
Round 1: 6 sc in magic ring (6 )
Round 2: inc X 6 (12)
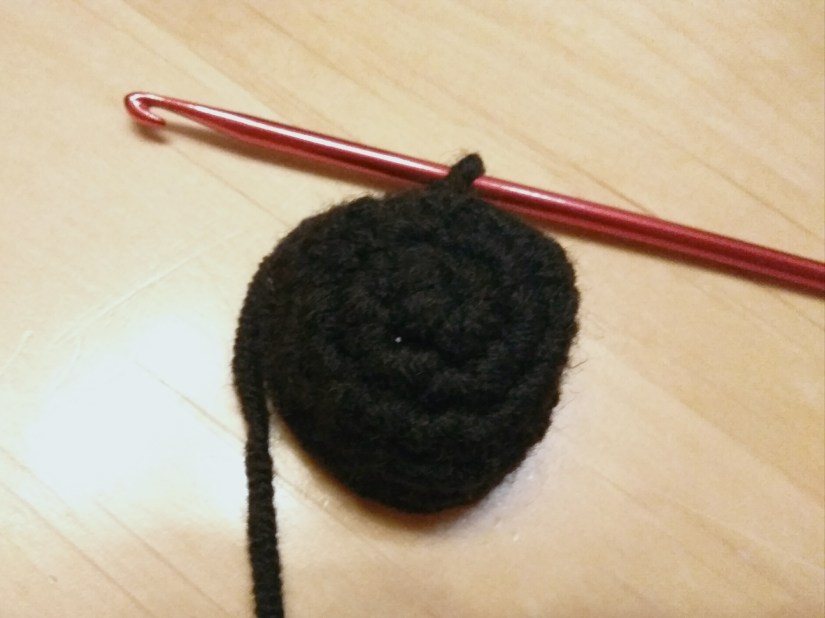
Round 3: (sc in next st, inc) X 6 (18)

IMG_20180909_222834
Round 4-5: sc in all st (18)
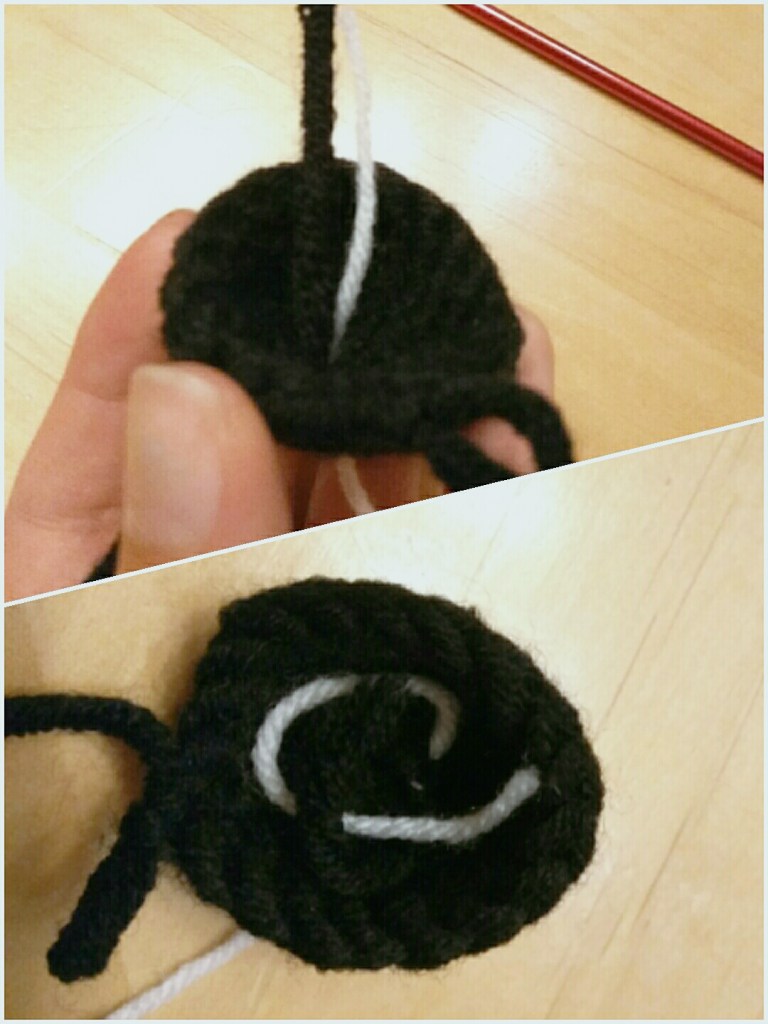
At this point you can make a spider net: just insert the white yarn in the body through the magic ring, make a knot with the end of the black yarn inside the spider body (see pictures below).

IMG_20180909_222906

Round 6: (sc in next st, dec) X 6 (12)
Stuff the body but not full (so there is some space left for inserting the legs).
Round 7: dec X 6 (6)
Close the body with a sewing needle.

Spider legs:
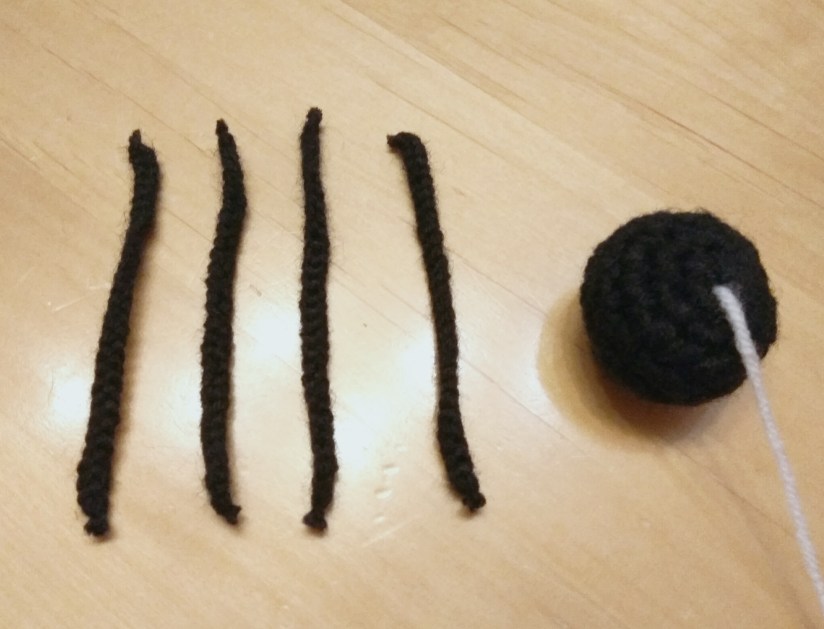
Make a chain 25 ch and cut the ends as short as possible. This is one pair of legs. As you know, we need 8 legs so make 3 more pairs.

IMG_20180909_223030

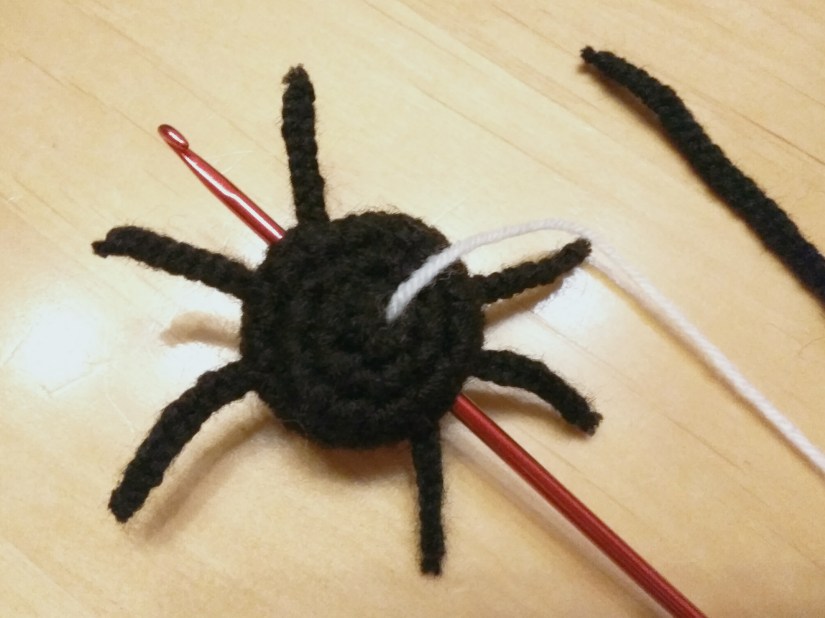
Insert the hook through the body and pull one of the chains through in the way that its two ends have the same length (as shown on the picture below). Do the same for other 3 chains.

IMG_20180909_223155

Stick the eyes on the body and the spider is finished! It did’t take long, right? Now you can attach it to your mailbox or enterance. Or you can crochet more spiders and decorate a room! This will look scaring! Have fun on Halloween!

IMG_20180910_155431

Think about crocheting a small basket for sweets? You can use this pattern for it, just take orange and/or black yarn instead of the packing twin!

Did you like to crochet with the tutorial? Check out my other patterns here!

amigurumi, Uncategorized

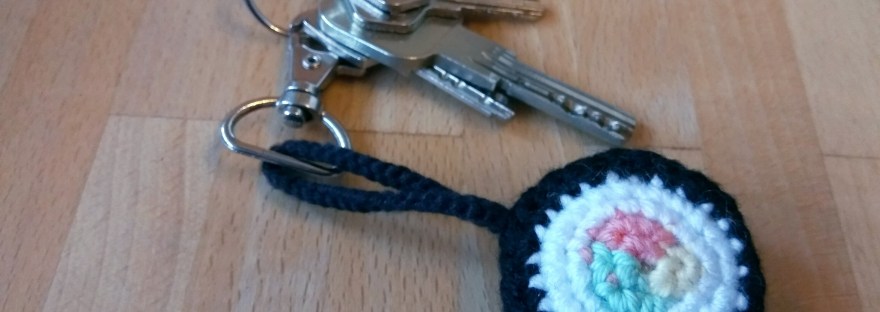
Crochet Key Ring Sushi

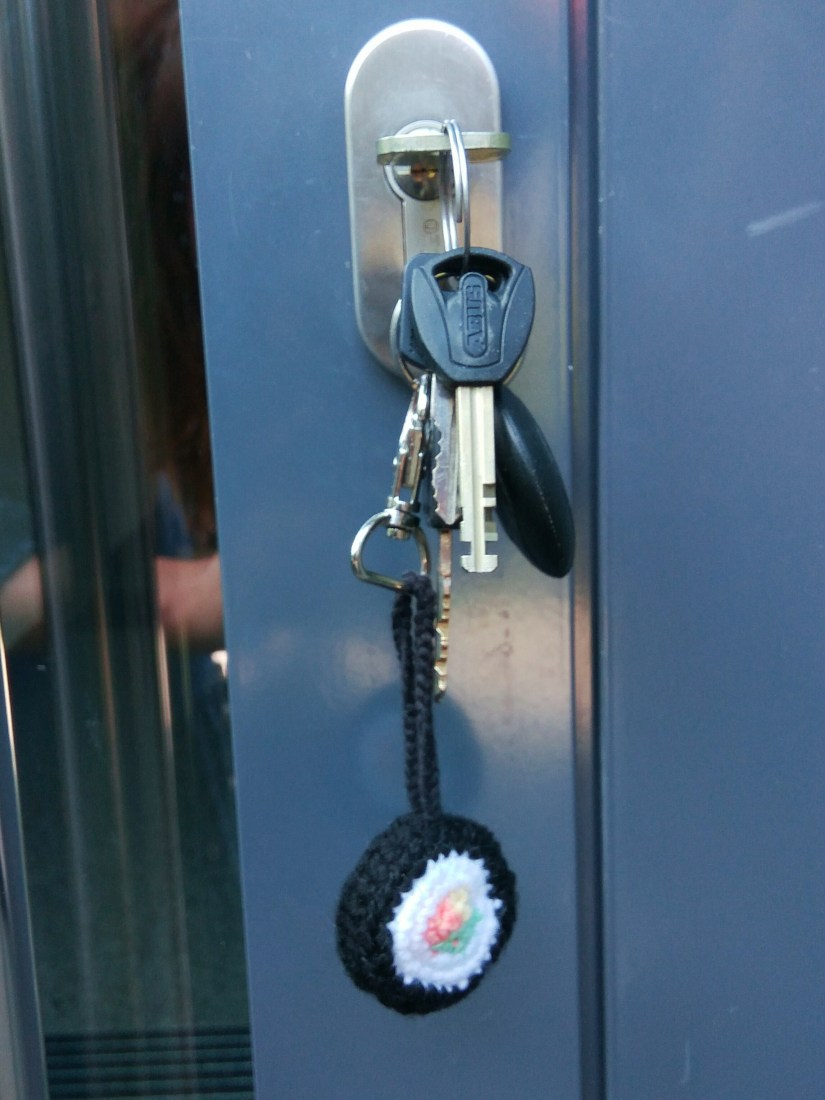
We moved into a new flat 3 months ago and my husband still has a key ring of a person before! It would be ok, but it is a big pink band with PETRA written on it. So I decided that it’s time to change it! We are huge sushi fans so I just thought: why don’t I crochet a sushi instead of being annoyed about the PETRA key ring? 🙂

The pattern is really easy, you should be able to make only the basic single crochet stitch. It will not cost you a lot of time but the result is quite impressive and you will get an unique key ring or an interesting idea for a present!

IMG_20180908_161334

You will need:

  • a crochet hook
  • pink/salmon colour, green, light yellow, white and black yarn
  • carabiner keyring (it’s optional, just make the total thing look fancier)
  • fiberfill
  • scissors and a sewing needle

Important to note: you can use a hook of any size (depending on desired size of the key ring), but it should match to the yarn size and that all yarns have the same thickness! Crochet the key ring tightly and try to weave in all the ends carefully – the key ring will be always in use and it should be durable!

Abbreviations:

  • ch – chain
  • st – stitch
  • sl st – slip stitch
  • sc – single crochet
  • inc – 2 sc in the same st
  • X 6 – repeat 6 times
  • at the end of every round total number of stitches is shown in brackets

Instructions:

Front part:
Work with pink, yellow and green yarn. Start with pink yarn.
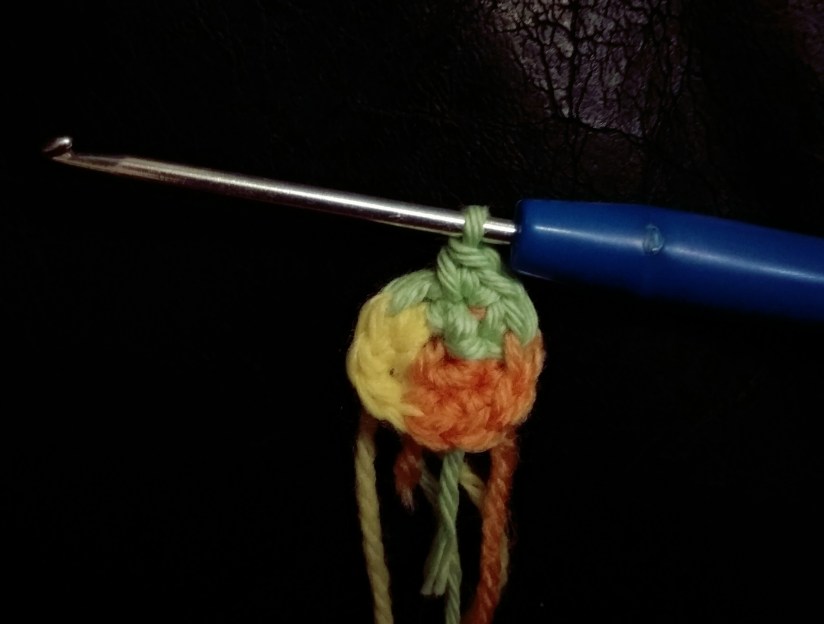
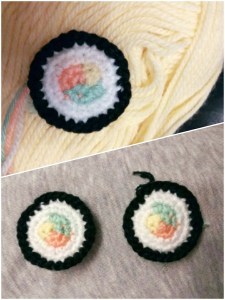
Round 1:  start making magic ring, crochet 2 sc in it, change to yellow yarn, crochet 2 sc in the same magic ring, change to green yarn, make two 2 sc (6 )
Round 2: change back to the pink yarn, inc X 2 (take care that you crochet in the pink st), change to the yellow yarn, inc X 2, change to the green yarn, inc X 2 (12)

IMG_20180901_083756
Round 3: change to white yarn (sc in next st, inc) X 6 (18)
Round 4: (sc in next 2 st, inc) X 6 (24)
Round 5: change to black yarn (sc in next 3 st, inc) X 6 (30)
Cut all the yarns leaving a tail (black yarn) for sewing.
Follow the instructions again to crochet the second side of the sushi, but use green yarn after pink, and only then yellow! On the picture below the sides look exactly that same and it was my mistake, so not repeat it! 🙂

IMG_20180901_083714

Side of the sushi:

Make 30 + 1 ch, turn to the other direction
Round 1: sc in all st, 1 ch
Round 2: sc in all st
Fasten off and cut the yarn.


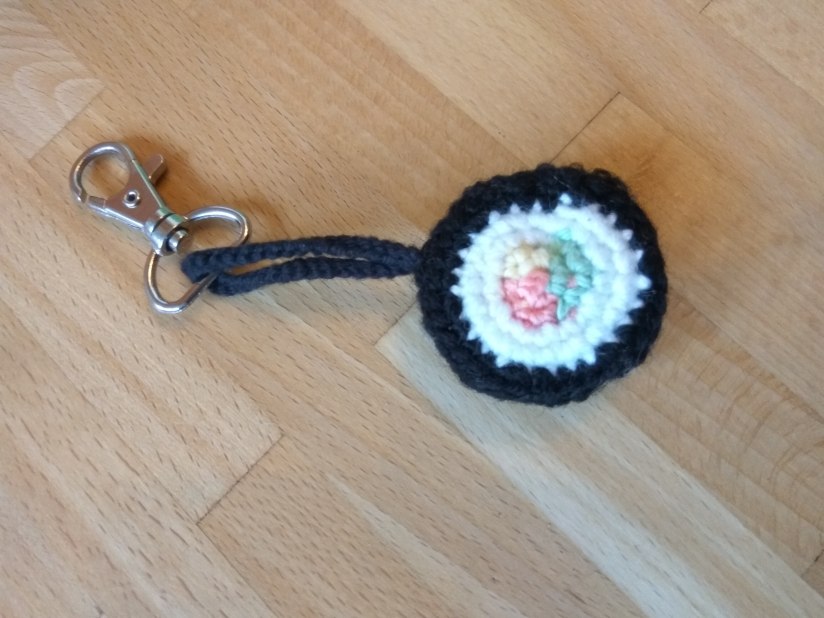
Now you should think of the way you want to attach the sushi to the key. I will make a chain loop to attach the carabiner keyring. Crochet 20 ch, insert in the carabiner and pull both ends of the chain through the side part of the sushi. Connect the ends on the other side and do that really good!

Sew the front parts to the side (take care that the colours on both sides match!) aaaaand … the Sushi key ring is finished!!!

IMG_20180907_181547

Was it fun to crochet with this tutorial? Have a look at my other patterns, maybe you will find something you like there!

Uncategorized

Crochet as a Meditation

Hi everyone! I am happy to be back and to write my next post. I started to work again so I had no time for developing new patterns and crocheting them and writing about them. At least I thought so. Now I am learning to use my time efficiently but at the same time to take care that I always can relax when I need it. So I want to share with all of you how crochet saved me again 🙂

There is no pattern in this post but an advertisement how cool it is to use patterns from other people 🙂 Being a parent is a great thing but it also can be really tough. You have to be always 100% concentrated, you have to keep thousends things in your head and plan everything. Well, sometimesit is just too much for me and then I am really looking forward to the evening, when my son goes to bed. And my holly time starts, the time when I can be anyone and when I can do anything. The truth is that often I have only capacity for laying on the sofa watching a series. Sounds like waste of time, right? No powers at all for creativity and finishing all the crochet projects I am excited about. So recently I discovered that a short meditation directly after a child falls asleep makes a real difference. Just some minutes of silence (or with a pleasant music) without any thoughts (or as little as possible) can clear the mind and “reset” our brain, it’s amazing! Later I realized that meditating by doing something simple works better for me. For example by practicing a yoga. Well, then I went even further and decided that meditation with producing something would be just great. And crochet was a perfect answer to that!

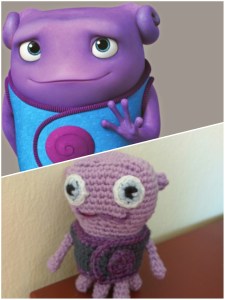
So just pick a cool pattern (there are so many nice ones in internet) and just follow it without thinking. I am a big fan of the movie HOME so I decided to crochet the boov Oh! I used this instructions which are by the way really nice and clear and look how it turned out:

IMG_20180501_104817

If you are balanced and relaxed, new ideas will always come to you! Following patterns of other people made me think of my own and now I am working on several small projects which I show you next days!

Good luck in your new projects and always try to find time for yourself!

Uncategorized

Baby Hat with Waves Pattern

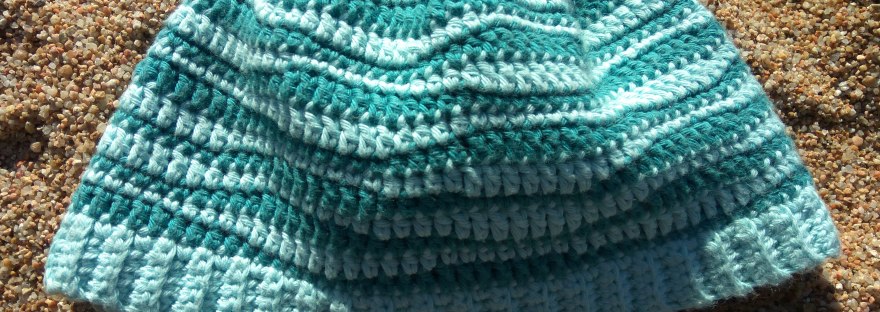
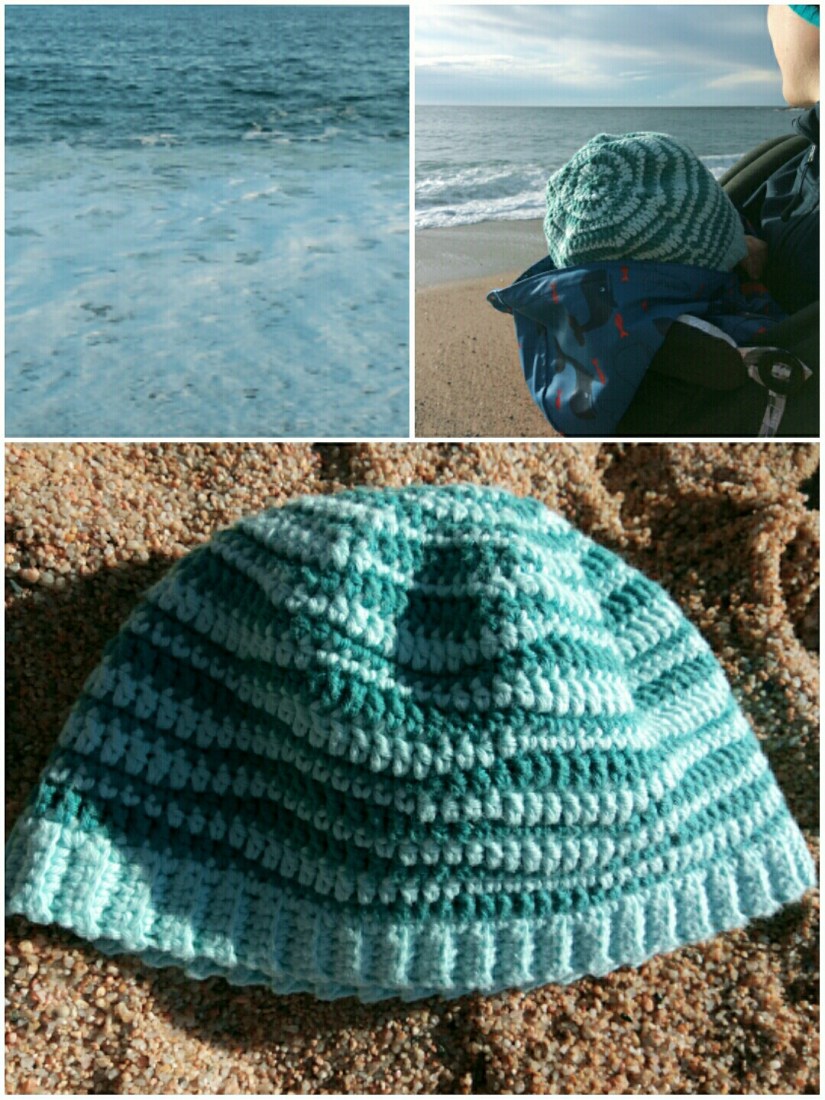
Inspiring Costa Brava! Being at the coast is great, it’s exciting and relaxing at the same time. All these wonderful views, seashells and waves are so impressive! Well, it’s the best place to get inspired with new creative ideas. Shades of blue and turquoise all over Barcelona, huge waves at the sea after a windy night made me think of the pattern I want to share with you!

You will need:

  • 3.00 mm crochet hook
  • light turquoise (colour 1) and turquoise (colour 2) cotton yarn

Abbreviations:

  • ch – chain
  • st – stitch
  • sl st – slip stitch
  • sc – single crochet
  • hdc – half double crochet
  • dc – double crochet
  • dec – 2 sc together (used to decrease the number of stitches)
  • X 3 – repeat 3 times
  • at the end of every round total number of stitches is shown in brackets

The hat was made for a 7 months old child (the head size is 44-45 cm).
IMG_20180402_084735

The pattern:

Ribbling (work with the colour 1):

5 ch + 1 turning ch
Round 1-88: sc in all st, 1 ch (5)
Fold the ribbling together, crochet through both the first and the last rows.
Round 89: sl st in all st (5)

Now we turn the ribbling inside out so that the sl st row is not visible.

The rest of the hat:

Round 1: sc in all st (one sc in every row of the ribbling), sl st (88)

Change to the colour 2.
Round 2: 3 ch, dc in next 6 st, hdc in next 4 st, sc in next 7 st, hdc in next 4 st,
(dc in next 7 st, hdc in next 4 st, sc in next 7 st, hdc in next 4 st) X 3 (88)

Change to the colour 1.
Round 3: 1 ch, sc in the same st, sc in next 6 st, hdc in next 4 st, dc in next 7 st, hdc in next 4 st,
(sc in next 7 st, hdc in next 4 st, dc in next 7 st, hdc in next 4 st) X 3 (88)

Now you have a straight line. So you see, that every row with the colour 2 makes a “wave line” and every row with the colour 1 compensates the hight of the stitches. In other words, we always have to make these 2 rows together in order to crochet straight. The order of the rows we can change, though. For example, now we crochet them the other way around so the waves look more “random”.

Change to the colour 2.
Round 4: repeat Round 3 (88)

Change to the colour 1.
Round 5: repeat Round 2 (88)
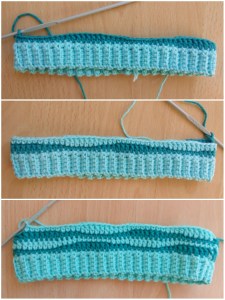
IMG_20180314_125325

Now we keep crocheting these two rows in a random order. Change colours every round.

Rounds 6-9 and rounds 10-13: repeat Rounds 2-5 (88)

Now we start decreasing the size of the hat.

Round 14: 1 ch, sc in the same st, sc in next 6 st, hdc in next 2 st, hdc dec, dc in next 7 st, hdc in next 2 st, hdc dec,
(sc in next 7 st, hdc in next 2 st, hdc dec, dc in next 7 st, hdc in next 2 st, hdc dec) X 3 (80)

Important: here I used a term “hdc dec”, this means I crochet 2 st together not with a single crochet but with a hdc. Later in the instructions I write just “dec” but you should always make the hdc dec.

Round 15: 3 ch, dc in next 6 st, hdc in next st, dec, sc in next 7 st, hdc in next st, dec,
(dc in next 7 st, hdc in next st, dec, sc in next 7 st, hdc in next st, dec) X 3 (72)

Round 16: 1 ch, sc in the same st, sc in next 5 st, hdc in next st, dec, dc in next 6 st, hdc in next st, dec,
(sc in next 6 st, hdc in next st, dec, dc in next 6 st, hdc in next st, dec) X 3 (64)

Round 17: 3 ch, dc in next 4 st, hdc in next st, dec, sc in next 5 st, hdc in next st, dec,
(dc in next 5 st, hdc in next st, dec, sc in next 5 st, hdc in next st, dec) X 3 (56)

Round 18: 1 ch, sc in the same st, sc in next 3 st, hdc in next st, dec, dc in next 4 st, hdc in next st, dec,
(sc in next 4 st, hdc in next st, dec, dc in next 4 st, hdc in next st, dec) X 3 (48)

Round 19: 3 ch, dc in next 2 st, hdc in next st, dec, sc in next 3 st, hdc in next st, dec,
(dc in next 3 st, hdc in next st, dec, sc in next 3 st, hdc in next st, dec) X 3 (40)

Round 20: 1 ch, sc in the same st, sc in next st, hdc in next st, dec, dc in next 2 st, hdc in next st, dec,
(sc in next 2 st, hdc in next st, dec, dc in next 2 st, hdc in next st, dec) X 3 (32)

Round 21: 3 ch, hdc in next st, dec, sc in next st, hdc in next st, dec,
(dc in next st, hdc in next st, dec, sc in next st, hdc in next st, dec) X 3 (24)

Round 22: 1 ch, sc in the same st, dec, dc in next st, dec,
(sc in next st, dec, dc in next st, dec) X 3 (16)

Round 23: dec X 8 (8)

Sew through the last round, fasten off and weave in the end. The hat is finished!
IMG_20180409_175044

Was it fun to crochet with this tutorial? Have a look at my other patterns, maybe you will find there something you like!

Uncategorized

Dummy Holder Crochet Tutorial

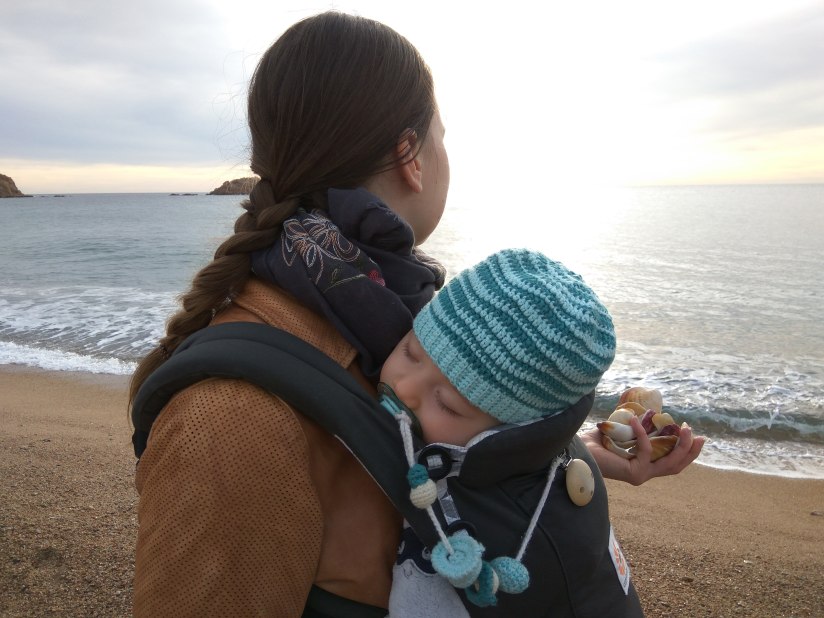
Tomorrow we fly with our 7 months old son for the first time! I am very excited about it! I have no idea how he will behave in the airport and during the flight. So I read hundreds of articles about travelling with children and what one should take. And then I realized that we don’t have a dummy holder! So I took a crochet hook and yarn leftovers, after an hour the problem was solved 🙂

You will need:

  • 2.00 mm crochet hook
  • left over yarn of colour you like
  • Scissors and sewing needle
  • wooden clip

Abbreviations:

  • ch – chain
  • st – stitch
  • sc – single crochet
  • hdc – half double crochet
  • dc – double crochet
  • inc – 2 sc in one st (used to increase the number of stitches)
  • dec – 2 sc together (used to decrease the number of stitches)
  • X 6 – repeat 6 times
  • at the end of every round total number of stitches is shown in brackets

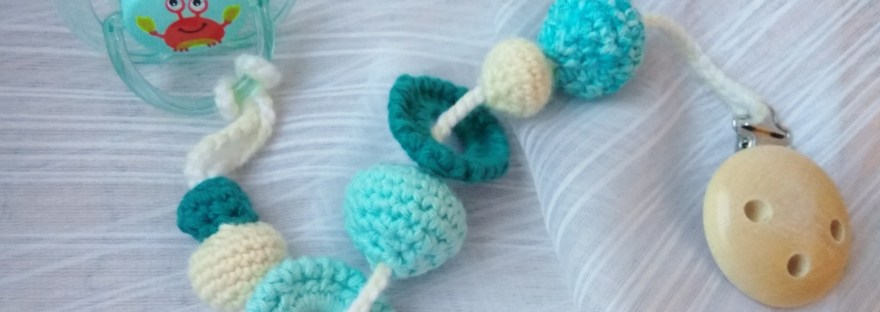
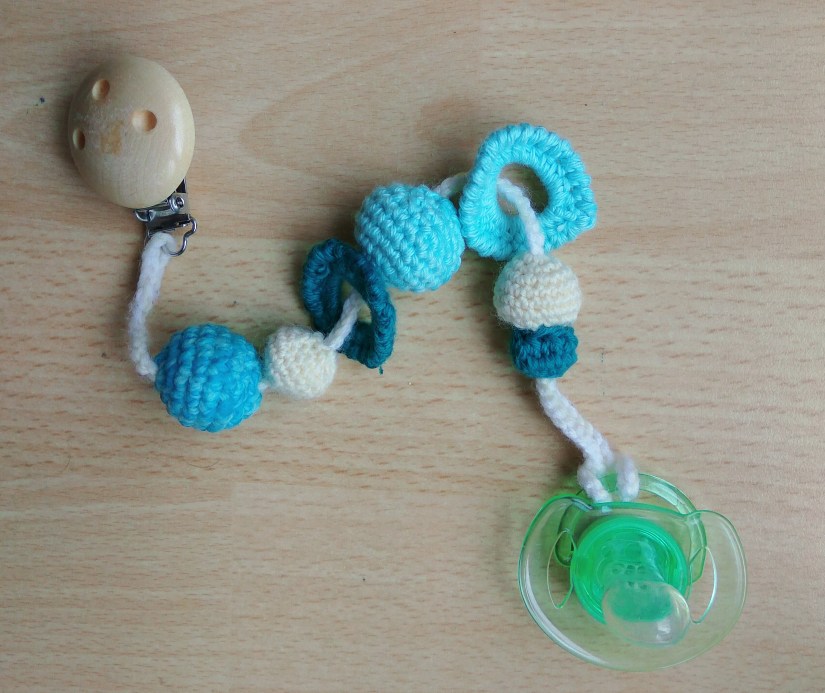
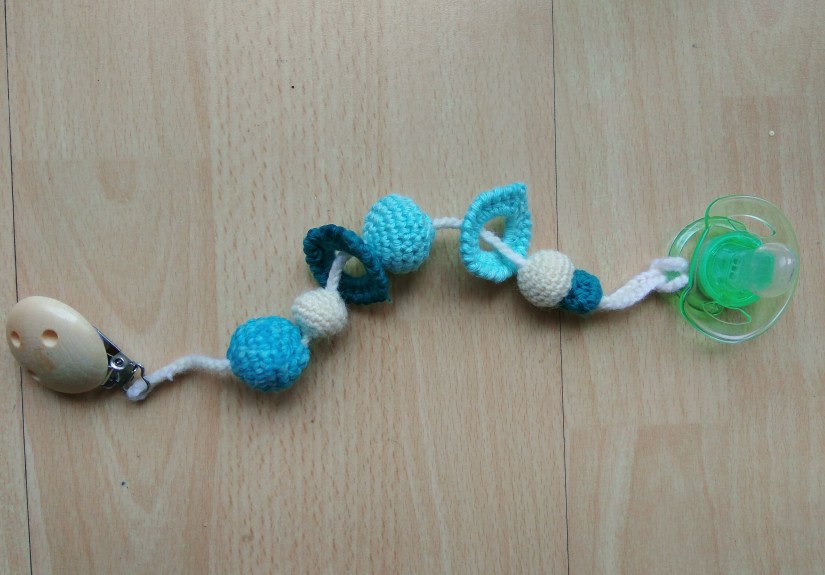
IMG_20180318_162456

Instructions:

As I mentioned before, yarn leftovers are perfect here. We basically make many small beads and rings to put on our dummy chain. Choose different sizes (also by choosing different yarn and hooks) and colours, make it interesting for your child!

So as you can see on pictures I made 4 beads (2 small and 2 bigger ones) and 2 rings. Of course, you can make as many as you’d like. You can also decorate the dummy holder with everything you want! You should remember that a baby will put it in its mouth most of the time so you should carefully choose deco elements.

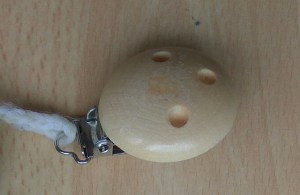
Step 1. Crochet the chain as long as you want the dummy holder to be and crochet 30 ch additionally (for the loop which actually connects dummy with the chain), don’t join the chain. Connect one end to the wooden clip.

IMG_20180318_162702

Step 2. Beads. Make as many as you want. Note, that you should make them in the order you want to put them on the chain (starting from the wooden clips)

Round 1: 6 sc in magic ring
Round 2: inc X 6 (12)
Round 3: (sc in next st, inc) X 6 (18)
Rounds 4-6: sc in all 18 st (18)
Round 7: (sc in next st, dec) X 6 (12)

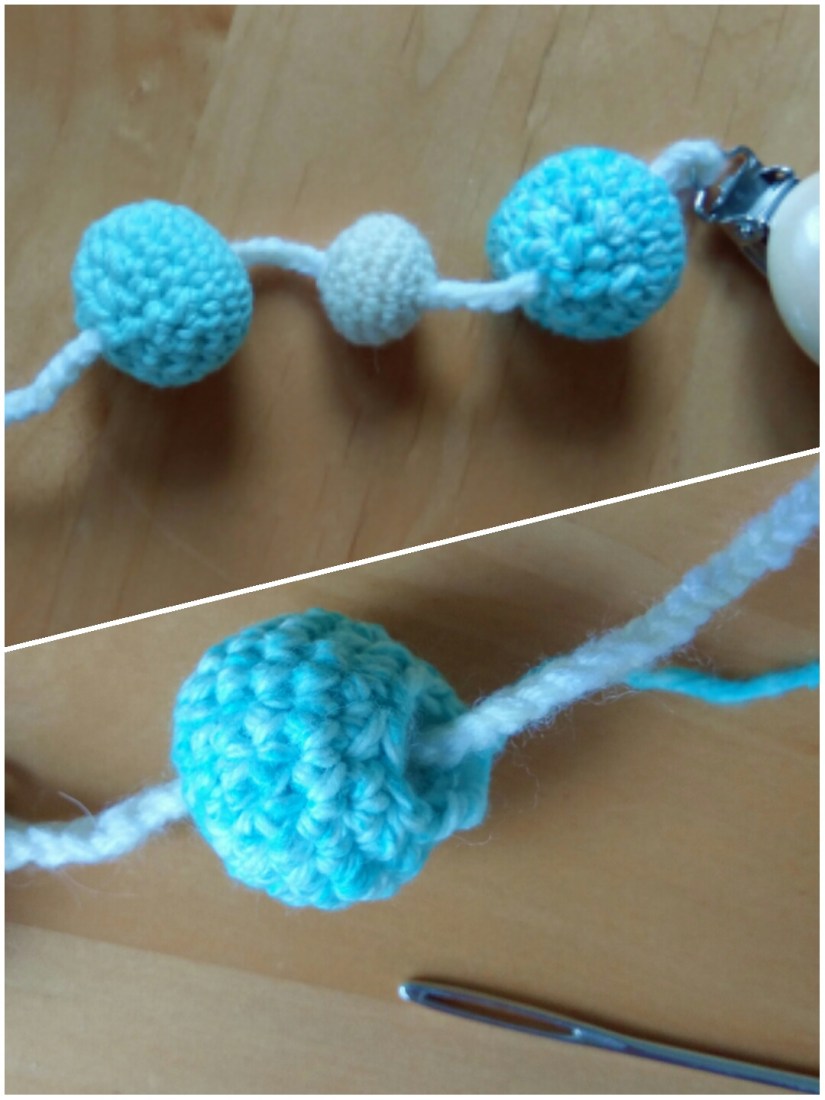
Using the hook pull the chain through the magic ring and stuff the bead. Later you can move the bead on the chain so the exact position is not very important for now.

Round 8: dec X 6 (6)

Cut the yarn leaving a tail for sewing and go with the sewing needle through the last round closing the bead.

IMG_20180317_171539

The bead is finished! You can make it bigger/smaller using bigger/smaller hook and yarn. Or you can change the size manually:

  • To make the bead bigger, crochet one more round between rounds 3 and 4:

Round 3.5: (sc in next 2 st, inc) X 6 (24)Then make 4 instead of 3 Rounds without changing. Afterwards crochet (sc in next 2 st, dec) X 6 (18) and you are at Round 7 of the description above, follow it to the end!

  • To make the bead smaller, crochet first two rounds, then make 2 rounds without changing (12) and pull the chain through the magic ring. Afterwards keep following the instructions.

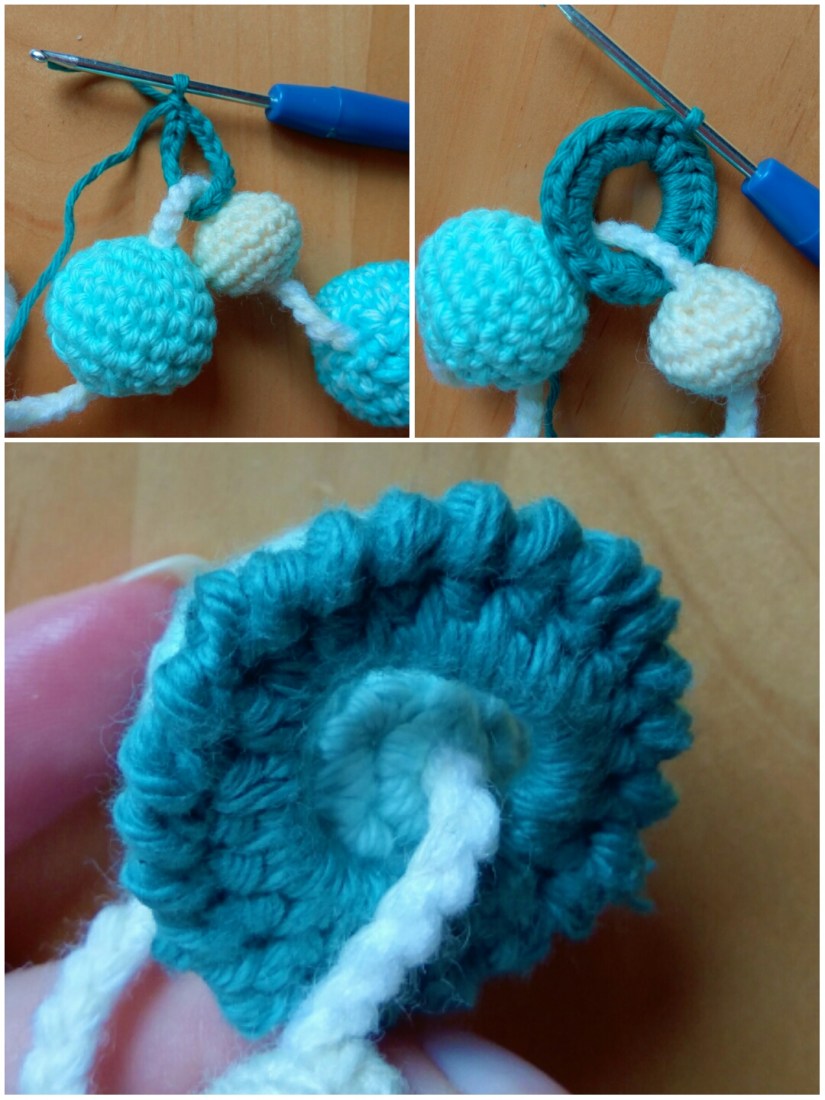
Step 3. Rings. You can put the rings any time in any order at any place of the chain.

Crochet 15 ch, join with sl st on the chain (at the right position).
2 ch, 28 hdc in the ring, join with sl st.
(reverse sc in next 6 st, inc) X 3, note: reverse sc is a regular sc but in the opposite direction!!!

IMG_20180317_171628

The ring is finished! If you want to make it smaller, make the row of sc’s instead of hdc’s. If you want to make it bigger, make crochet dc instead of hdc in the row.

That’s it! Now you can combine these two shapes and play with sizes and colours! Have fun! I hope, your baby will like its new dummy holder!

IMG_20180318_162529

Was it fun to crochet with this tutorial? Have a look at my other patterns, maybe you will find there something you like!