amigurumi

Funny Piggy Ring Rattle for Babies

Oh, this wonderful moment, when your baby starts not only to hold toys but to take them from you! Finally you can really play with him or her! Is it possible to teach a baby to take toys or does it happen by itself? I don’t know, but I am sure that a baby takes a toy only if it really wants the toy! And of course it has to be able to hold the toy (little hands are soo small!). A thin ring with a funny face is what you need right now! And again, there is no better toy that the one which is made by the mom!

This pattern is very very simple and 2 hours will be more than enough to complete it! I crocheted it so fast so I forgot to take pictures in the process. That’s why the tutorial contains only pictures of the result. But as I said, it’s easy! Just start and remember: you don’t have to take exactly the same colours or make the exact same face for the piggy. Just be creative and think what your baby will like!

IMG_20180114_091819

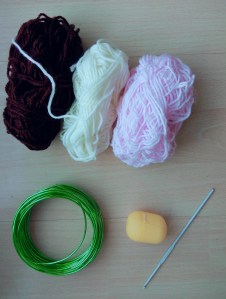
You will need:

  • 3.00 mm crochet hook
  • Beige, light pink and brown yarn
  • 6 mm safety eyes
  • Scissors and sewing needle
  • Fiberfill
  • Wires
  • Kinder Surprise plastic egg (or any other small container) and a couple of coffee beans (or any other noise makers)

IMG_20180114_091549

Abbreviations:

  • ch – chain
  • st – stitch
  • sc – single crochet
  • inc – 2 sc in one st (used to increase the number of stitches)
  • dec – 2 sc together (used to decrease the number of stitches)
  • X 6 – repeat 6 times
  • at the end of every round total number of stitches is shown in brackets

Before you start have a look at my tricks for crocheting amigurumi. I am sure you will find it helpful! Have fun crocheting!

Ring (start with light pink yarn):
Round 1: 6 sc in magic ring (6)
Round 2 – Round 6: sc in all 6 st (6)
Change to brown yarn.
Round 7 – Round 12: sc in all 6 st (6)
Round 13 – Round 54: sc in all st. Keep changing the colours every 6 rounds (6)
Change to beige yarn, we will crochet the head now.

Head:
Round 55: inc X 6 (12)
Round 56: (sc in next st, inc) X 6 (18)
Round 57: (sc in next 2 st, inc) X 6 (24)
Round 58: (sc in next 3 st, inc) X 6 (30)
Round 59: (sc in next 4 st, inc) X 6 (36)
Round 60: (sc in next 5 st, inc) X 6 (42)
Round 61: (sc in next 6 st, inc) X 6 (48)
Round 62 – Round 68: sc in all st (48)
Round 69: (sc in next 6 st, dec) X 6 (42)
Round 70: (sc in next 5 st, dec) X 6 (36)
Now insert safety eyes (one eye between rounds 63 and 64, the second one between rounds 66 and 67), embroider a mouth. Insert a wire in the ring but don’t stuff it. Insert a noise making container in the head, stuff the head.
Round 71: (sc in next 4 st, dec) X 6 (30)
Round 72:  (sc in next 3 st, dec) X 6 (24)
Round 73: (sc in next 2 st, dec) X 6 (18)
Round 74: (sc in next st, dec) X 6 (12)
Round 75: dec X 6 (6)
Cut the yarn leaving a tail for sewing. Sew the head to the second end of the ring.

Nose (work with light pink yarn):
5 ch
Round 1: (3 sc in next st, sc in next 2 st) X 2 (10)
Round 2: (sc in next st, inc, sc in next 3 st) X 2 (12)
Round 3 – Round 4: sc in all st (12)
Cut the yarn leaving a tail for sewing, stuff the nose and sew it to the head.

Ears (work with rose yarn, make two):
4 sc in magic ring (4)
Round 1: inc X 4 (8)
Round 2: (inc, sc in next 2 st, inc) X 2 (12)
Round 3: (inc, sc in next 4 st, inc) X 2 (16)
Cut the yarn leaving a tail for sewing, stuff the ears and sew them to the head.

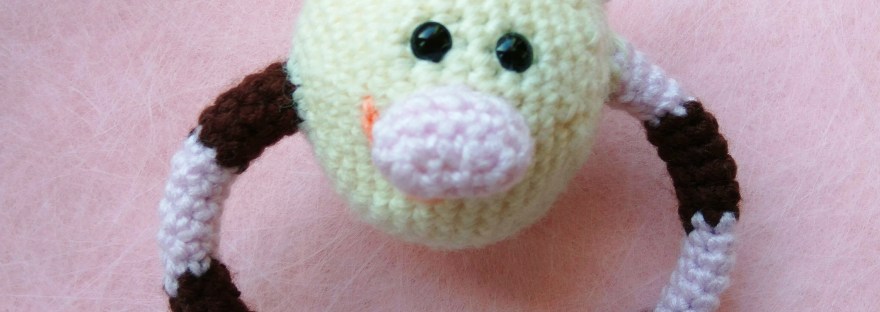
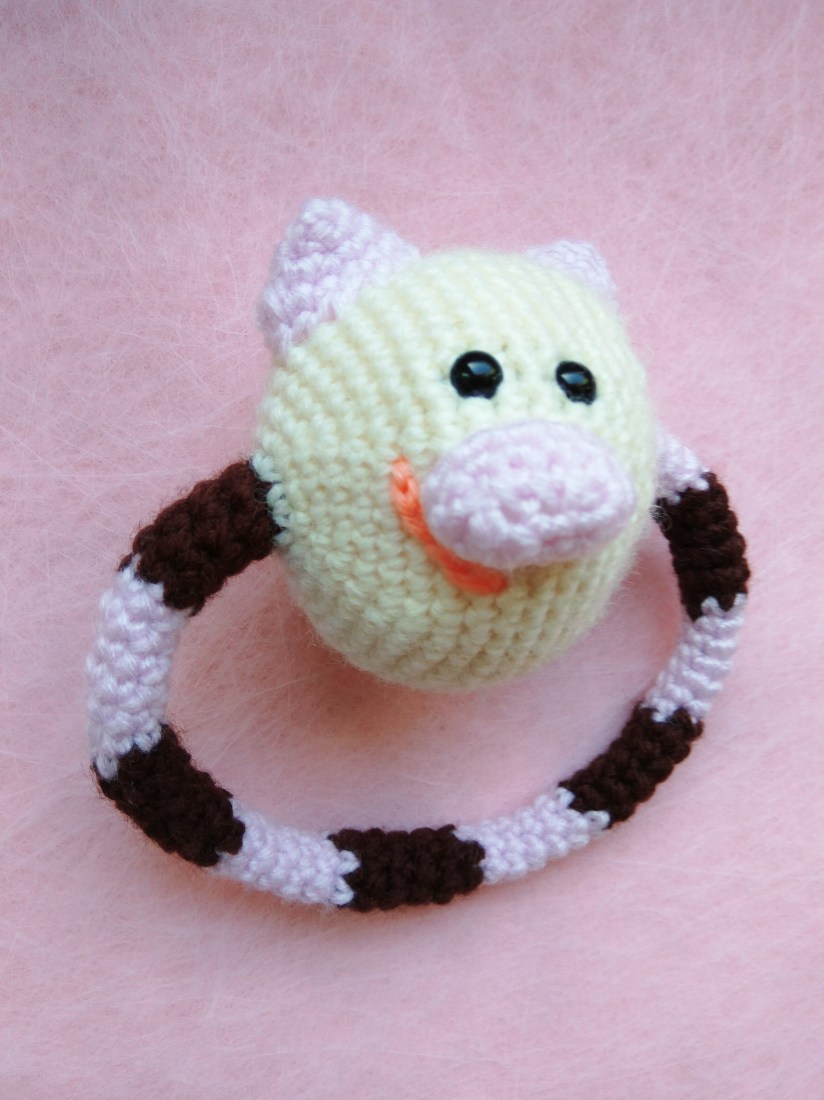
So, it looks like the rattle is finished! You did a good job, I hope your baby will have a lot of fun with the piggy rattle!


Was it fun to crochet with this tutorial? Have a look at my other patterns, maybe you will find something you like there!

Uncategorized

Baby Mittens Crochet Pattern

You will be surprised how long baby nails are directly after the birth. So there is a huge risk that your baby can scratch its own face and you. But unfortunately, it’s recommended to not cut them for the first couple of days. Actually it is quite difficult to do, they are so small! What if the baby gets hurt by scissors? Brrrrrr! My aunt told me she was afraid to do it for half a year and always asked a friend of hers to cut the nails of her daughter 🙂
So if you see scratches on the soft skin of the little face and think: “oh, no, my poor baby!” then it’s time to hide the fingers to prevent even more damage!

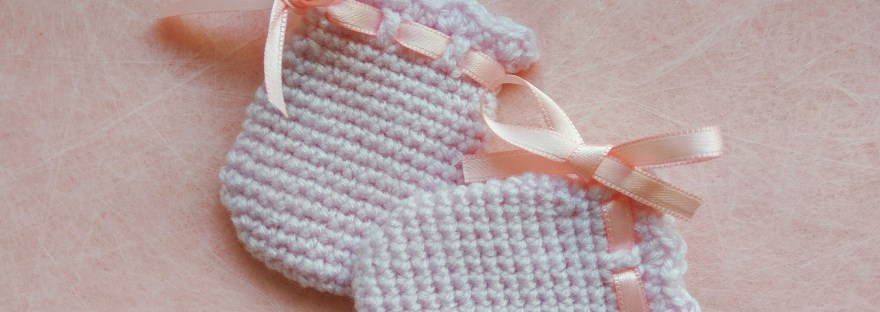
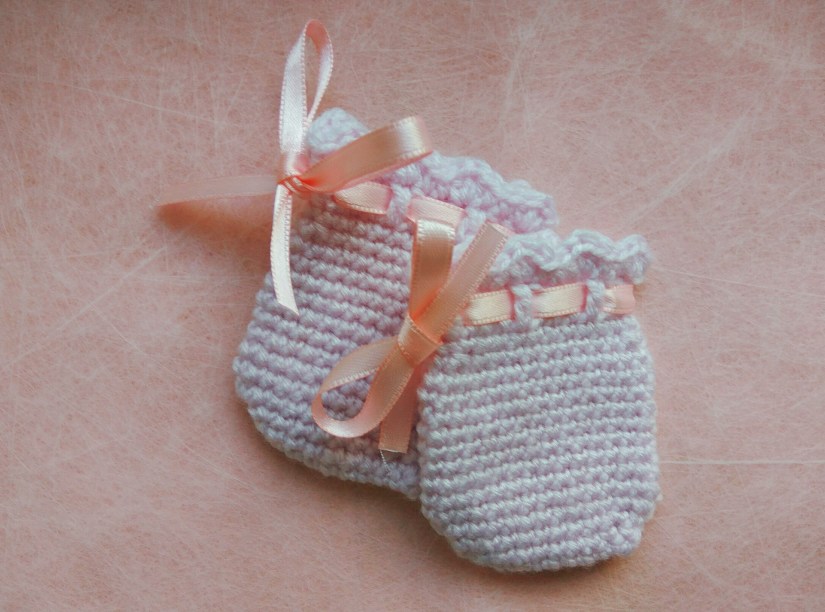
I want to show you my pattern for baby mittens! It’s simple, really fast to crochet (time is so important now!) and the mittens look very cute!

IMG_20180112_162711

Materials:

  • 3 mm crochet hook
  • light pink yarn
  • light pink band
  • scissors

Abbreviations:

  • ch – chain
  • st – stitch
  • sl st – slip stitch
  • sc – single crochet
  • hdc – half double crochet
  • dc – double crochet
  • inc – 2 sc in one st (used to increase the number of stitches)
  • dec – 2 sc together (used to decrease the number of stitches)
  • X 8 – repeat 8 times
  • at the end of every round total number of stitches is shown in brackets

Here is the pattern:
9 + 1 ch
Round 1: 3 sc in next st, sc in next 7 st, 3 sc in next st, sc in next 7 st (20)
Round 2: sc in all st (20)
Round 3: inc, sc in next st, inc, sc in next 7 st, inc, sc in next st, inc, sc in next 7 st (24)
Round 4: sc in next 2 st, 3 sc in next st, sc in next 11 st, 3 sc in next st, sc in next 9 st (28)
Rounds 5-13: sc in all st (28)
Round 14: sc in next st, dec, sc in next st, dec, sc in next 9 st, dec, sc in next st, dec, sc in next 8 st (24)
Round 15: sc in all st (24)
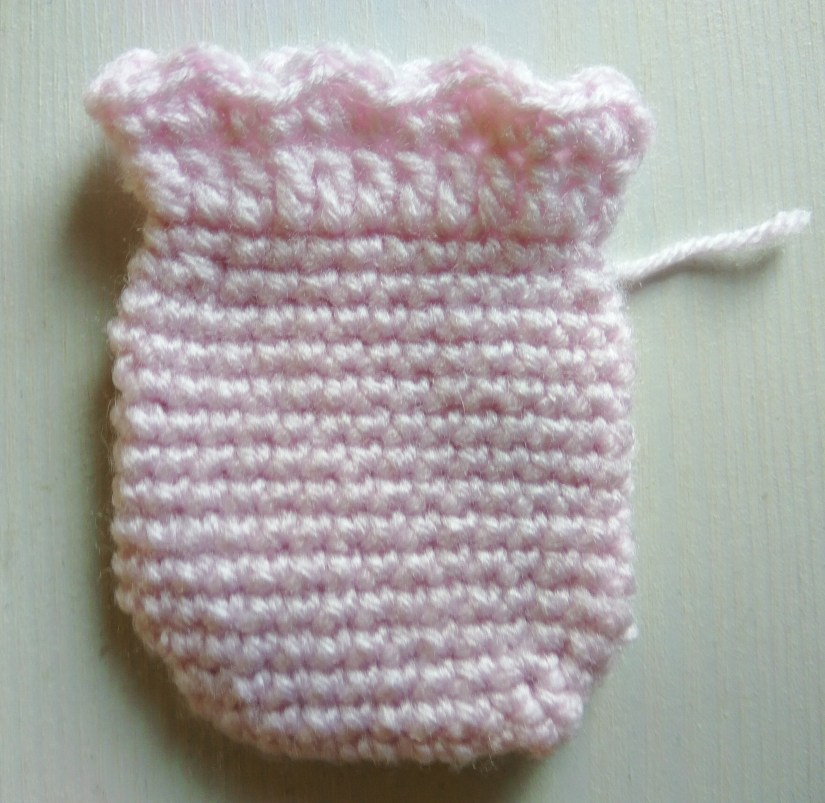
Round 16: sl st, 2 ch, dc in next 23, join with sl st (24)
Round 17: (sc in next 2, (hdc+dc+hdc) in next st) X 8 (24)
Cut the yarn and weave in the end. Make the second mitten the exact same way.

IMG_20180104_121939

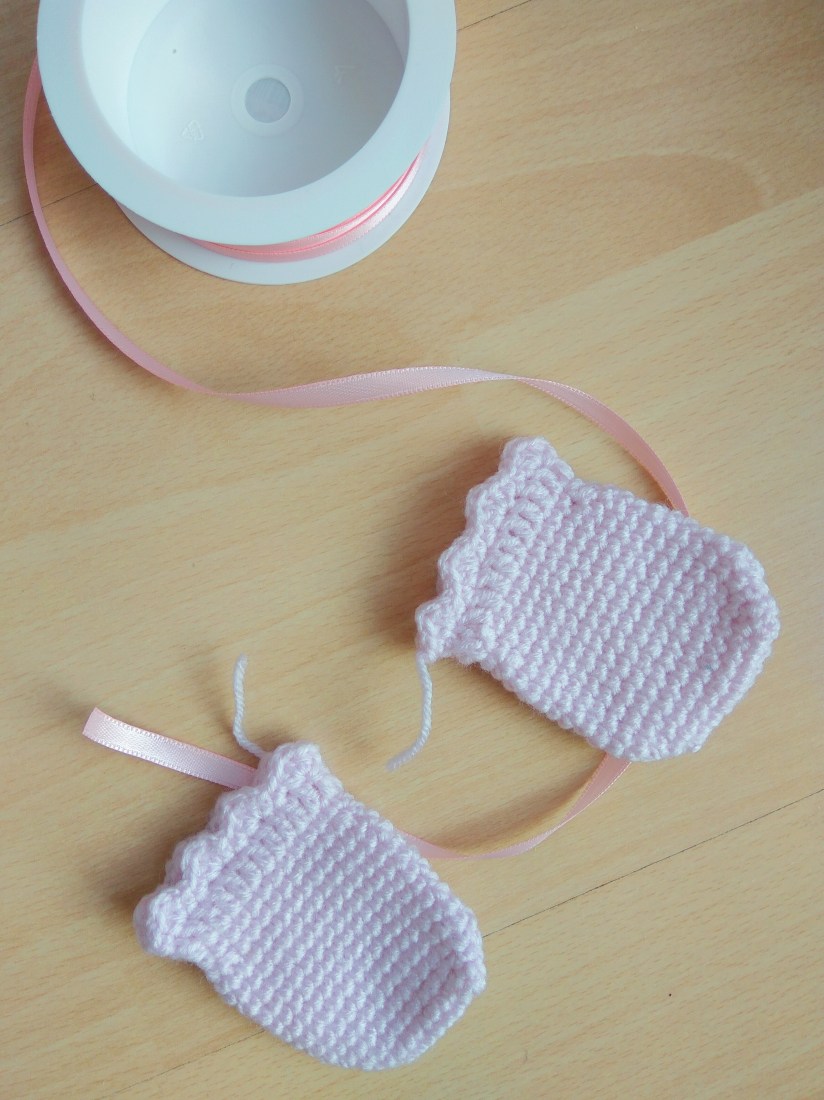
Take the band and insert it in the Round 16.

IMG_20180112_151224

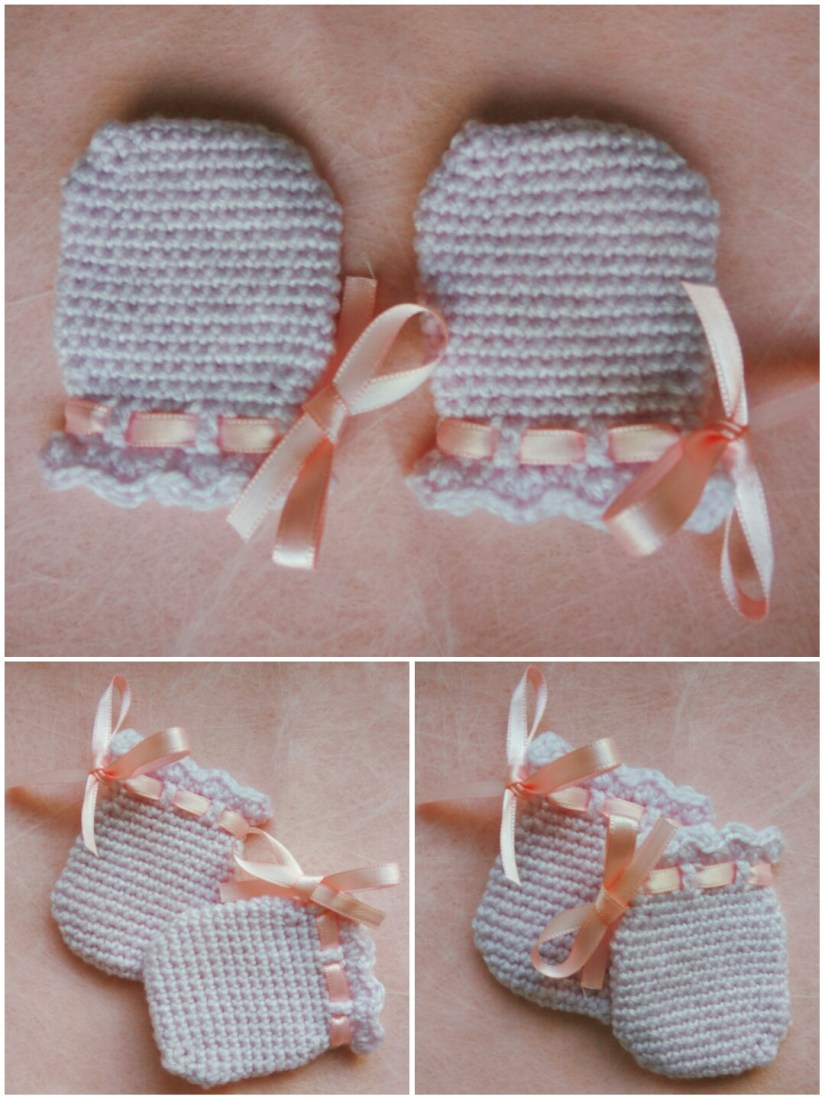
The mittens are finished! If you want to make them later again, you will need a bigger size! For that just use bigger crochet hook and yarn. You can also adjust the number of rounds after Round 4 for the size you need! Good luck!

IMG_20180112_162843

Was it fun to crochet with this tutorial? Have a look at my other patterns, maybe you will find something you like there!

Uncategorized

Princess Leia, Free Crochet Pattern with Pictures!

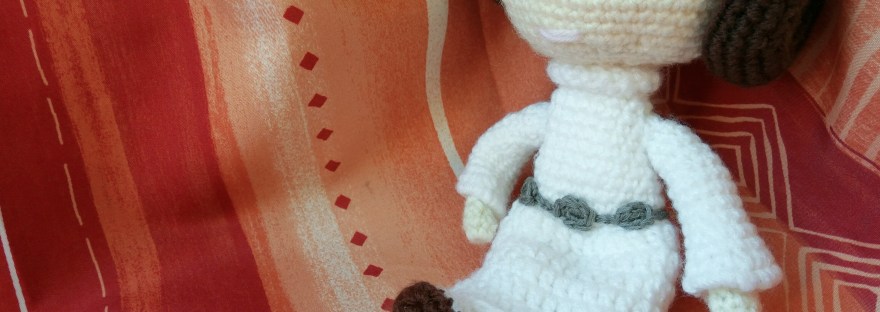
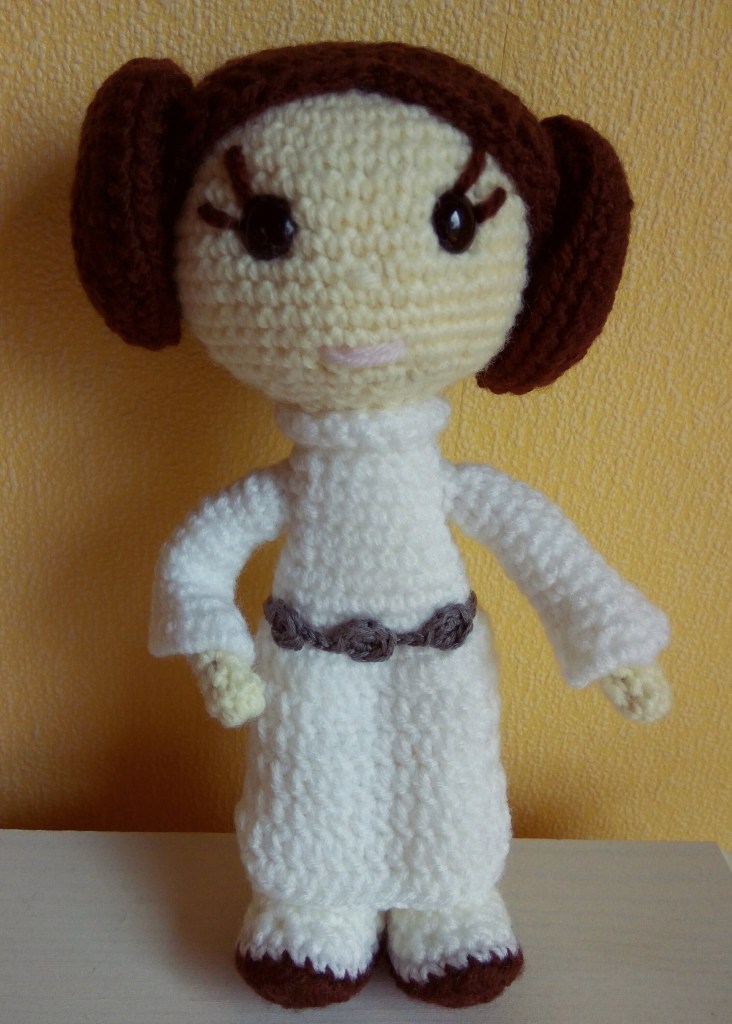
A third winter in a row we go to the cinema to watch a new episode of Star Wars! We all grew up with the first movies and we really love them! And now our favourite characters come back! I know, I know, many people dislike the new movies… But maybe it inspires us to make ourselves comfortable on the sofa, grab a huge cup of hot chocolate and enjoy the very first Star Wars movies? In any case I was inspired to crochet my own Star Wars Set! And the first character I want to present is Princess Leia. She is so unlike all other female characters in movies, she is one of a kind that’s why she was Number 1 of my “Star Wars To Do” list!
IMG_20180104_121905

You will need:

  • 3.00 mm crochet hook
  • Beige, white, dark brown and grey yarn
  • 10 mm safety eyes
  • Scissors and sewing needle
  • Light pink embroidery floss for the mouth
  • Fiberfill
  • Wires (optional, if you want to Princess Leia certain arm postures)

Abbreviations:

  • ch – chain
  • st – stitch
  • sl st – slip stitch
  • sc – single crochet
  • hdc – half double crochet
  • dc – double crochet
  • exdc – extended double crochet
  • tr – treble crochet
  • inc – 2 sc in one st (used to increase the number of stitches)
  • dec – 2 sc together (used to decrease the number of stitches)
  • X 6 (or any other number) – repeat 6 (or other number) times
  • at the end of every round total number of stitches is shown in brackets

Before you start have a look at my tricks for crocheting amigurumi. I am sure you will find it helpful! Have fun crocheting!

Head (work with beige yarn):
Round 1: 6 sc in magic ring (6)
Round 2: inc X 6 (12)
Round 3: (sc in next st, inc) X 6 (18)
Round 4: (sc in next 2 st, inc) X 6 (24)
Round 5: (sc in next 3 st, inc) X 6 (30)
Round 6: (sc in next 4 st, inc) X 6 (36)
Round 7: (sc in next 5 st, inc) X 6 (42)
Round 8: (sc in next 6 st, inc) X 6 (48)
Round 9-17: sc in all st (48)
Round 18: (sc in next 6 st, dec) X 6 (42)
Round 19: (sc in next 5 st, dec) X 6 (36)
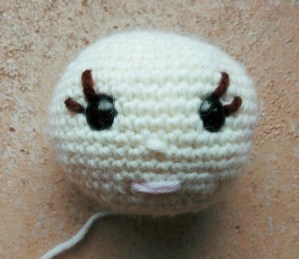
Now it’s time to insert the safety eyes (I did it between rounds 12 and 13, 8 st between the eyes) and embroider the face (I made the nose between rounds 14 and 15, the mouth – rounds 17 and 18).
Round 20: (sc in next 4 st, dec) X 6 (30)
Round 21: (sc in next 3 st, dec) X 6 (24)
Round 22: (sc in next 2 st, dec) X 6 (18)
Round 23: (sc in next st, dec) X 6 (12)
Fasten off and leave a tail for sewing, stuff the head.
IMG_20180101_090809

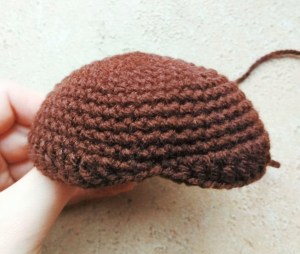
Hairs (work with brown yarn):
Round 1: 6 sc in magic ring (6)
Round 2: inc 6 times (12)
Round 3: (sc in next st, inc) X 6 (18)
Round 4: (sc in next 2 st, inc) X 6 (24)
Round 5: (sc in next 3 st, inc) X 6 (30)
Round 6: (sc in next 4 st, inc) X 6 (36)
Round 7: (sc in next 5 st, inc) X 6 (42)
Round 8: (sc in next 6 st, inc) X 6 (48)
Round 9-13: sc in all st (48)
Round 14: (sc, hdc, dc, exdc, tr in next 7 st, exdc, dc, hdc, sc, sl st) 2 times (32)
Fasten off and leave a tail for sewing.
IMG_20180101_090653

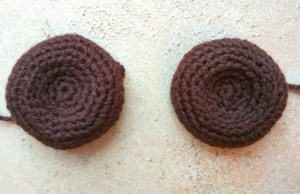
Buns (make two, work with brown yarn):
Round 1: 6 sc in magic ring (6)
Round 2: inc 6 times (12)
Round 3: (sc in next st, inc) X 6 (18)
Round 4: in back loops only: (sc in next 2 st, inc) X 6 (24)
Round 5: in back loops only: (sc in next 3 st, inc) X 6 (30)
Round 6: (sc in next 4 st, inc) X 6 (36)
Round 7-8: sc in all st (36)
Round 9: (sc in next 4 st, dec) X 6 (30)
Fasten off and leave a tail for sewing the buns to the hairs.
IMG_20171230_101352

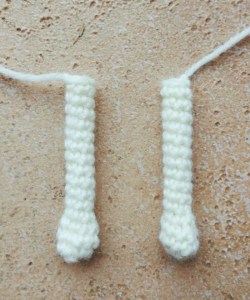
Arms (make two, work with beige yarn):
Round 1: 9 st in magic ring (9)
Round 2: sc in all 9 st (9)
Round 3: (sc in next st, dec) X 3 (6)
Round 4-15: sc in all 6 st (6)
Fasten off and hide the end.
IMG_20180101_090706

Sleeves (make two, work with white yarn):
16 ch, join with sl st
Round 1: 18 sc in the ring (18)
Round 2: (sc in next st, dec) X 6 (12)
Round 3-8: sc in all 12 st (12)
Round 9: (sc in next 2 st, dec) X 3 (9)
Round 10-12: sc in all 9 st (9)
Put the arm into the sleeve and insert the hook through both layers.
Round 13: sc in all 9 st through both layers (arms have only 6 st in the upper round, but don’t worry about it, just crochet every 3rd st to the previous st of the arm one more time)
Fasten off and leave a tail for sewing.

IMG_20180101_084300

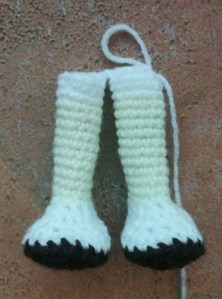
Legs (start with brown yarn):
7 ch
Round 1: inc, sc in next 4 st, 3 sc in next st, sc in next 4 st, inc (15)
Round 2: inc, sc in next 5 st, inc, sc in next st, inc, sc in next 5 st, inc (19)
Round 3: inc, sc in next 8 st, 3 sc in next st, sc in next 8 st, inc (23)
Change to white yarn.
Round 4: crochet in back loops only! sc in all 23 st (23)
Round 5: sc in next 6 st, (dec)X5, sc in next 7 st (18)
Round 6: sc in all 18 st (18)
Round 7: sc in next 4 st, (dec)X5, sc in next 4 st (13)
Change to beige yarn. Stuff the foot.
Round 8: sc in next 11 st, dec (12)
Round 9-19: sc in all 12 st (12)
Change to white yarn.
Round 20-21: sc in all 12 st (12)
Cut the yarn, stuff the leg. Crochet the second leg and don’t cut the yarn, we will continue crocheting further.
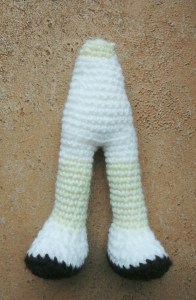
Crochet sc in next 8 st, make 1 ch and crochet sc in the first leg (on the side) and crochet sc in next 8 st of the first leg. Now we are on the back side of the first leg and here we start to crochet the body.
IMG_20180101_090755

Body (start with white yarn):
Round 1: sc in next 4 st, sc in next ch, sc in next 12 st, sc in next ch, sc in next 8 st (26)
Round 2: sc in all 26 st (26)
Round 3-4: in back loops only! sc in all 26 st (26)
Round 5: sc in all 26 st (26)
Round 6: (sc in next 11, dec)X2 (24)
Round 7: sc in all 24 st (24)
Round 8: (sc in next 6, dec)X3 (21)
Round 9: sc in all 21 st (21)
Round 10: (sc in next 5, dec)X3 (18)
Round 11: sc in all 18 st (18)
Round 12: (sc in next 4, dec)X3 (15)
Round 13: sc in all 15 st (15)
Change to beige yarn.
Round 14: sc in all 15 st (15)
Round 15: (sc in next 3, dec)X3 (12)
Round 16: sc in all 12 st (12)
Fasten off and stuff the body.
IMG_20180101_090740

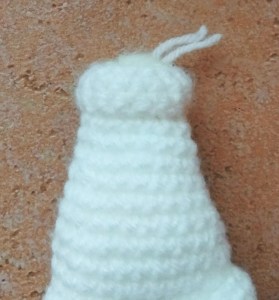
Collar (work with white yarn):
Start crocheting from the middle of the back of the body in front loops of Round 13.
Round 1-3: sc in all 15 st (15)
Fasten off and hide the end.
IMG_20180101_084710

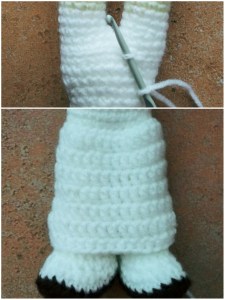
Skirt (work with white yarn):
Start crocheting from the middle of the back of the body in the front loops of Round 2. Hold the body upside down, crochet in the direction of the feet.
Round 1: sc in all 26 st, join with sl st (26)
Round 2: 2 ch, dc in next 2 st, 2 dc in next st, dc in next 6 st, 2 dc in next st, dc in next 5 st, 2 dc in next st, dc in next 6 st, 2 dc in next st, dc in next 2 st, join with sl st (30)
Round 3-5: 2 ch, dc in next 29 st, join with sl st (30)
Round 6: 2 ch, dc in next 7 st, 2 dc in next st, dc in next 14 st, 2 dc in next st, dc in next 6 st, join with sl st (32)
Round 7: 2 ch, dc in next 7 st, 2 dc in next st, dc in next 15 st, 2 dc in next st, dc in next 7 st, join with sl st (34)
Round 8: 2 ch, hdc in next 33 st, join with sl st (34)
Fasten off and weave in the end.
IMG_20180101_093156

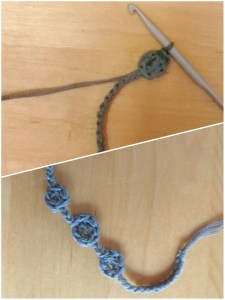
Belt (work with grey yarn):

15 ch, 6 sc in the 14th ch,  sc in next 2 st, sl st, 5 ch, 8 sc in the 4th ch,  sc in next 3 st, sl st, 5 ch, 6 sc in the 4th ch,  sc in next 2 st, sl st, 13 ch.
IMG_20180104_122857

Now all parts are finished! It’s time for sewing, take a sewing needle.
Sew the buns to the hairs (stuff them, but not full), sew the hairs to the head.
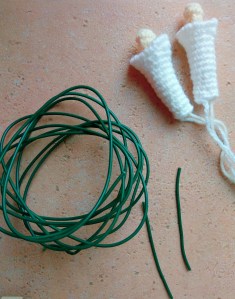
Cut short pieces of wire and put them in the arms (to form arm postures), sew arms to the body.
IMG_20180101_083636

You can also put a small wire into the neck so the head holds better. Alternatively you can stuff the neck very full before sewing the head to the body.
Sew the head to the body and sew the belt between the upper body and the skirt.

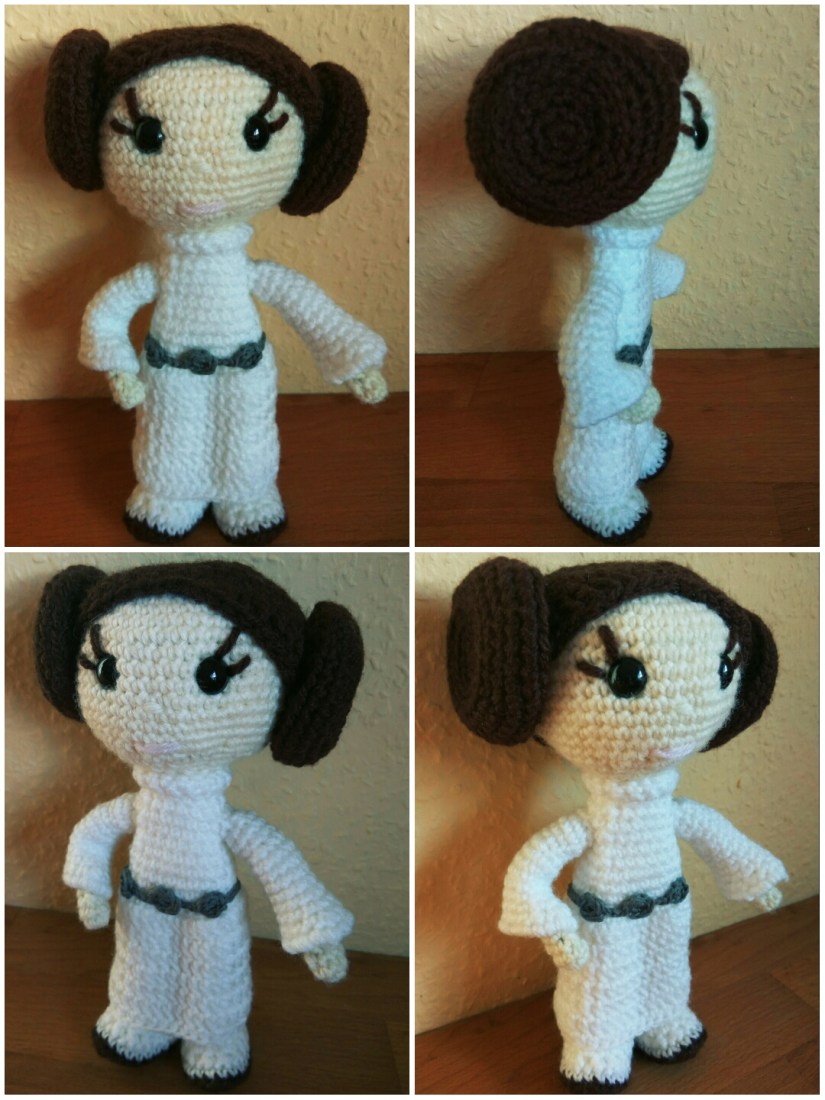
Your Proncess Leia is finished!
IMG_20180102_142849

Was it fun to crochet with this tutorial? Have a look at my other patterns, maybe you will find something you like there!

You may also like:

10 Reasons Why I Was Afraid to Try Irish Lace Crochet
IMG_20200514_153901_581

St. Valentine’s Day – 5 Crochet Gift Ideas for Him

IMG_20180126_095400

3 Simple Stuffings Which Make Your Amigurumi Special
IMG_20180202_161505

Uncategorized

Five little amigurumi tips that are rarely mentioned in patterns

Have you been wondering why amigurumi toys look so accurate and nice on pictures but yours look… tired? Today I want to share with you couple of tricks which are very helpful for crocheting amigurumi. These things are usually not mentioned in tutorials and patterns!

  1. Use smaller hook than it’s indicated on the yarn label! Otherwise fibelfill can look through the holes, which is especially unfortunate if your toy is dark coloured.
  2. Crochet in a spiral (without a standart slip stitch at the end of every round). Then the boarders between rounds will be not visible and your toy will look smooth.
  3. When decreasing the number of stitches in a round, insert the hook only in front loops of the stitches.
  4. Do you have a lot of leftover yarn after cutting tails away? Keep them and use them to stuff small parts of a toy like arms and ears. After a while it will save you plenty of materials!
  5. Cannot decide what size of the eyes to use and where they should be located? Just make the eyes from the paper first and try it on! Then mark the stitches and insert safety eyes! Your amigurumi will get a lovely face!

I hope my little secrets with help you and now you will enjoy crocheting even more!
Have fun!

IMG_20171212_093625

Did you find the article helpful? Have a look at my other patterns, maybe you will find something you like there!

Uncategorized

Crochet Cute Baby Rattle Jellyfish, Step-by-step Tutorial with Pictures!

The first toy is very important and it is soooo nice to watch your baby play with its “friend” which is made by you! No doubts: the first toy of a baby has to be made by its mom! But what is the best toy for a newborn? Something soft, sweet looking, not too small, not too big, not dangerous, something the baby can hold and shake 😉 This adorable jellyfish rattle is definitely a perfect idea!

The free crochet pattern is here waiting for you! It’s very easy to make even with basic crochet skills but the result will look impressive, I promise!

You will need:

  • 3 mm crochet hook
  • yarn of three different colours (this is optional, one colour would be enough, too. I made the bottom part and tentacles of different colours. One needs only a little yarn for that – perfect opportunity to use leftover yarn!)
  • safety eyes (I had 10 mm)
  • sewing needle
  • scissors
  • Kinder Surprise plastic egg (or any other small container) and two coffee beans
  • fiberfill

Abbreviations:

  • ch – chain
  • st – stitch
  • sl st – slip stitch
  • sc – single crochet
  • dc – double crochet
  • inc – 2 sc in one st (used to increase the number of stitches)
  • dec – 2 sc together (used to decrease the number of stitches)
  • X 6 – repeat 6 times
  • at the end of every round total number of stitches is shown

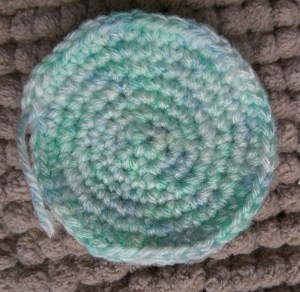
Bottom part:

Round 1: 6 sc in magic ring (6 )
Round 2: inc X 6 (12)
Round 3: (sc in next st, inc) X 6 (18)
Round 4: (sc in next 2 st, inc) X 6 (24)
Round 5: (sc in next 3 st, inc) X 6 (30)
Round 6: (sc in next 4 st, inc) X 6 (36)
Round 7: (sc in next 5 st, inc) X 6 (42)

1

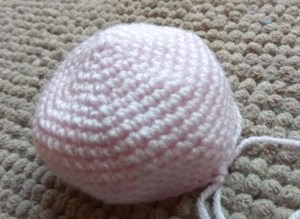
Upper part:

Round 1: 6 sc in magic ring (6 )
Round 2: inc X 6 (12)
Round 3: (sc in next st, inc) X 6 (18)
Round 4: (sc in next 2 st, inc) X 6 (24)
Round 5: (sc in next 3 st, inc) X 6 (30)
Round 6: (sc in next 4 st, inc) X 6 (36)
Round 7: (sc in next 5 st, inc) X 6 (42)
Round 8: (sc in next 6 st, inc) X 6 (48)
Round 9-14: sc in all st
Round 15:(sc in next 6 st, dec) X 6 (42)
Don’t cut the yarn!

2

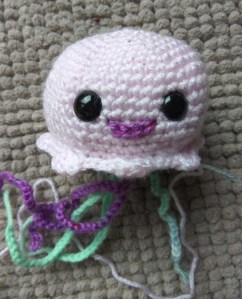
Now you can make a lovely face for your jellyfish: insert the safety eyes and embroider a mouth!

Joining the upper and the bottom parts + tentacles:

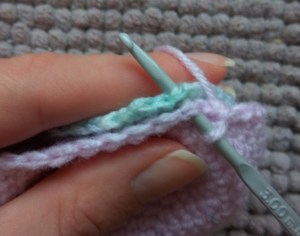
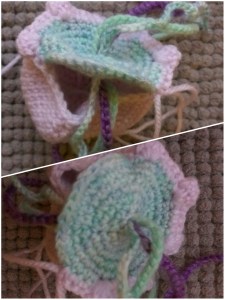
Insert the hook through both layers.

3b

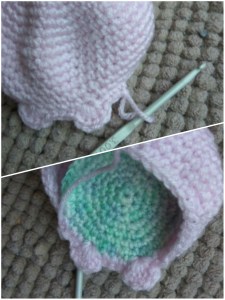
Round 16: (sc, in next st: (sc + 3 dc + sc), sc in next 3 st) – repeat it till the half of the round!!! It’s time to stuff the body and to insert the tentacles.

IMG_20171224_071427

By the way, it’s the last moment when you can insert the safety eyes and embroider a mouth! I actually forgot about it before so I will do it now:

10

Put it to the side for now and take a differently coloured yarn. From now on you can feel free to be creative and to not stick to the pattern. Its tentacles are the things which make your jellyfish individual and special.
Here I show how I made them, but as I said you can just play with colours and lengths however you like!

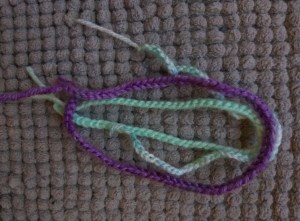
Crochet a chain of the bottom part colour and two more chains of the third colour (or the other way around). The lengths are between 40 and 100 stitches. The more different lengths are there, the more interesting the tentacles will look!

6

Using the hook insert the chains in the middle of the magic ring in the bottom part and pull them through halfway.

IMG_20171223_203753

Pull the three ends which are inside through the bottom part between rounds 1 and 2. Place the coffee beans in your contrainer and put it inside the jellyfish, stuff the body with the fiber. Finish the round 16.

Insert the hook between the 3rd and 4th rounds. Crochet 50 chains und one more chain for turning, crochet back making 3 single crochets in every stitch till the beginning of the chain. Then make 3 slip stitches on the bottom part and crochet a chain (70+1 ch) again.

This time crochet 3 DOUBLE crochets in every stitch (the tentacle will be a bit bigger than the one before). Make 3 slip stitches on the bottom part and crochet a third chain (70+1 ch). Crochet SLIP STITCH in every stitch (the tentacle will be thin, only slightly twisting).

Now the half of the round is over and you have 3 different tentacles. Repeat it one more time and at the end you will have 6 tentacles (2 of every kind). Cut the yarn, weave in all ends.

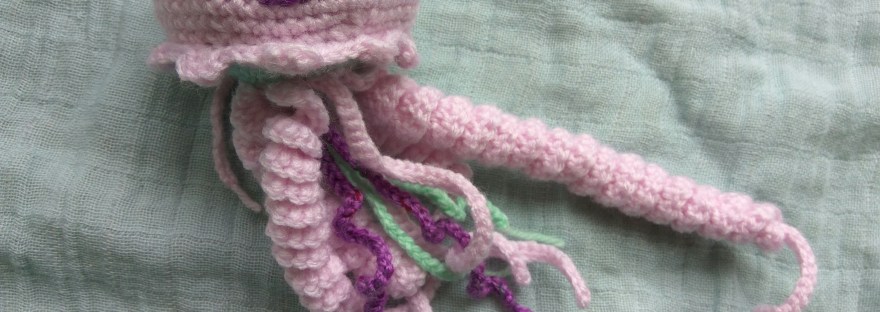
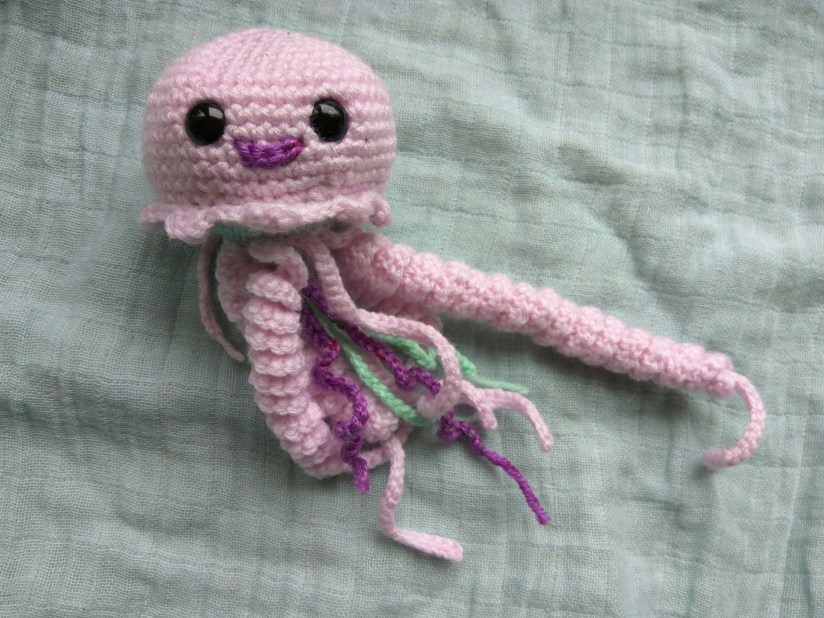
The jellyfish is finished!!! I am sure, you baby will love it!

214

Was it fun to crochet with this tutorial? Have a look at my other patterns, maybe you will find something you like there!