Uncategorized

Cozy Earwarmer Crochet Pattern

If you bike a lot, go to the swimming pool or just like hair buns, this pattern is for you! As most of the patterns in the blog, it is really quick. The best part is that it looks complex, but it is really easy to crochet! An earwarmer is an amazing thing, I have it only one day and I love it already, I did not even take it off when I came home after a walk!

IMG_20180210_165608

You will need:

  • 5 mm crochet hook
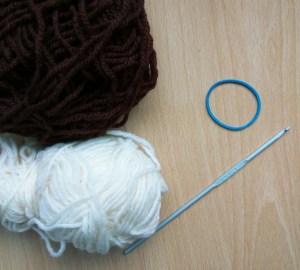
  • recommended for the hook black and grey yarn
  • scissors

Abbreviations:

  • ch – chain
  • st – stitch
  • sl st – slip stitch
  • hdc – half double crochet
  • dc – double crochet
  • exFPtrc – extended front post treble crochet (US crochet terms), this stitch is explained in the tutorial.

Let’s get started!

The Pattern:

Start with black yarn: 86 ch, join with sl st, 2 ch.
Finish every round with sl st and start a new one with 2 ch.
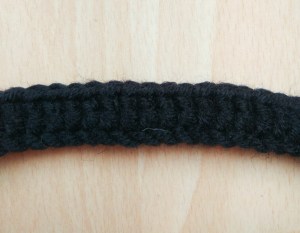
Round 1: dc in all ch (86)

IMG_20180209_221959

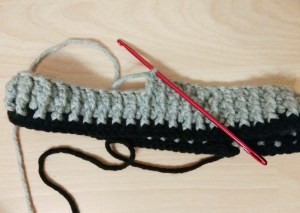
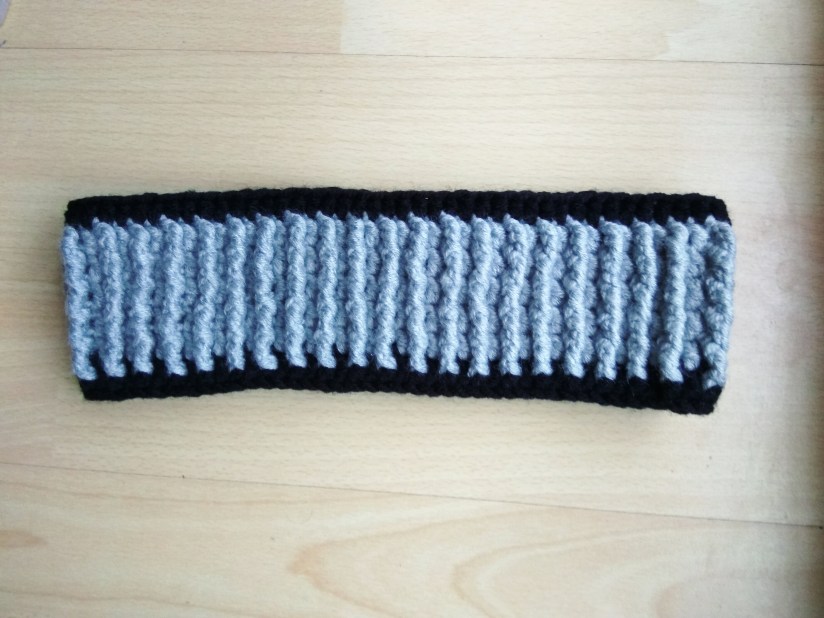
Rounds 2- 6: (change to grey yarn) (dc in next st, exFPtrc in dc under next st) X 43 (86)

IMG_20180209_222045

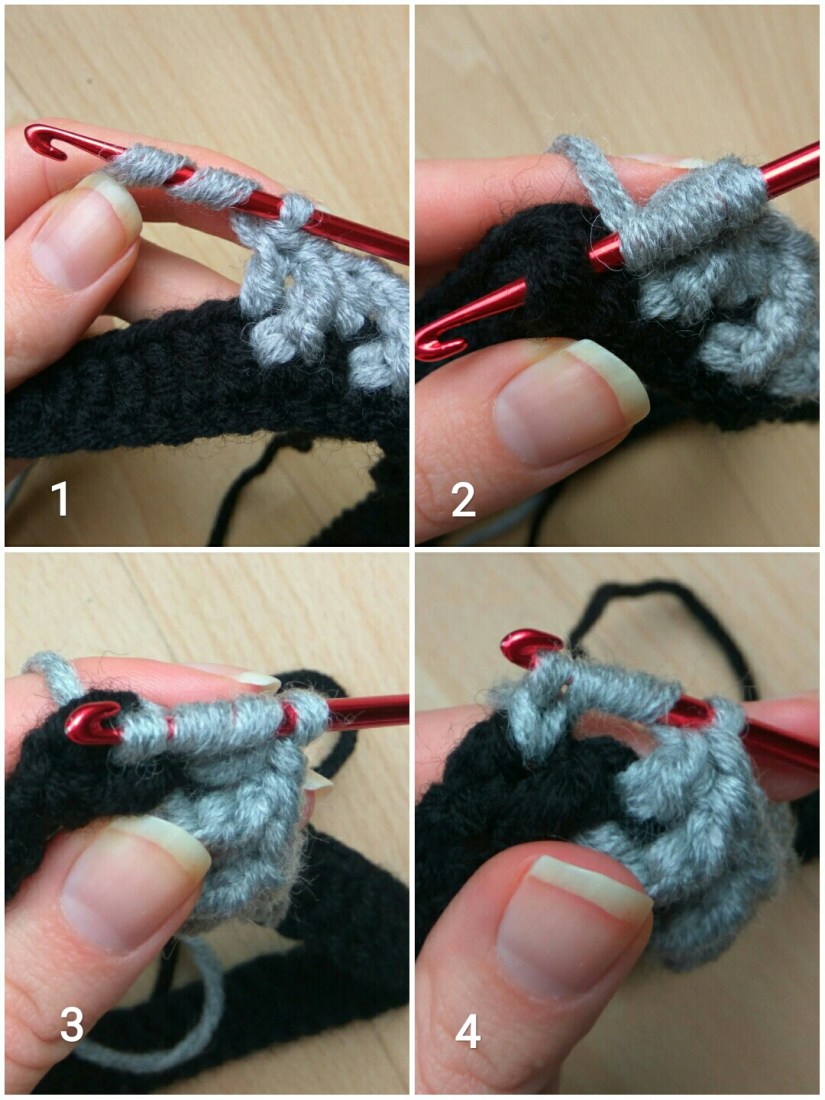
How to make exFPtrc:

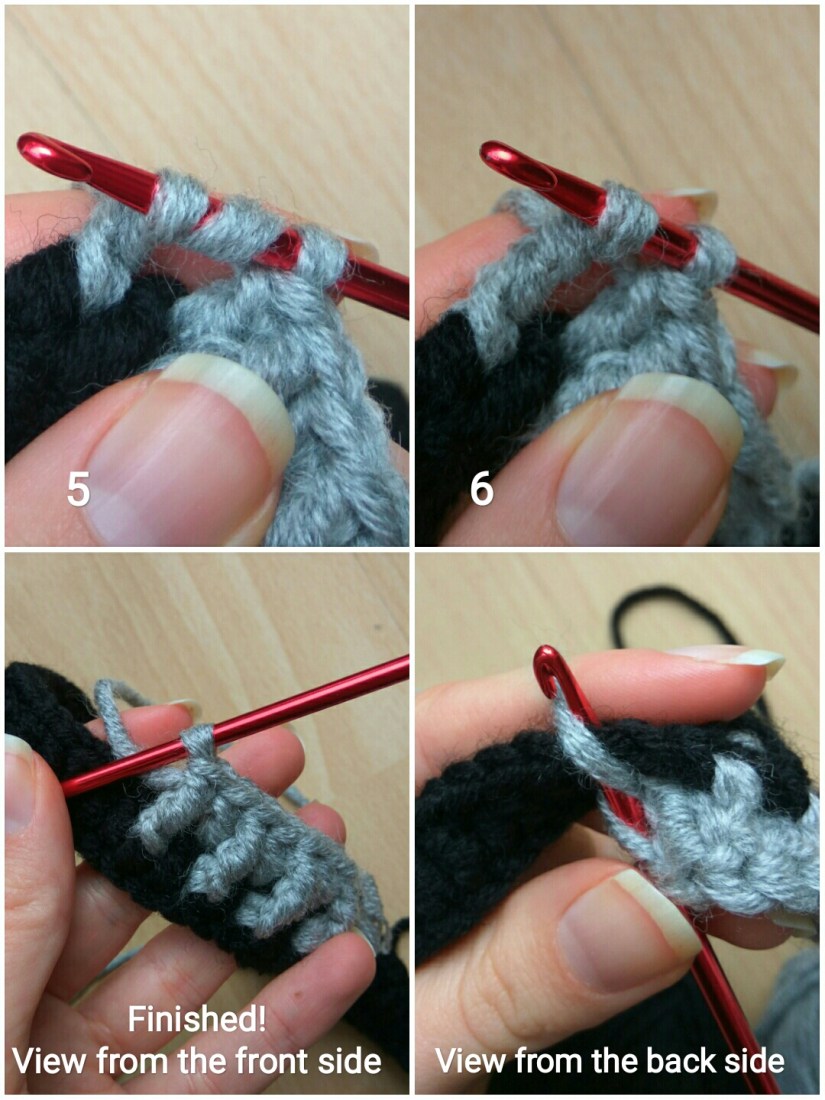
Yarn over twice (Picture 1), go through the next dc  (Picture 2), yarn over and pull the hook through (Picture 3), you have 4 loops on the hook now. Yarn over and pull through the first loop on the hook (Picture 4).

IMG_20180209_221419

Then yarn over again and pull though next two yarn loops, now you have tree loops left (Picture 5), yarn over and pull again though next two yarn loops, now there are only 2 loops on the hook (Picture 6), the last step: yarn over and pull though all two loops. You just crocheted your first exFPtrc! Congratulations! Compare your result with the lower two pictures and follow the pattern further!

IMG_20180209_221840

Round 7: (change to black yarn) hdc in all st (86)
Fasten off, cut the yarn and weave in the end.
Your earwarmer is finished! Enjoy 🙂

IMG_20180210_165524

Was it fun to crochet with this tutorial? Have a look at my other patterns, maybe you will find something you like there!

Uncategorized

Crochet Gloves, Step-by-Step Tutorial

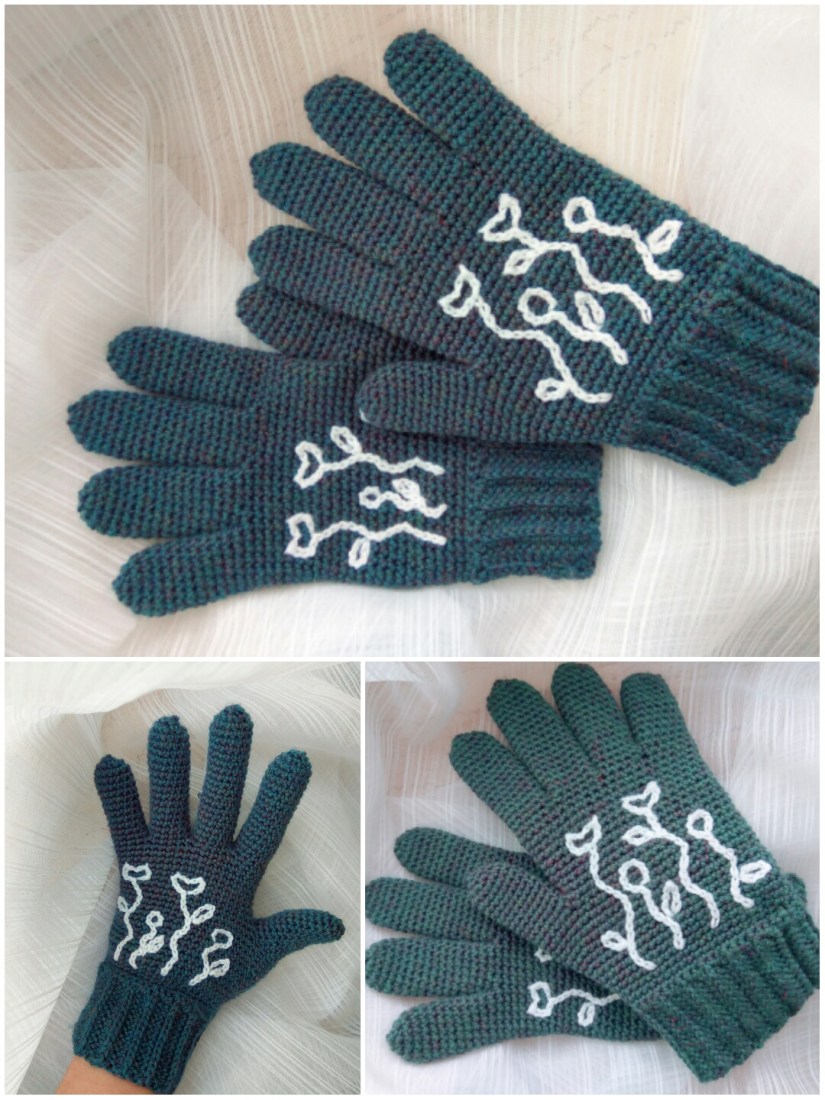
Earlier I thought that it is impossible to crochet good comfortable gloves. And as I never actually could knit, I just never dreamed of making gloves myself. But now there are so many cool new tricks for crocheting! One can crochet really anything and noone can say that for making socks or gloves one should learn knitting!

Last week I lost my gloves somewhere and it’s time to crochet new ones!
IMG_20180205_133500


Materials:

  • 3 mm crochet hook
  • recommended for the hook dark blue yarn (I used a yarn 50g = 125 m (1.75 oz = 137 yds) and I needed 100 g (3.5 oz) for the gloves)
  • white embroidery floss and a needle
  • scissors

Abbreviations:

  • ch – chain
  • st – stitch
  • sl st – slip stitch
  • sc – single crochet
  • hdc – half double crochet
  • inc – 2 sc in one st (used to increase the number of stitches)
  • dec – 2 sc together (used to decrease the number of stitches)

The Pattern

Try to crochet not too tight otherwise the gloves will be too hard. You can also take a hook one size bigger than recommended for your yarn. I wanted to make warm gloves so I didn’t use a bigger hook.

Ribbing:

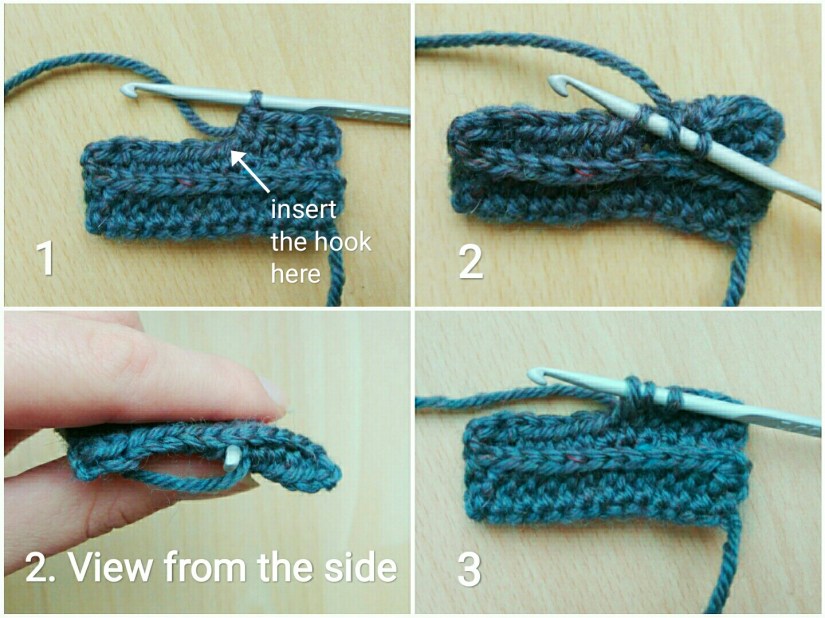
It may look confusing when you start, but once you try you will see that it’s simple and very beautiful way to crochet a ribbing. I will explain now how it works and if you have more questions afterwards, you can also have a look at the tutorial.

13 ch
Round 1: hdc in all 13 ch, 2 turning ch

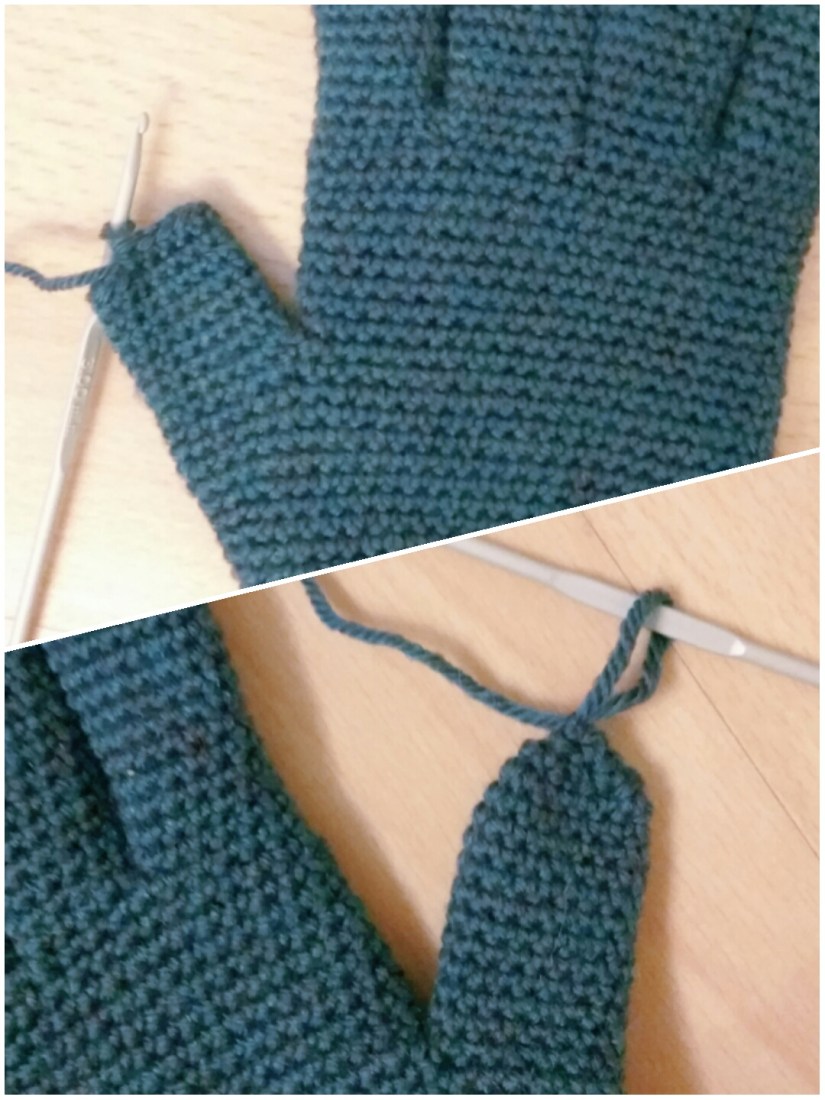
Rounds 2-30: hdc in all 13 st (here comes the trick: while crocheting the row, insert the hook one stitch lower than the one you would normally use. It is shown in the picture below (N 2). As you can see there, you crochet always to the front part, that’s why the ribbing looks knitted), 2 turning ch.  At the end of Round 30 make only 1 ch instead of 2.
IMG_20180126_131352

Body:
Now we join the ribbing. Insert the hook into both layers and join them with sl st in all 13 st. Turn the ribbing inside out so the sl st are not visible.
Now we can start the glove body. Continue crocheting on one side of the ribbing
Round 1: sc in 45 st. (You have to crochet sc one time into every vertical stitches row and two times between the rows, it will give you 45 sc) (45)
Rounds 2-4: sc in all 45 st (45)


Round 5: sc in next 21 st, inc, sc in next st, inc, sc in next 21 st (47)
Round 6: sc in all st (47)
Round 7: sc in next 21 st, inc, sc in next 3 st, inc, sc in next 21 st (49)
Round 8: sc in all st (49)
Round 9: sc in next 21 st, inc, sc in next 5 st, inc, sc in next 21 st (51)
Round 10: sc in all st (51)
Round 11: sc in next 21 st, inc, sc in next 7 st, inc, sc in next 21 st (53)
Rounds 12-15: sc in all st (53)
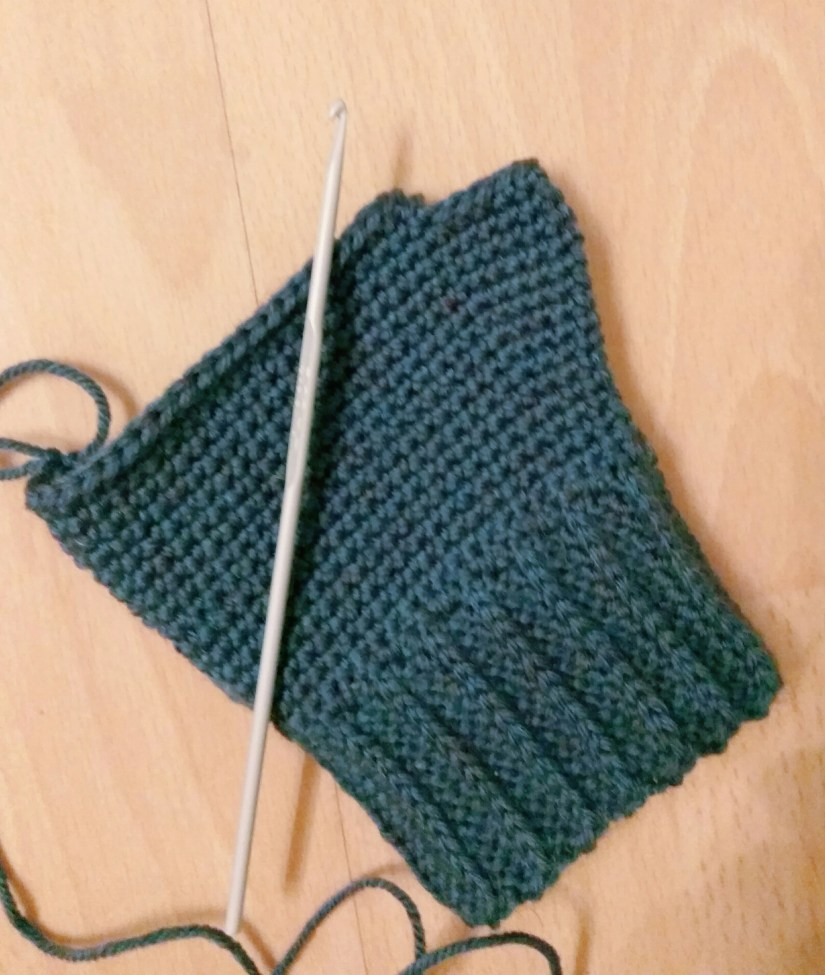
Round 16: sc in next 21 st, skip next 11 st, sc in next 21 st (42)
IMG_20180130_203059

Rounds 17-26: sc in next 42 st (42)

Little finger:
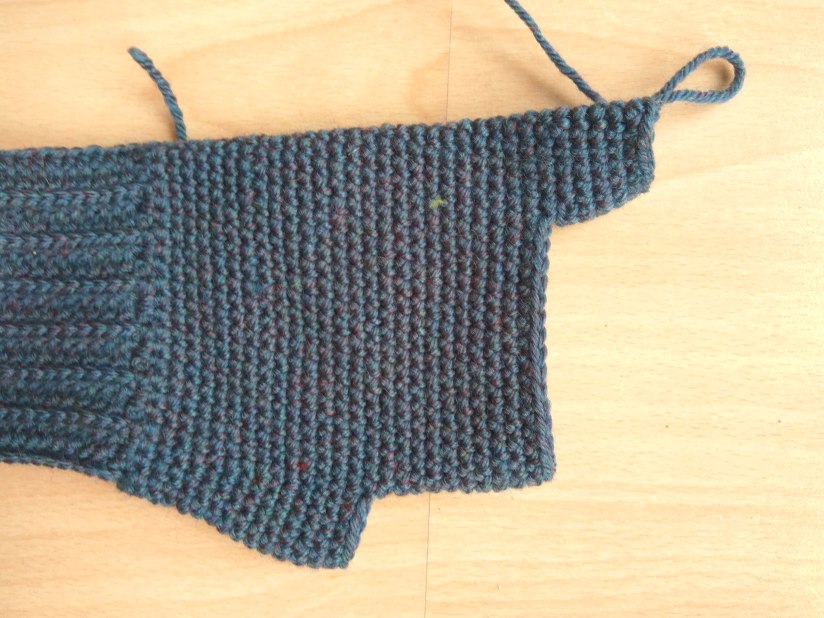
Round 1: sc in next 6 st, 2 ch, skip next 30 st, sc in next 6 st (14)
Rounds 2-11: sc in all 14 st (14)
Round 12: (sc in next st, skip next st) X 7 (7)
Round 13: (sc in next st, skip next st) X 4 (4)
Round 14: sc in next st, skip 1 st, sl st in next st.
Fasten off, cut the yarn and weave in the end.
IMG_20180130_141519

Ring finger:

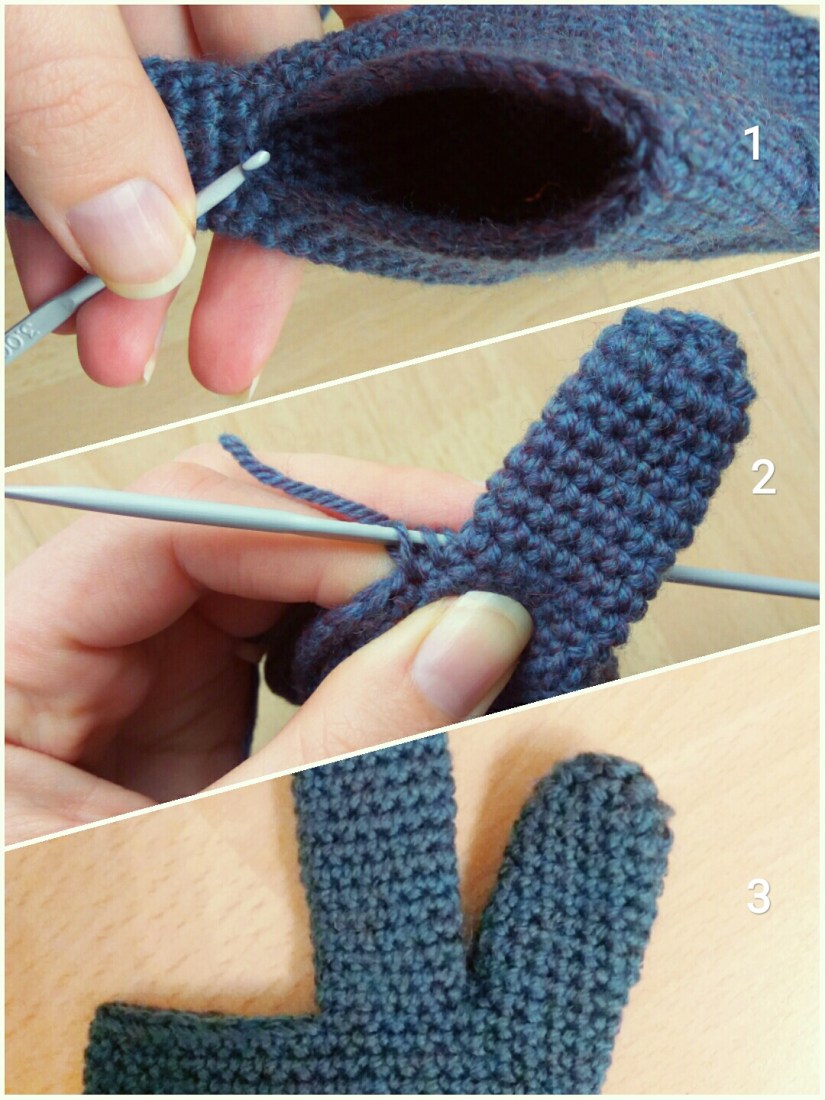
Round 1: Start crocheting the ring finger in the middle of the bottom of the little finger. Insert there the hook (as it is shown in the picture (1) below), make 1 ch, sc in next st, dec (to make the corner smooth, see picture (2) below), skip next 21 st, sc in next 5 st, 2 ch, sc in next 4, dec, sc in next st (15)

Rounds 2-15: sc in all 15 st (15)
Round 16: (sc in next st, skip next st) X 7 (7)
Round 17: (sc in next st, skip next st) X 4 (4)
Round 18: sc in next st, skip 1 st, sl st in next st.
Fasten off, cut the yarn and weave in the end.
IMG_20180130_203008

Middle finger:

Round 1: Start crocheting in the middle of the bottom of the ring finger. Insert there the hook, make 1 ch, sc in next st, dec, skip next 12 st, sc in next 5 st, 2 ch, sc in next 4, dec, sc in next st (15)

Rounds 2-18: sc in all 15 st (15)
Round 19: (sc in next st, skip next st) X 7 (7)
Round 20: (sc in next st, skip next st) X 4 (4)
Round 21: sc in next st, skip 1 st, sl st in next st.
Fasten off, cut the yarn and weave in the end.

Forefinger:

Round 1: Start crocheting in the middle of the bottom of the middle finger. Insert the hook there, make 1 ch, sc in next st, dec, sc in next 11 st, dec, sc in next st (15)
Rounds 2-15: sc in all 15 st (15)
Round 16: (sc in next st, skip next st) X 7 (7)
Round 17: (sc in next st, skip next st) X 4 (4)
Round 18: sc in next st, skip 1 st, sl st in next st.
Fasten off, cut the yarn and weave in the end.

Thumb:
Round 1: Start crocheting in the middle of the bottom of the forefinger. Insert there the hook, make 1 ch, sc in all st, now you don’t make dec in the corners so that the thumb points a bit to the side (16)
Rounds 2-11: sc in all 15 st (15)
Round 12: (sc in next st, skip next st) X 8 (8)
Round 13: (sc in next st, skip next st) X 4 (4)
Round 14: sc in next st, skip 1 st, sl st in next st.
Fasten off, cut the yarn and weave in the end.
IMG_20180201_200440

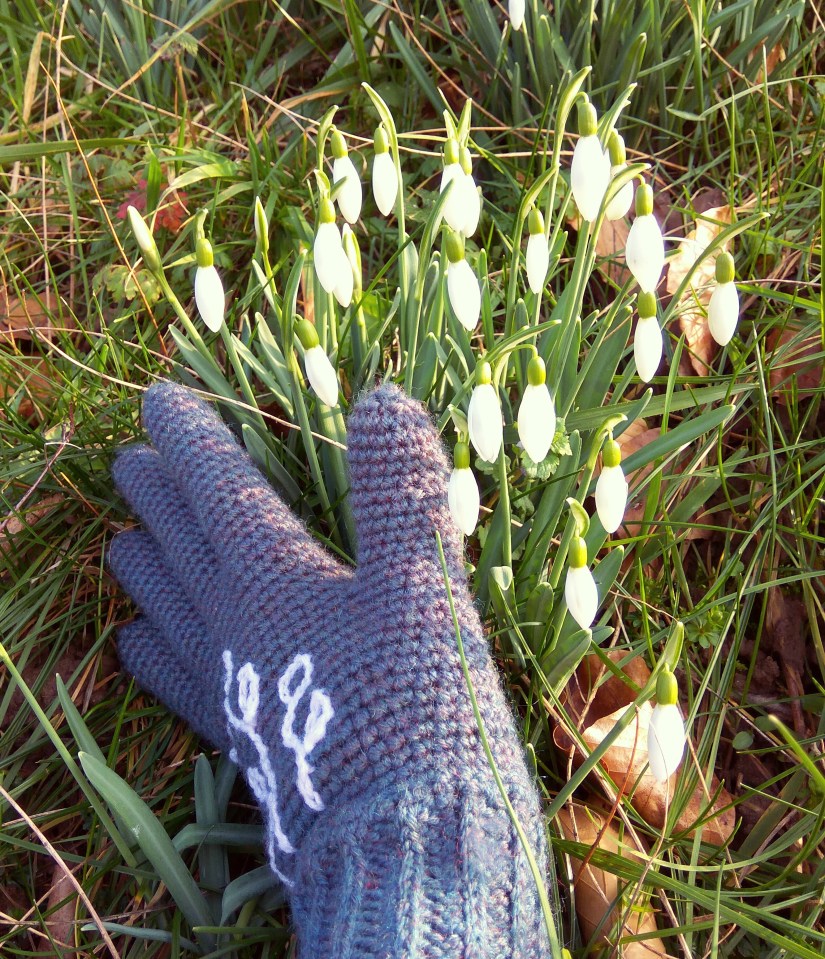
First glove is finished! make the second one the exact same way!


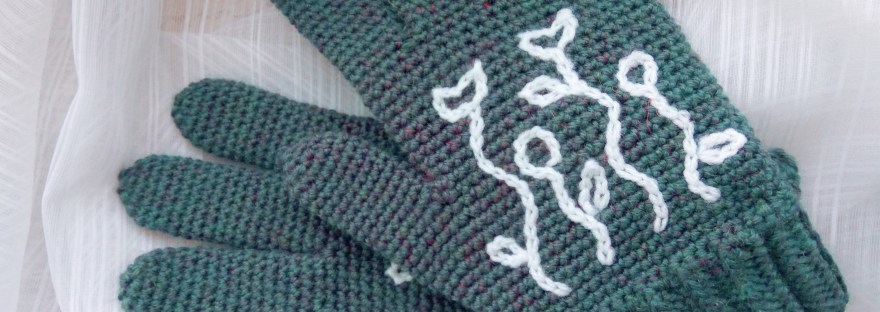
Now you can embroider something if you like or just leave them like they are! The gloves are finished! I am sure you will wear them proudly and nobody will believe that you have made them yourself!
IMG_20180205_163611

Was it fun to crochet with this tutorial? Have a look at my other patterns, maybe you will find something you like there!

You may like:

Crochet Pattern EarwarmerIMG_20180210_171747
 

Uncategorized

Hairband, Quick and Simple Crochet Pattern

I didn’t post anything here for a while, because right now I am crocheting gloves and as I have extremly little time for it, it takes forever. Bigger crocheting projects are sometimes difficult for me because I need a feeling that I can finish something. So every time when I crochet a bit bigger thing, I make something small at the same time. I don’t know if it is logical because then the main project takes even longer but I like it! That’s why I want to share with you a simple and quick way to make a hair band. It takes only 10-15 minutes and you can choose any colour and style you like!

Materials:

  • 3 mm crochet hook
  • yarn recommended for the hook
  • rubber band
  • scissors

IMG_20180112_141010

Abbreviations:

  • ch – chain
  • st – stitch
  • sl st – slip stitch
  • sc – single crochet
  • dc – double crochet
  • at the end of every round total number of stitches is shown in brackets

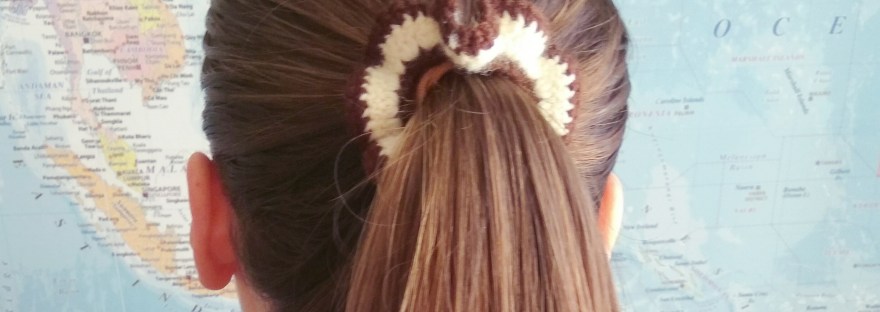
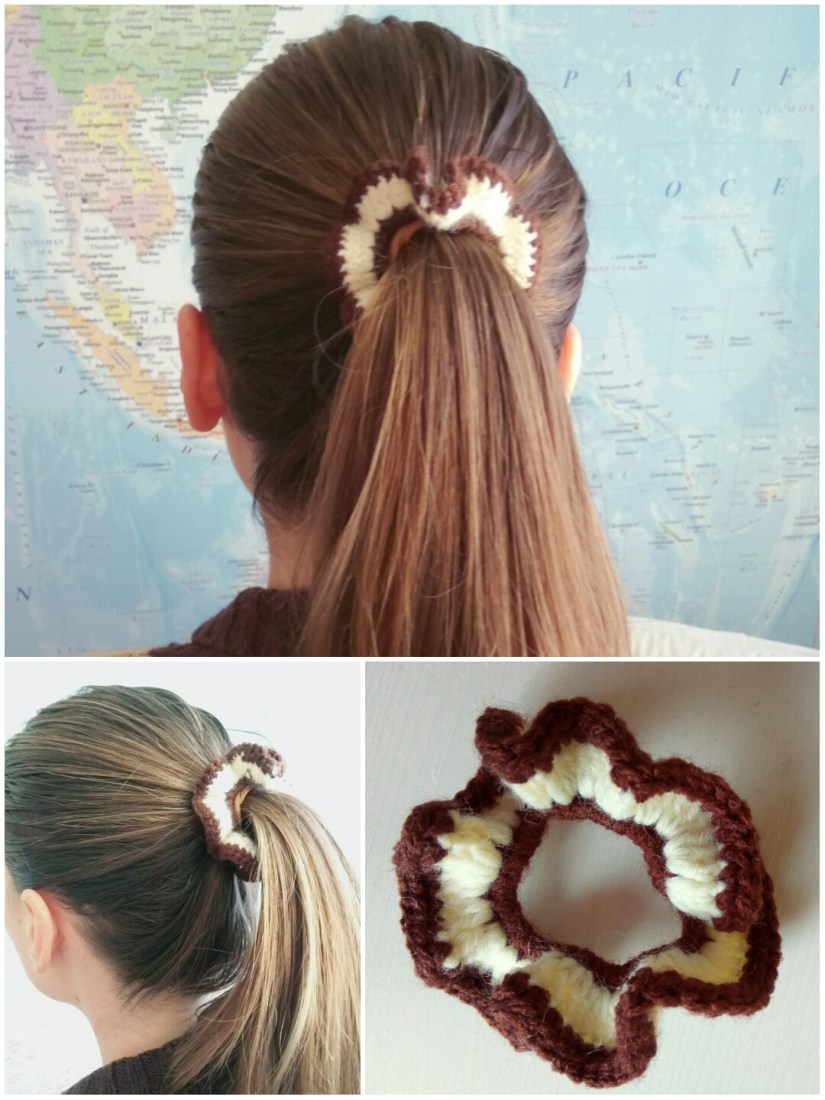
Only three steps and you get a perfect accessory which completes your outfit! I chose a “Milk coffee” colour, it matches my hair 🙂

IMG_20180104_122017

Instructions:

Round 1: 31 sc in the rubber band (31). Important: the size of the hair band I made is quite small, it fits better for children. If you want a bigger hairband, just make more stitches, stretch the gummy and look if it is big enough for you. In other words, the 31 stitches is a minimal size.
Round 2: 3 dc in next 31 st (93)
Round 3: sc in all 93 st (93)

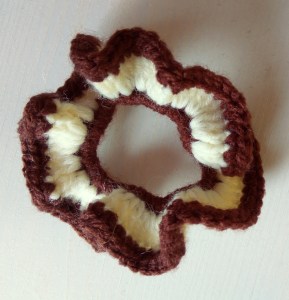
The hairband is finished!

IMG_20180203_114911

Was it fun to crochet with this tutorial? Have a look at my other patterns, maybe you will find something you like there!

Uncategorized

Amigurumi Heart Free Pattern

St. Valentine Day is coming and it’s so great to make the day special for the ones we love! Today we learn how to crochet a cute puffy heart! It’s so easy and you will need not more than an hour to make it! You can choose any size you like for the heart! So at the end it can be cosy pillow or cute keychain! You can embroider a funny face on it or the name of your second half! You can use the heart to decorate the room for your romantic date! If you hate St. Valentine Day, you can use the heart as a base for your needles 😉

Materials:

  • a crochet hook (any size you like)
  • yarn (a bit bigger than it’s recommended for the hook)
  • fiberfill
  • sewing needle and scissors

Abbreviations:

  • ch – chain
  • st – stitch
  • sl st – slip stitch
  • sc – single crochet
  • inc – 2 sc in one st (used to increase the number of stitches)
  • dec – 2 sc together (used to decrease the number of stitches)
  • X N – repeat N times
  • at the end of every round total number of stitches is shown in brackets

Ok, now you know everything you need and we can finally start crocheting! Before you start have a look at my tricks for crocheting amigurumi. I am sure you will find it helpful! Have fun crocheting!
And now we will see what 5 Little Monsters have prepared for us 🙂

The pattern:

Round 1: 4 sc in magic ring (4)
Round 2: (inc, sc in next st) X 2 (6)
Round 3: (inc, sc in next st) X 3 (9)
Round 4: (inc, sc in next 2 st) X 3 (12)
Round 5: (inc, sc in next 3 st) X 3 (15)
Round 6: (inc, sc in next 4 st) X 3 (18)
Round 7: (inc, sc in next 5 st) X 3 (21)
Round 8: (inc, sc in next 6 st) X 3 (24)
Round 9: (inc, sc in next 7 st) X 3 (27)
Round 10: (inc, sc in next 8 st) X 3 (30)
Round 11: (inc, sc in next 9 st) X 3 (33)
Round 12: (inc, sc in next 10 st) X 3 (36)
Round 13: (inc, sc in next 11 st) X 3 (39)
Round 14: (inc, sc in next 12 st) X 3 (42)
Round 15: in next 21 st (21 – now we start to crochet one of the upper halfs)
Round 16: insert the hook in the first st of the Round 15 ans sc in next 21 st
Round 17: (dec, sc in next 5 st) X 3 (18)
Round 18: (dec, sc in next st) X 6 (12)
Round 19: dec X 6 (6)
Cut the yarn, take a sewing needle and weave the yarn through the last round, fasten off and weave in the end.
Round 20: Begin working with the 22nd st of Round 14. sc in next 20 st, dec (the second st of dec is a st of the finished part) (21)
Rounds 21 – 24: the same as Rounds 16 – 19.
Cut the yarn, stuff the heart and finish it the same way as the first half.

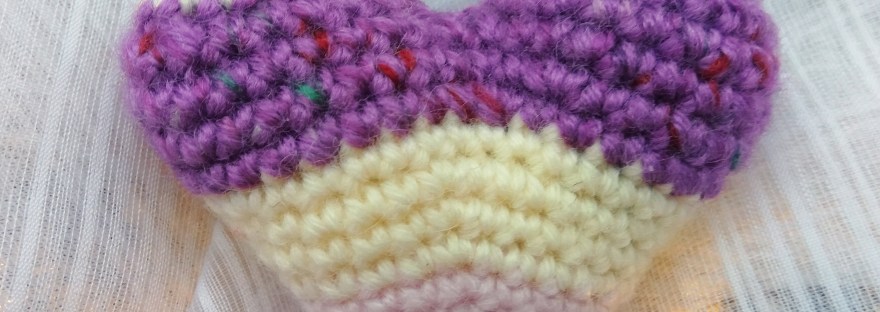
The heart is finished! Are you impressed how nice it worked out? This was really fast!

I hope this little heart helps to make the day romantic and special!
Happy St. Valentine Day and enjoy the romantic time with your love! And don’t forget to show your feelings to the people you love! Not only once per year but in every day life! Maybe we should crochet hearts more often?.. 🙂

IMG_20180127_111742

Was it fun to crochet with this tutorial? Have a look at my other patterns, maybe you will find something you like there!

amigurumi

Octopus for Preemies: Save Lifes Crocheting! Free Pattern here!

IMG_20180112_141258


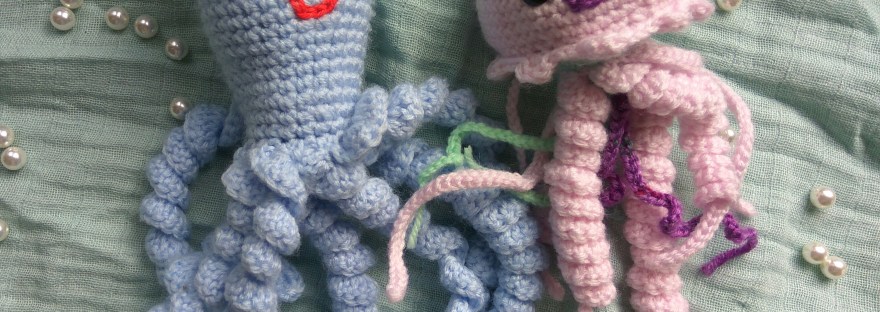
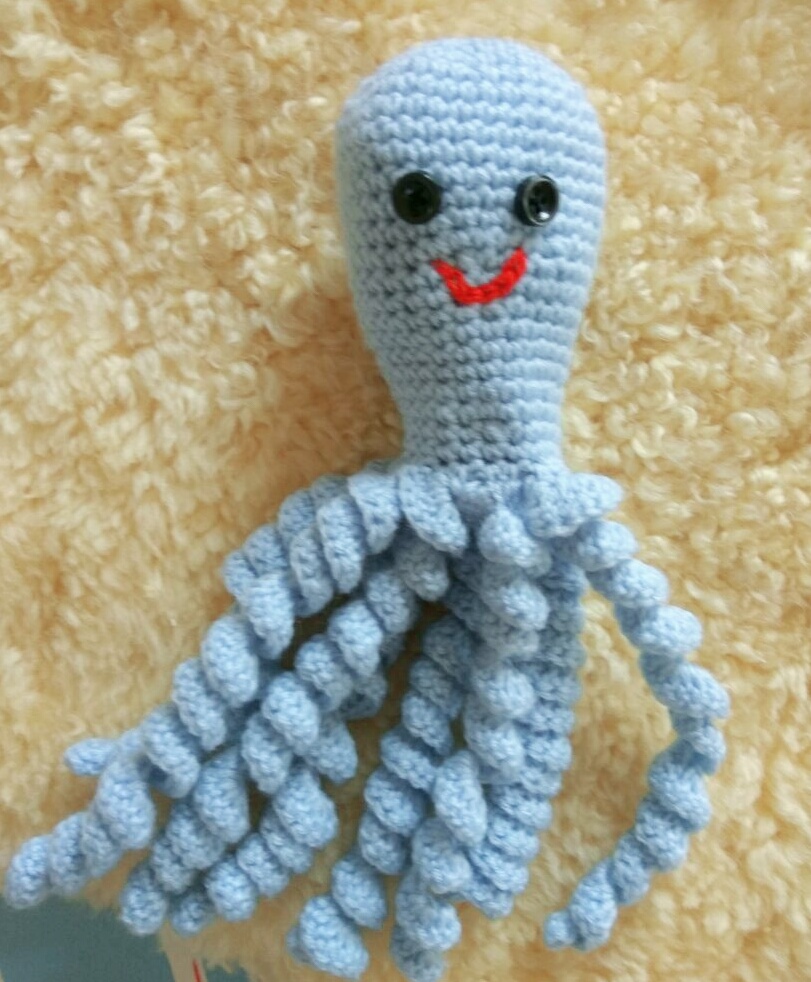
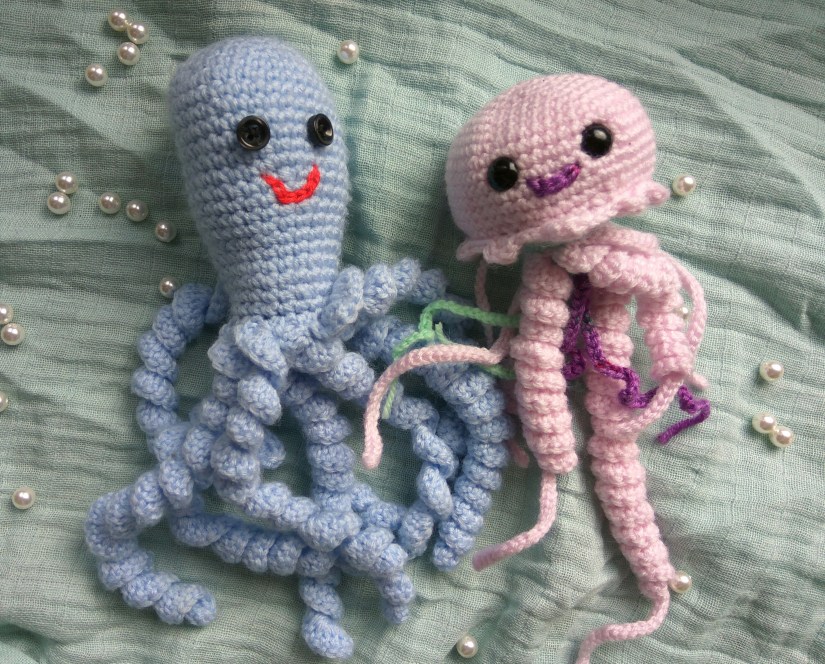
Did you know that you can save lifes crocheting? It was found that snuggling crocheted octopuses might make preemies feel safer!

The idea originated in Denmark, where researchers found that preemies who cuddles up with their octopus had more regular heartbeats, better breathing, and higher levels of oxygen in their blood. Moreover, the babies were also less likely to pull out their monitors and tubes. Apparently the tentacles of the octopus remind the babies of their mom’s umbilical cords, and the soft bodies of the toys remind them of the womb. Now hospitals in the whole world recieve the crocheted life savers from volunteers!

So if you want to make the world a little better and donate an octopus to a hospital, to make a perfect gift for newborn or just to crochet something for your baby, take a hook, yarn and follow the tutorial!

You will need:

  • 3.00 mm crochet hook
  • Blue cotton yarn (recommended for the hook size)
  • 6 mm safety eyes
  • Scissors and sewing needle
  • Fiberfill
  • Red embroidery floss for the mouth

Abbreviations:

  • ch – chain
  • st – stitch
  • sc – single crochet
  • inc – 2 sc in one st (used to increase the number of stitches)
  • dec – 2 sc together (used to decrease the number of stitches)
  • X N – repeat N times
  • at the end of every round total number of stitches is shown in brackets

For safety reasons there are some things you should think of:

  • The size of the toy: the head should not be smaller than 5 cm and the length of the arms should not exceed 20 cm.
  • Materials: the yarn should be 100% cotton. The toy should be able to hold 60° washing temperature. Because of that it’s better to stuff it with fiberfill. Don’t use wool, a baby can be allergic to it.
  • The toy should not include a lot of details and any decoration. It has to be as simple as possible! Use safety eyes and take care that the sewing holds very good.

Ok, now you know everything you need and we can finally start crocheting! Before you start have a look at my tricks for crocheting amigurumi. I am sure you will find it helpful! Have fun crocheting!

Bottom part:
Round 1: 5 sc in magic ring (5)
Round 2: inc X 5 (10)
Round 3: (sc in next st, inc) X 5 (15)
Round 4: (sc in next 2 st, inc) X 5 (20)
Cut the yarn.

Upper part:
Round 1: 6 sc in magic ring (6)
Round 2: inc X 6 (12)
Round 3: (sc in next st, inc) X 6 (18)
Round 4: (sc in next 2 st, inc) X 6 (24)
Round 5: (sc in next 3 st, inc) X 6 (30)
Round 6: (sc in next 4 st, inc) X 6 (36)
Rounds 7 – 10: sc in all st (36)
Round 11: (sc in next 16, dec) X 2 (34)
Round 12: (sc in next 15, dec) X 2 (32)
Round 13: sc in all st (32)
Round 14: (sc in next 14, dec) X 2 (30)
Round 15: (sc in next 13, dec) X 2 (28)
Round 16: sc in all st (28)
Round 17: (sc in next 12, dec) X 2 (26)
Round 18: sc in all st (26)
Round 19: (sc in next 11, dec) X 2 (24)
Round 20: sc in all st (24)
Round 21: (sc in next 10, dec) X 2 (22)
Round 22: sc in all st (22)
Round 23: (sc in next 9, dec) X 2 (20)
Round 24: sc in all st (20)
Don’t cut the yarn. Stuff the head, take the bottom part.

Arms:
The whole next round we crochet through the both parts making the arms. Insert the hook in both layers: upper and bottom parts.
Round 25: (sc in next st, 50 ch, 2 dc in next ch, sc in next 2 st, 50 ch, 2 dc in next ch) X 4
Cut the yarn and weave in the end.

IMG_20180112_140353

Was it fun to crochet with this tutorial? Have a look at my other patterns, maybe you will find something you like there!