amigurumi

3 Simple Stuffings Which Make Your Amigurumi Special

The New Year has arrived! This is time of new ideas for us. If the cuteness of your amigurumi is not enough for you anymore and you are wondering how to make the figures really special and interesting, this post is for you.

Instead of stuffing amigurumi just with a fiberfill you can be a bit more creative and your amigurumi will be brought to live 🙂 Here are 3 simple tricks I use to add a cool function to amigurumi figures. I am sure everyone of you has all the supplies at home.

1) Dried peas or coffe beans

If you want to make somthing heavy and stable (like a door stopper, for example) or you want that your toy sits without loosing a balance, just put dried peas or beans instead of fiberfill (or partly). This trick is also helpful if you want to make a small antistress toy. I often use coffee beans for that, because of nice aroma 🙂


2) Wires

You want to make a flexible ballerina or a doll, whos arms position can be changed? Just put soft wires inside while stuffing. You should just take care that the sharp ends do not look out by making small circles on every end.


3) Noise makers

Amigurumi is a perfect gift for a kid, and we all know how much kids love noise 🙂 Good news: it is really easy to make and you do not need anything special for that. Just take a plastic egg from the Kinder surprise egg or any other small plastic container, fill it with dried beans. If you do not have a plstic container of a right size, use packages of candies. They make a lot of noise and you get some candies 🙂 Of course you could always buys a squeaker for toys, it would better fit for “flat” toys.


I hope this post has inspired you to play with amigurumi stuffing and see what happens!

Did you find the article helpful? Have a look at my other patterns, maybe you will find something you like there!

You may also like:

Five tips that make your amigurumi look great

IMG_20171212_093856


Uncategorized

Autumn Beanie for Children Free Pattern

The summer is over which means we need crochet more than ever! How to stay warm and stylish during the cold seasons? Here is my idea for a hat! Of course it can be made any size and colours, but let’s admit that the burning colours of autumn are magical!
IMG_20191010_145835

Materials:

  • 3.5 mm crochet hook
  • recommended for the hook yellow, orange and light brown yarn (I used an amazing yarn will all the colours coming one after another without a gradient (see the picture). 210 m = 85 g, I needed a little less than 85 g)
  • scissors
  • pompon (if you do not have one, just make it yourself using the tutorial)

Abbreviations:

  • ch – chain
  • st – stitch
  • sl st – slip stitch
  • dc – double crochet
  • dinc – in this case: 2 double crochet in 1 st
  • FPdc – front post double crochet
  • (…) X 10 – repeat “…” 10 times

The pattern is for a 2 years old child (50-52 cm head). If you use a yarn of a different sickness, the size of the hat might change!

The pattern:

Important: At the beginning of every round we make 3 ch which are counted as one dc in the pattern. At the end of every round the last dc is connected to the first one with one sl st.

Round 1: 10 dc in magic ring (10)
Round 2: dinc X 10 (20)
Round 3: (dc in next st, dinc) X 10 (30)
Round 4: (dc in next 2 st, dinc) X 10 (40)
Round 5: (dc in next 3 st, dinc) X 10 (50)
Round 6: (dc in next 4 st, dinc) X 10 (60)
Round 7: (dc in next 5 st, dinc) X 10 (70)
Round 8: (dc in next 6 st, dinc) X 10 (80)

IMG_20191010_155646
Round 9-18: dc in all st (80)

Now we start crocheting the ribbling (just go on further without cutting the yarn).
Round 19-21: FPdc in all dc of the prvious round (80) If you do not know the stitch, no worries, it is really easy! Just insert the hook into a double crochet of the round before (as it is shown on the picture below), the rest is the same as a regular dc.

IMG_20191011_155151

As you see, I made 3 rounds in the ribbling, but you can make more if you think, that the ribbling is too narrow. Perfect would be to let your child try it on. If you do not have the opportunity, just make 4 rounds to be sure that the hat is long enough!

Now you can fasten off, cut the yarn, weave in the end and sew the pompon to the hat. If you have do not have a pompon and you have never made it before, here is one of the method (the easiest) explained.

Yeeeey… the hat is ready!!!

My son loves his new autumn hat, he even wanted to wear it indoor 🙂

IMG-20191229-WA0010

I hope that a little owner of the hat you made will like it and stay warm!

Did you like to crochet with the tutorial? Check out my other patterns here!

You may also like:

My Crochet Highlights 2019

IMG_20191229_171502

Crochet for Baby

IMG_20180114_094332

Uncategorized

My Crochet Highlights of the Year

Hello Everybody!

Just two more days and we will welcome a New Year of adventures in the world of crochet! Well, it is a perfect timepoint to think back and remember the best moments of the current year. I have not been that active posting my patterns this year… Why? Actually, I was busy crocheting! And here are my crochet highlights 2019:

  • I have learned to crochet sweaters! I am very proud and excited about it! I have never thought that I can actually wear a crocheted sweater. But now I have learned an easy technique to make really fashionable designs! As always, my first attempt was for my son, and then I was so happy with the result and it motivated me to crochet my first adult sweater ever!!!

IMG_20191229_171502

  • 2. A while ago I saw a Seaside Stash Busting Blanket by Eleonora from Coastal Crochet. I was too late for taking part in the Crochet Along with Eleonora but the style of the blanket is sooo inspiring! So trying out the pattern became the Number 1 in my “Crochet To Do List”. And I ended up making accessories one after another using the stitches I have learned from Eleonora. Here are photos of some of the things I have made. Thank you Eleonora for showing the awesome stitches and inspiring me for creating these things!

And here is a flower pot decoration for our terrasse:

IMG-20191229-WA0011

I wish you all a great New Year full of ideas and inspiration! My New Year resolution is to share with you the patterns for all of the things mentioned in this post. I hope you are as excited as I am about crocheting new things and making your families and friends happy with your wonderful handmade gifts!


Uncategorized

Sendung mit der Maus – German TV show for Kids, Amigurumi Pattern

I guess, everyone in Germany (or in the world?) knows the educational TV show for kids (actually for everyone) Sendung mit der Maus. A friend of mine still loves the little mouse so I made her an amigurumi Maus for her Birthday. If you don’t know who that is, here is a couple of pictures for you! I made the pattern and did not test it again after I have finished the mouse, so please let me know, if you find any mistakes or if you have any questions!

You will need:

  • 3.00 mm crochet hook
  • Orange, brown yarn (one size bigger than recommended for the hook), leftovers of black and white yarn
  • Scissors and sewing needle
  • Fiberfill
  • dried peas (if you want to make the mouse in a sitting position)

Abbreviations:

  • ch – chain
  • st – stitch
  • sc – single crochet
  • inc – 2 sc in one st (used to increase the number of stitches)
  • dec – 2 sc together (used to decrease the number of stitches)
  • X N – repeat N times
  • at the end of every round total number of stitches is shown in brackets

Before you start have a look at my tricks for crocheting amigurumi. I am sure you will find it helpful! Have fun crocheting!

We start with the small details because we are going to sew them to the body before how we go.

Ears (make two, brown yarn):

4 + 1 ch, crochet around:
Round 1: 3 sc in second from the hook st, sc in next 2 st, 3 sc in next st, sc in next 2 st (10)
Round 2: inc, sc in next st, inc, sc in next 2 st, inc, sc in next st, inc, sc in next 2 st (14)
Round 3: sc in next 2 st, 3 sc in next st, sc in next 6 st, 3 sc in next st, sc in next 4 st (18)
Rounds 4-5: sc in all st (18)
Round 6: sc in next st, dec, sc in next st, dec, sc in next 4, dec, sc in next st, dec, sc in next 3 st (14)
Round 7: dec, sc in next st, dec, sc in next 2, dec, sc in next st, dec, sc in next 2 st (10)
Round 8: dec, sc in next 3 st, dec, sc in next 3 st (8)
Fasten off and cut the yarn leaving a longer tail for sewing. The photo of the ears is under the picture of the arms.

Arms (make two, brown yarn):

Round 1: 6 sc in magic ring (6)
Round 2: inc X 6 (12)
Round 3-10: sc in all (12)
Round 11: (sc in next 2 st, dec) X 3 (9)
Round 12-15: sc in all (9)

Fasten off and cut the yarn leaving a longer tail for sewing.

IMG_20191004_105411

Nose (black yarn):

Round 1: 6 sc in magic ring (6)
Round 2: inc X 6 (12)
Round 3: sc in all st (12)
Round 4: dec X 6 (6)

Fasten off and cut the yarn leaving a longer tail for sewing.

Eyes (make two, start with black and orange yarn):

Round 1: 6 sc in magic ring, Note: 3 of the 6 sc should be black, other 3 orange (6)
Round 2: inc X 6, Note: crochet orange stitches over orange of the previous round and white over the black stitches (see picture) (12)

IMG_20191004_105239

Fasten off and cut the yarn leaving a longer tail for sewing.

Legs (make two, brown yarn):

4 ch, the crochet around:
Round 1: 3 sc in the second from the hook st, sc in next st, 3 sc in next st, sc in next st (8)
Round 2: sc in next st, 3 sc in next st, sc in next 3 st, 3 sc in next st, sc in next 2 st (12)
Round 3: sc in next st, inc, inc, inc, sc in next 3 st, inc, inc, inc, sc in next 2 st (18)
Rounds 4-6: sc in all st (18)
Round 7: sc in next st, dec, dec, dec, sc in next 11 st (15)
Round 8: dec, dec, dec, sc in next 9 st (12)
Round 9: dec, dec, sc in next 3 st, dec, sc in next 3 st (9)
Rounds 10-16: sc in all 9 st

Fasten off and cut the yarn leaving a longer tail for sewing.

IMG_20191020_194016

Body (start with orange yarn):

Round 1: 6 sc in magic ring (6)
Round 2: inc X 6 (12)
Round 3: (sc in next st, inc) X 6 (18)
Round 4: (sc in next 2 st, inc) X 6 (24)
Round 5: (sc in next 3 st, inc) X 6 (30)
Round 6: (sc in next 4 st, inc) X 6 (36)
Round 7: (sc in next 5 st, inc) X 6 (42)
Round 8: (sc in next 6 st, inc) X 6 (48)
Round 9: (sc in next 7 st, inc) X 6 (54)
Round 10-16: sc in all st (54)
Round 17: sc in next 20 st, fasten off, cut the yarn. Skip 9 st, insert the hook in the 10th stitch and make sc in the next 25 st (54)
Round 18: sc in next 20 st, 13 ch, skip 9 st, insert the hook in the 10th stitch and make sc in the next 25 st (58)
IMG_20191020_193656

Round 19: sc in next 20 st, dec, sc in next 9 ch, dec, sc in the next 25 st (56)
Round 20: sc in next 20 st, dec, sc in next 7 ch, dec, sc in the next 25 st (54)

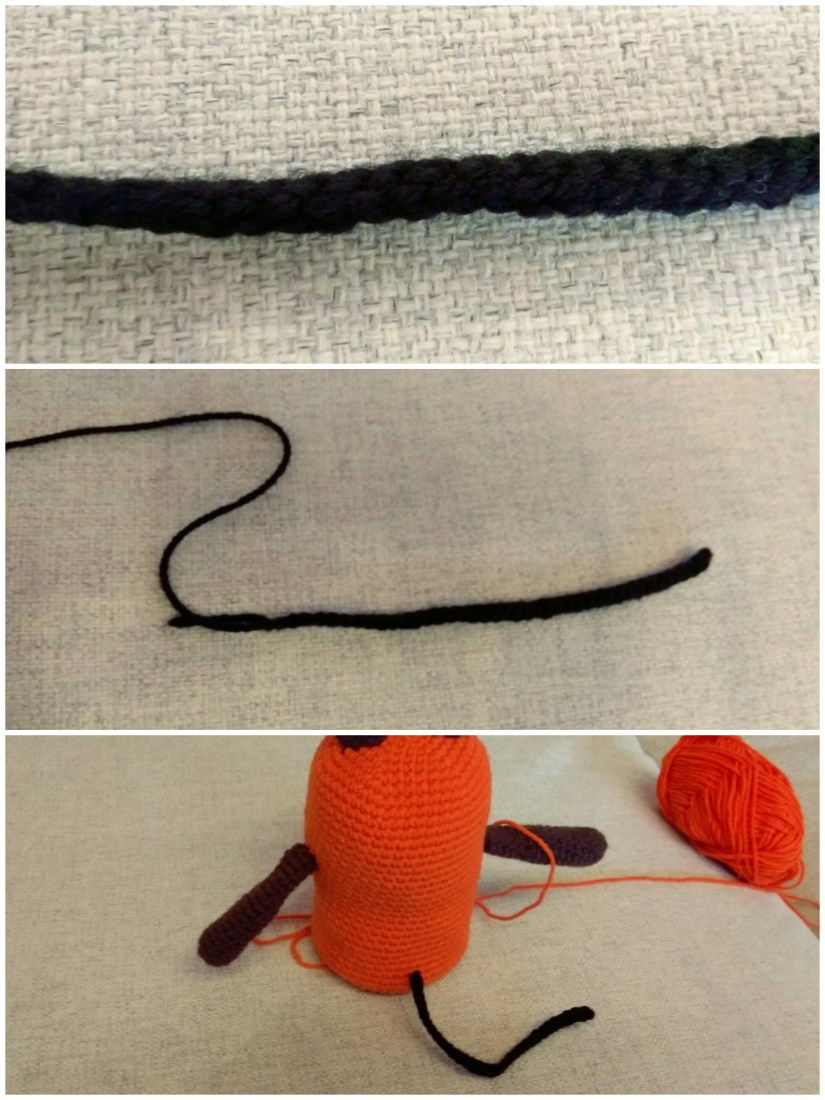
Now we continue working with the nose so we cut the yarn but do not fasten off, we will go on with crocheting the body afterwards.

Insert the hook in the center of the bottom part of the hole we left for the nose.

Round 1: crochet around the hole, sc in all st (13 st from ch, 9 skipped st and 1 row on each side=24 st)
Round 2: (sc in next 2 st, dec)X6 (18)
Round 3: sc in next 3 st, dec, sc in next 7 st, dec, sc in next 4 st (16)
Round 4: sc in next 3 st, dec, sc in next 6 st, dec, sc in next 3 st (14)
Round 5: sc in next 2 st, dec, sc in next 4 st, dec, sc in next 2 st (12)
Round 6: (dec)X6 (6), skip 2 st, sl st

IMG_20191020_193801

Continue with the body:

Rounds 21-26: sc in all at (54)

Now is a perfect moment to sew the arms, ears, eyes and the nose to the body. Afterwards stuff the body as you go. Remember, if you are making “sitting mouse”, the last quarter of the body volume should be filled with the dry peas.

Rounds 27-32: sc in all at (54)
Round 33: (sc in next 7 st, dec) X 6 (48)
Round 34: (sc in next 6 st, dec) X 6 (42)
Round 35: (sc in next 5 st, dec) X 6 (36)
Round 36: (sc in next 4 st, dec) X 6 (30)
Round 37: (sc in next 3 st, dec) X 6 (24)
Round 38: (sc in next 2 st, dec) X 6 (18)
Round 39: (sc in next st, inc) X 6 (12)
Round 40: (dec)X6 (6), fill with the dry peas and sew the hole.
IMG_20191004_105641

Sew the legs to the body. Make a tail: just crochet a 5 cm long ch. Weave in all ends.

IMG_20191004_105030

Yooohoo, the mouse is finished!!! I hope you had fun crocheting with me and you like the result!

IMG_20191020_221055

Did you like to crochet with the tutorial? Check out my other patterns here!

You may also like:

Crochet Halloween Decoration Spider

SAVE_20180910_194121


Uncategorized

Crochet Potholder Rudolph

Christmas is almost there! It’s time to create a special athmosphere of a miracle around. We exchange all home decorations with christmas specialities. Candels, Nutcrackers, angels and stars are everywhere. Kitchen towels of christmas colours, tablecloth with winter ornaments and a potholder with a funny Rudolph on it!

IMG_20181209_103757

You will need:

  • 3.5 mm crochet hook
  • Green, red, brown and white yarn recommended for the hook
  • Scissors
  • Sewing needle

Abbreviations:

  • ch – chain
  • st – stitch
  • sc – single crochet
  • reverse sc – reverse single crochet
  • inc – 2 sc in one st (used to increase st number)
  • X 6 – repeat 6 times
  • number of st in every round is indicated in brackets at the end

Tips:

1. Do not crochet in spiral so the shapes of the nose and the head are clear. Make sl st and 1 ch at the end of every round instead.

2. The base of the pattern is that we have to add 6 st at every round. The inc stitches are over each other in the pattern (like that instructions look more understandable), but if you shift them a bit from each other, the round shapes will look more round and less hexagonal.

Instructions:

Round 1: Start with the red yarn. 6 sc in magic ring (6 )
Round 2: inc X 6 (12)
Round 3: (sc in next st, inc) X 6 (18)
Round 4: (sc in next 2 st, inc) X 6 (24)
Round 5: (sc in next 3 st, inc) X 6 (30)
Round 6: Change to the brown yarn. (sc in next 4 st, inc) X 6 (36)
Round 7: (sc in next 5 st, inc) X 6 (42)
Round 8: (sc in next 6 st, inc) X 6 (48)
Round 9: (sc in next 7 st, inc) X 6 (54)
Round 10: (sc in next 8 st, inc) X 6 (60)
Round 11: (sc in next 9 st, inc) X 6 (66)
Round 12: Change to the green yarn. (sc in next 10 st, inc) X 6 (72)

IMG_20181205_144036
Round 13: (sc in next 11 st, inc) X 6 (78)
Round 14: (sc in next 12 st, inc) X 6 (84)
Round 15: (sc in next 13 st, inc) X 6 (90)
Round 16: (sc in next 14 st, inc) X 6 (96)
Round 17: (sc in next 15 st, inc) X 6 (102)
Round 18: (sc in next 16 st, inc) X 6 (108)
Round 19: (sc in next 17 st, inc) X 6 (114)
Round 20: (sc in next 18 st, inc) X 6 (120)
Round 21: (sc in next 19 st, inc) X 6 (126)
Round 22: Change to the white yarn. (sc in next 20 st, inc) X 6 (132)
Round 23: Make a hanging loop: 20 ch, (reverse sc in next 21 st, reverse inc) X 6 (138)
Fasten off, cut the yarn and weave in the ends.

IMG_20181209_101409

Eyes:

Round 1: Start with the brown yarn. 6 sc in magic ring, sl st (6 )
Round 2: Change to the white yarn. 1 ch, inc X 6, sc through the center, sl st (12)
Fasten off, cut the yarn leaving tails for sewing (unfortunately, I forgot to do that :).

IMG_20181209_101316

Sew the eyes to the head. Embroider the mouth (between Rounds 7 and 8, 15 st long) and the horns, be creative 🙂

IMG_20181209_103640

The potholder is finished! Happy Christmas cooking! Ho Ho Ho!

Did you like to crochet with the tutorial? Check out my other patterns here!

You might also like:

Winter Hat Crochet Egg Cosy

IMG_20181202_115804

IMG_20181128_194949

Mulled Wine Mug Cosy – Cabled Pattern

IMG_20181027_221058