Earlier I thought that it is impossible to crochet good comfortable gloves. And as I never actually could knit, I just never dreamed of making gloves myself. But now there are so many cool new tricks for crocheting! One can crochet really anything and noone can say that for making socks or gloves one should learn knitting!
Last week I lost my gloves somewhere and it’s time to crochet new ones!
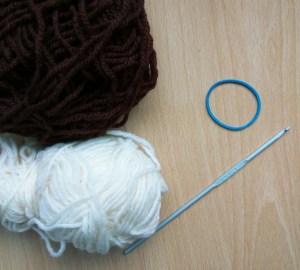
Materials:
- 3 mm crochet hook
- recommended for the hook dark blue yarn (I used a yarn 50g = 125 m (1.75 oz = 137 yds) and I needed 100 g (3.5 oz) for the gloves)
- white embroidery floss and a needle
- scissors
Abbreviations:
- ch – chain
- st – stitch
- sl st – slip stitch
- sc – single crochet
- hdc – half double crochet
- inc – 2 sc in one st (used to increase the number of stitches)
- dec – 2 sc together (used to decrease the number of stitches)
The Pattern
Try to crochet not too tight otherwise the gloves will be too hard. You can also take a hook one size bigger than recommended for your yarn. I wanted to make warm gloves so I didn’t use a bigger hook.
Ribbing:
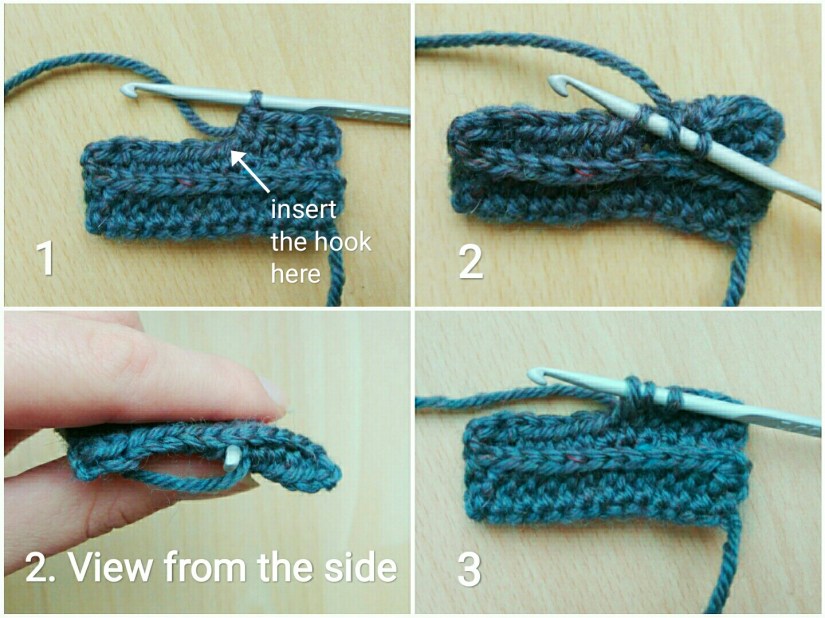
It may look confusing when you start, but once you try you will see that it’s simple and very beautiful way to crochet a ribbing. I will explain now how it works and if you have more questions afterwards, you can also have a look at the tutorial.
13 ch
Round 1: hdc in all 13 ch, 2 turning ch
Rounds 2-30: hdc in all 13 st (here comes the trick: while crocheting the row, insert the hook one stitch lower than the one you would normally use. It is shown in the picture below (N 2). As you can see there, you crochet always to the front part, that’s why the ribbing looks knitted), 2 turning ch. At the end of Round 30 make only 1 ch instead of 2.
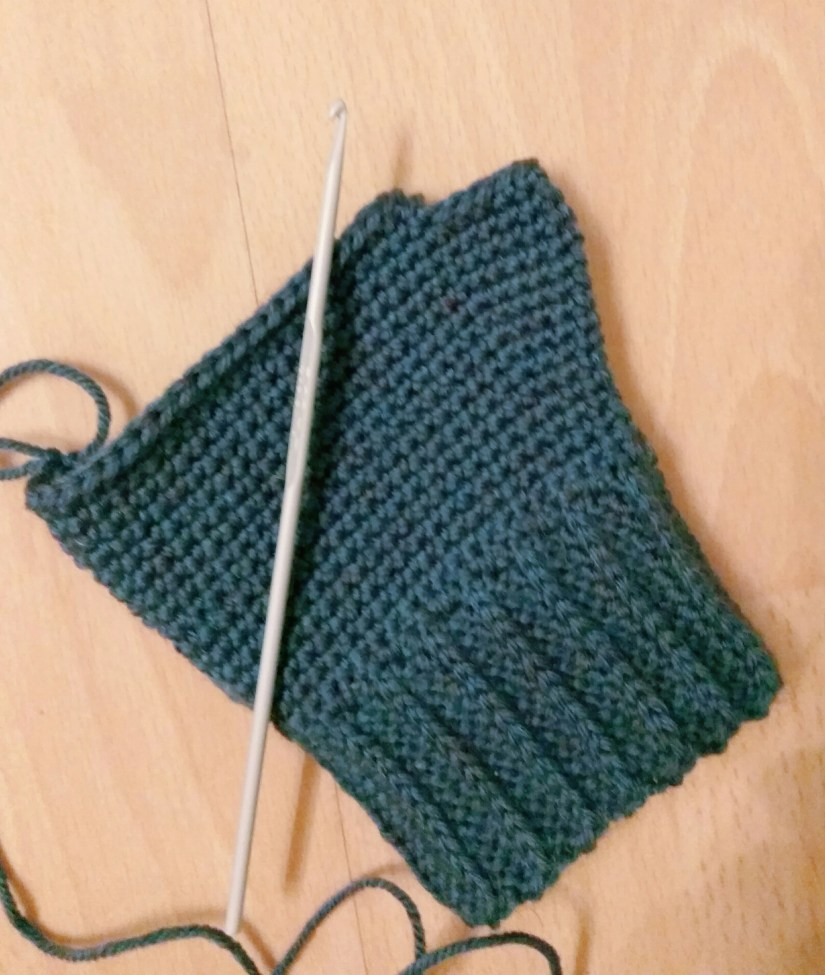
Body:
Now we join the ribbing. Insert the hook into both layers and join them with sl st in all 13 st. Turn the ribbing inside out so the sl st are not visible.
Now we can start the glove body. Continue crocheting on one side of the ribbing
Round 1: sc in 45 st. (You have to crochet sc one time into every vertical stitches row and two times between the rows, it will give you 45 sc) (45)
Rounds 2-4: sc in all 45 st (45)


Round 5: sc in next 21 st, inc, sc in next st, inc, sc in next 21 st (47)
Round 6: sc in all st (47)
Round 7: sc in next 21 st, inc, sc in next 3 st, inc, sc in next 21 st (49)
Round 8: sc in all st (49)
Round 9: sc in next 21 st, inc, sc in next 5 st, inc, sc in next 21 st (51)
Round 10: sc in all st (51)
Round 11: sc in next 21 st, inc, sc in next 7 st, inc, sc in next 21 st (53)
Rounds 12-15: sc in all st (53)
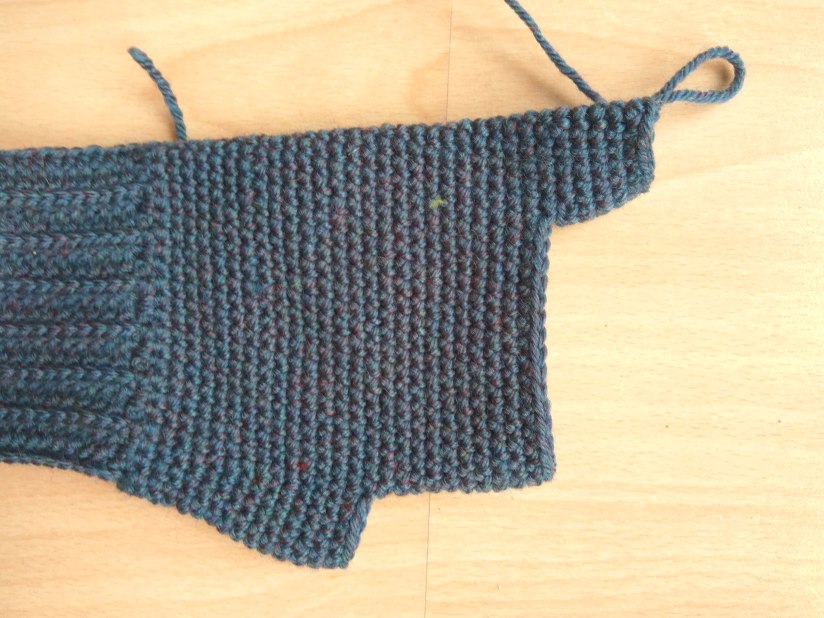
Round 16: sc in next 21 st, skip next 11 st, sc in next 21 st (42)
Rounds 17-26: sc in next 42 st (42)
Little finger:
Round 1: sc in next 6 st, 2 ch, skip next 30 st, sc in next 6 st (14)
Rounds 2-11: sc in all 14 st (14)
Round 12: (sc in next st, skip next st) X 7 (7)
Round 13: (sc in next st, skip next st) X 4 (4)
Round 14: sc in next st, skip 1 st, sl st in next st.
Fasten off, cut the yarn and weave in the end.
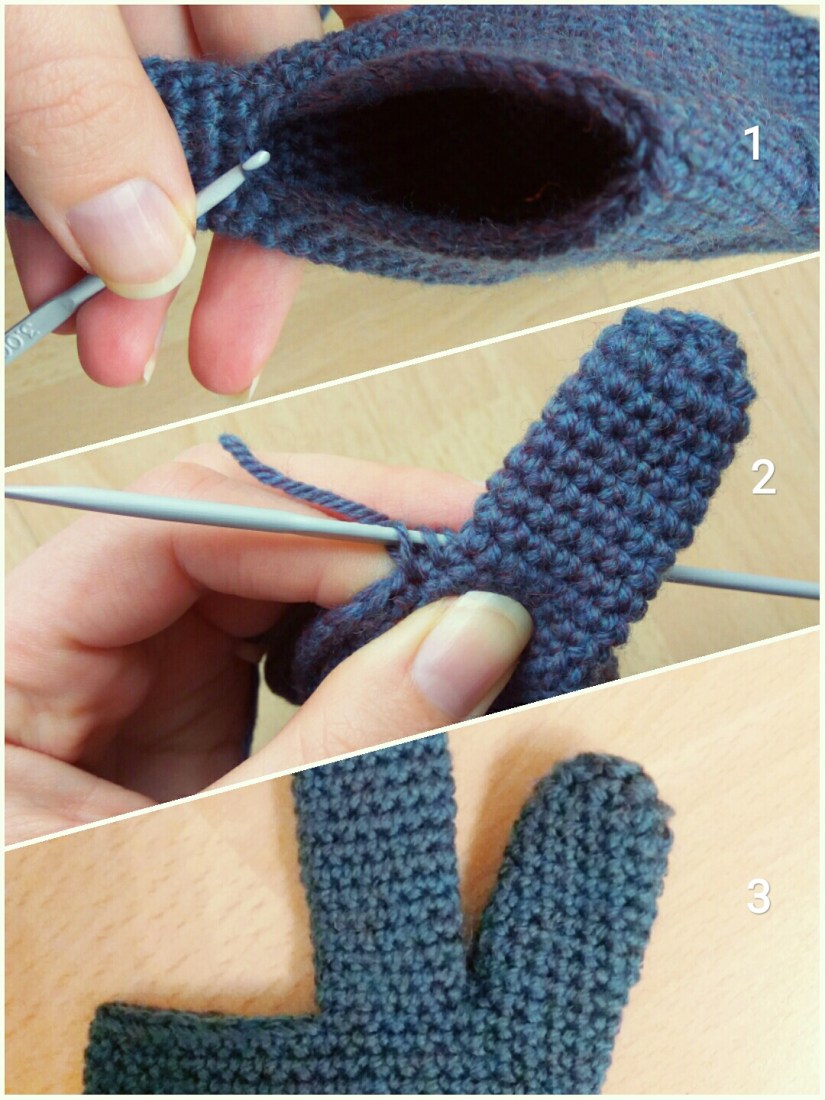
Ring finger:
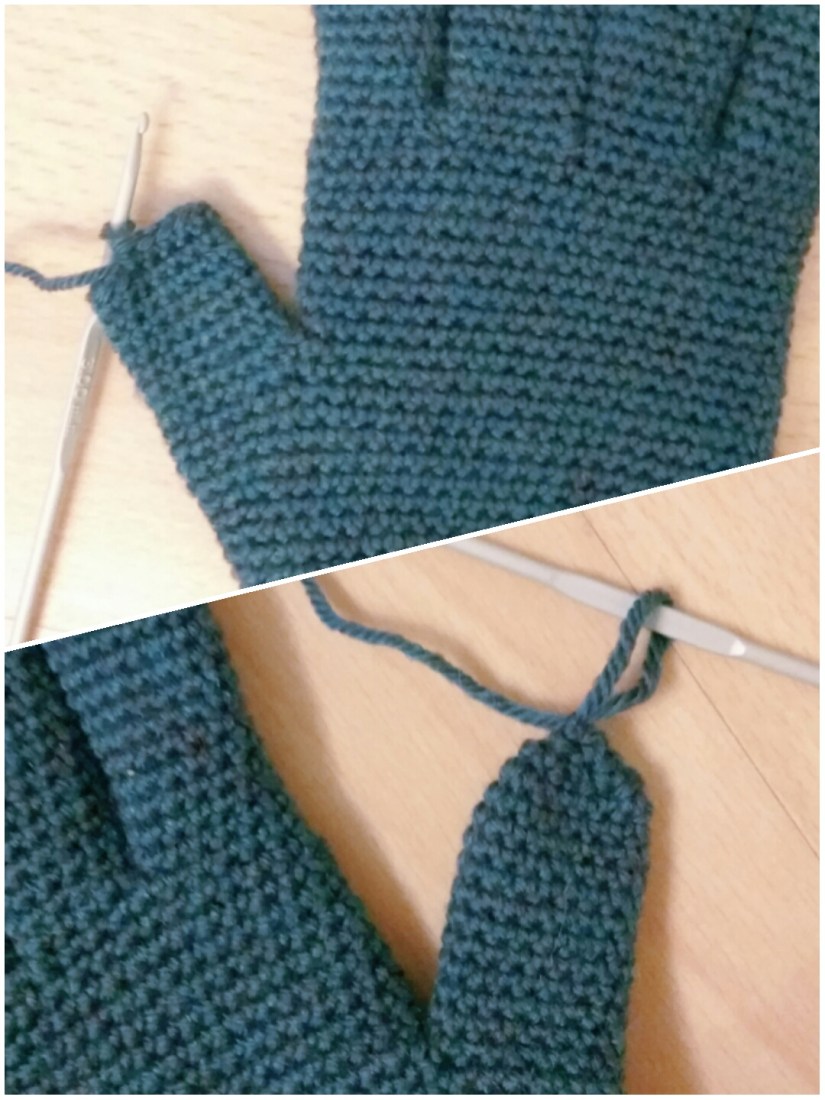
Round 1: Start crocheting the ring finger in the middle of the bottom of the little finger. Insert there the hook (as it is shown in the picture (1) below), make 1 ch, sc in next st, dec (to make the corner smooth, see picture (2) below), skip next 21 st, sc in next 5 st, 2 ch, sc in next 4, dec, sc in next st (15)
Rounds 2-15: sc in all 15 st (15)
Round 16: (sc in next st, skip next st) X 7 (7)
Round 17: (sc in next st, skip next st) X 4 (4)
Round 18: sc in next st, skip 1 st, sl st in next st.
Fasten off, cut the yarn and weave in the end.
Middle finger:
Round 1: Start crocheting in the middle of the bottom of the ring finger. Insert there the hook, make 1 ch, sc in next st, dec, skip next 12 st, sc in next 5 st, 2 ch, sc in next 4, dec, sc in next st (15)
Rounds 2-18: sc in all 15 st (15)
Round 19: (sc in next st, skip next st) X 7 (7)
Round 20: (sc in next st, skip next st) X 4 (4)
Round 21: sc in next st, skip 1 st, sl st in next st.
Fasten off, cut the yarn and weave in the end.
Forefinger:
Round 1: Start crocheting in the middle of the bottom of the middle finger. Insert the hook there, make 1 ch, sc in next st, dec, sc in next 11 st, dec, sc in next st (15)
Rounds 2-15: sc in all 15 st (15)
Round 16: (sc in next st, skip next st) X 7 (7)
Round 17: (sc in next st, skip next st) X 4 (4)
Round 18: sc in next st, skip 1 st, sl st in next st.
Fasten off, cut the yarn and weave in the end.
Thumb:
Round 1: Start crocheting in the middle of the bottom of the forefinger. Insert there the hook, make 1 ch, sc in all st, now you don’t make dec in the corners so that the thumb points a bit to the side (16)
Rounds 2-11: sc in all 15 st (15)
Round 12: (sc in next st, skip next st) X 8 (8)
Round 13: (sc in next st, skip next st) X 4 (4)
Round 14: sc in next st, skip 1 st, sl st in next st.
Fasten off, cut the yarn and weave in the end.
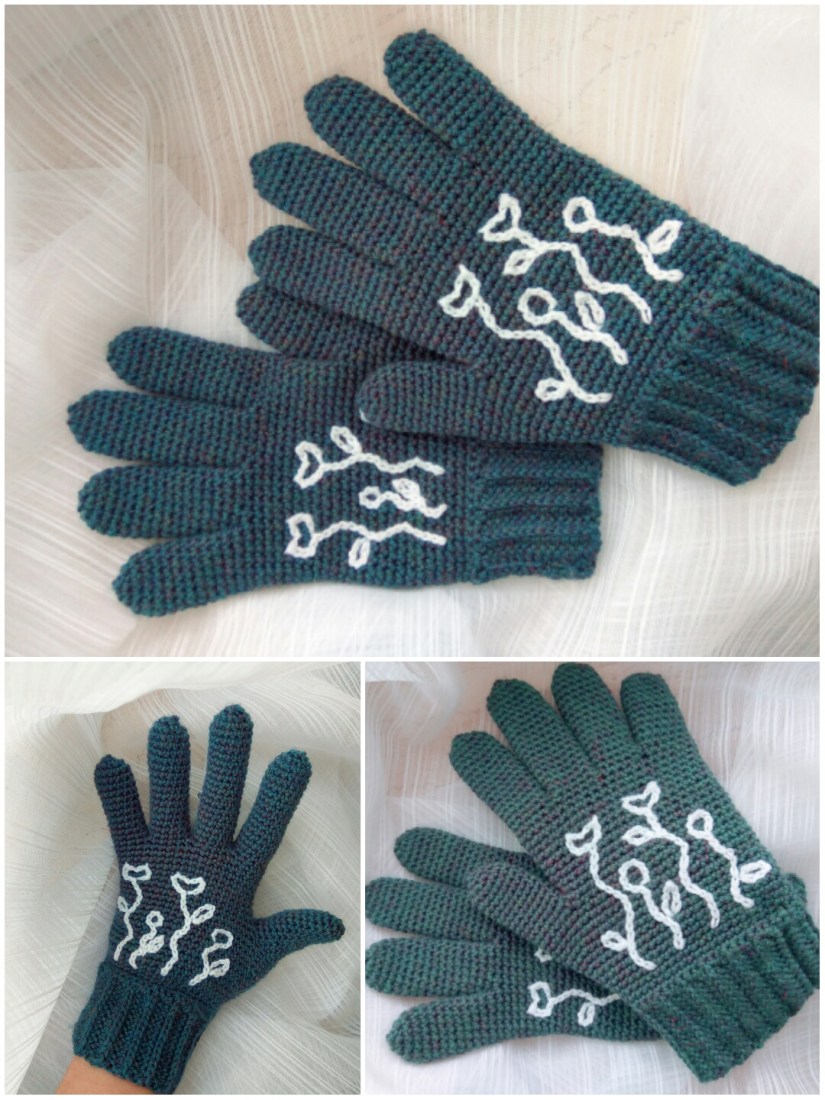
First glove is finished! make the second one the exact same way!


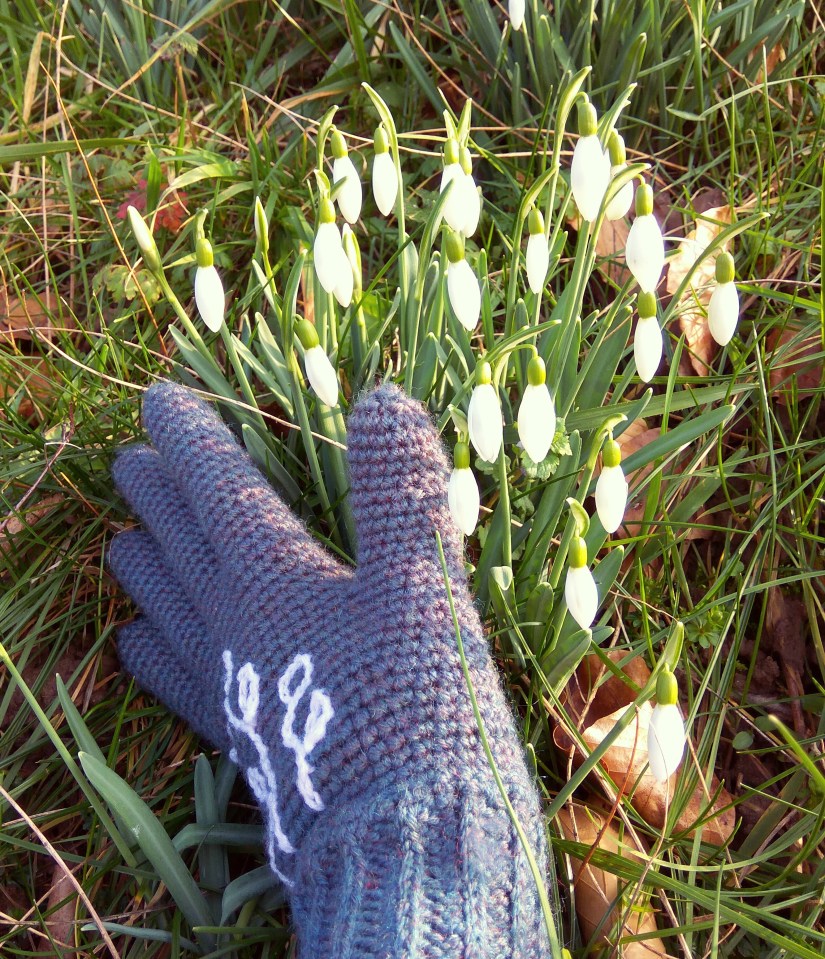
Now you can embroider something if you like or just leave them like they are! The gloves are finished! I am sure you will wear them proudly and nobody will believe that you have made them yourself!
Was it fun to crochet with this tutorial? Have a look at my other patterns, maybe you will find something you like there!
You may like: